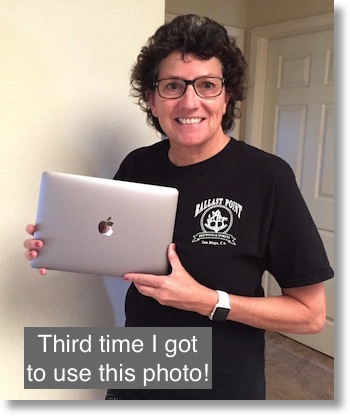
 If you’ve been following the show for a bit, you’ll know that I got a 12″ MacBook shortly after they were released. You’ll also know that I had to have it replaced because their fancy new key technology started locking up on me. Apple was great about replacing it on the spot, taking it back to figure out what the root cause was so hopefully they could correct their manufacturing processes
Well, the sad news is that I’ve had to replace MacBook #2 as well. This one worked a champ but had intermittent charging problems with that fancy new USB-C port. Once it started to charge, it always charged all the way up, but it was getting it to start that was the problem. At first I thought it was the dodgy outlet I was using because the power adapter would sort of wiggle in the port, but then Steve gave me a power strip that plugged into that port with a ground pin that held it tightly in and still I had trouble starting the charge. The MacBook makes a happy ding sound (even when closed) when it starts charging, and I would plug and unplug about 8 times before I would finally hear the happy ding.
I took it into Apple on Tuesday (after a 3 day wait to get a genius bar appointment) and of COURSE it charged immediately in front of the genius. I was a little disappointed in the tech’s idea of a scientific experiment, he wanted to swap out the cable and the power adapter, but I explained that that would only yield interesting results if we got it to consistently fail with mine. I asked him whether he could run diagnostics on the computer first and he said that he had nothing that would detect this problem unless it was actively failing at the time. That made no sense to me at all, if there was something dodgy electrically in the Mac I would think it would still show up.
 Finally since we couldn’t get it to fail with either adapter, he decided to do a network boot to his diagnostics tools (sorta like I thought he should have earlier). Since the MacBook only has the one USB-C port, he had to do the dongle dance to achieve this. He plugged an Ethernet cable into an Ethernet to USB-C adapter, then he added in their digital video adapter. He did that because it gave him a pass through USB-C port so he could plug my power adapter in and pass the power to the Mac. If you have studied design of experiments at all, you know that you should try to change as few things as possible for each test so you know what the root cause is, but the good news is that with this Frankenstein setup the MacBook decided not to charge.
He ran the diagnostics and it showed that the Mac wasn’t seeing the correct voltage. He said that even if the power adapter was at fault and completely dead, the MacBook should have still seen a trickle amount of power. Not sure that makes any sense but at least I was able to show him the failure.
He went in the back and discussed with his manager whether to make me wait for a repair or to just give me a new one and luckily it went in my favor yet again and I got a new MacBook. They technically returned my 2nd Mac and sold me a new one because in this way I got a new 3 year start on my AppleCare which was swell. Having a new computer that works is excellent but I told you that story so I could tell you how I attack configuring a new Mac.
Isn’t it a pain setting up a new Mac?
Many of you are thinking that this is a GIANT pain. I have to say that it doesn’t bother me a bit. In the old days it meant dragging out boxes with CDs or DVDs in them, hunting down where we’d scribbled down our license keys (if we even were smart enough to have done that). Nowadays it’s really a snap. The first advantage to me is that so much of our data is in the cloud. I use iCloud to manage the files between my Macs that I use for the weekly podcast production, and I use Dropbox for everything else I share between computers and with Steve and other people. My photos are all in iCloud Photo Library so those are all safe. On this Mac I only use CrashPlan for offsite backups and to be honest I don’t think it has much work to do. I knew that I could hand my Mac to Apple and I could confidently say I had no problem with them taking it away.
Secondly, so many apps are in the Mac App Store now that it’s super easy to get them back. I use a lot of odd little utilities but it’s easy enough to go snag the latest download. Need the license key? Of course those are all in 1Password and synced to my Macs via Dropbox. Easy peasy to replace apps.
What order do you do things?
I’ve done this enough times that I’m getting pretty quick at it and I like to watch the order in which I load things because it really teaches me what’s really important to me. If you haven’t had all the problems I’ve had and your system has worked swimmingly for years, I highly recommend doing a clean install of the OS once a year or so, because it’s a GREAT way to clean out cruft on your machines. You simply don’t load stuff you don’t need. Of course with three new laptops inside of a couple of months of each other, even I hadn’t put much cruft on my machine, but you get what I mean. I hope by walking through this it might encourage at least one of you to go through the mental exercise of doing a clean install from scratch to speed up your machine. Of course my most important apps won’t be the same as yours but I hope it will be fun to compare and contrast.
When I started working on this I posted to Twitter, Facebook and G+ asking what would the first five apps be that YOU would load if you had a new machine or a fresh install. I was overwhelmed at how many people answered this question! I’ve had to put the data in Excel and I’m running some pivot tables on it so in a later discussion I’ll be able to tell you what the top five apps on the Mac are. But for now, I want to walk through how I decided what HAD to be installed immediately.
The very first thing I did when I got this new Macbook was open up Photos, turn on iCloud Photo Library and set it to optimized images. I knew that my 58K photos would take days to come down even at that setting so I might as well start it before doing anything else!

 The very first app that needs to be installed for me is Dropbox. Without Dropbox I can’t get to 1Password so I can’t install anything else. This is a tricky step because of course to log into Dropbox I need access to 1Password because that’s where the password to Dropbox is! This might be a vote to use iCloud instead for 1Password because once you log in with your iCloud credentials (which you pretty much HAVE to store in your head because Apple makes you enter it so often), you’d have access to 1Password. In my case I just bring up 1Password on another device, look up Dropbox and I’m golden. If you use LastPass instead for your passwords, of course this question is moot because you’ll have access to your passwords straight away.
 Next up HAS to be TextExpander. I simply cannot bear to use a Mac without it. I can’t even stand to type the name TextExpander without my snippet shortcut for TextExpander!
By this time I’ve been using the Mac for 10 minutes and I’m losing my mind because the trackpad isn’t set up the way I want it. Off to System Preferences, Trackpad and turn on single tap to click. You used to be able to get to 3-fingered drag of windows in the same place but in a moment of sheer cruelty, Apple moved it to Accessibility, Mouse & Trackpad, Trackpad Options, Enable dragging, three fingered drag. While we’re in Accessibility we might as well select Zoom and turn on Use scroll gesture with modifier keys to zoom. At my advanced years, I use zoom ALL the time so being able to hold down the control key and do a quick scroll on the trackpad to zoom in on the screen is essential.
 The podcast is VERY highly dependent on a niche application called Feeder from reinventedsoftware.com so that’s up next. I use it to write all my blog posts, and the feed itself that sends the podcast to you is all because of Feeder. Luckily it now supports syncing of settings via Dropbox so my text and all the server settings are all there as soon as I tell it to sync.
You’re going to laugh at what I need next – it’s a font of all things. Years ago I fell in love with Century Gothic and I use it for pretty much everything. I can’t stand using any other font to write the show in Feeder. Getting Century Gothic is a bit tricky. It came originally with Office 2011, so I have to steal it from a Mac with that installed. Luckily I’m a whiz at the Terminal now, I can remote connect into my MacBook Pro over the network and copy it from ~/Library/Fonts back to that location on the MacBook and I’m in business. Now my eyes are serene.
When you first create an account with a new computer, it asks for your Apple ID so your Apple email will start coming in automatically. But of course who has one email account these days? I really appreciate how easy it is to add email accounts these days. Gone are the hours spent trying to configure the server settings. Both of mine happen to be Google accounts and all I do is put in my email address and get my password from 1Password and I’m in business. In comes all of my email. Such a delight. If you didn’t live through those hard days, ask an old person what it was like!
 Too much productivity going on here, time to add some goofing around apps, so I threw on Tweetbot for Twitter, and my new favorite messaging app, Telegram. Without Telegram, how are Steven Goetz and I to be full time enablers for each other to spend money?
Around this time I realized that my Finder windows were missing some crucial information – time to turn on View Status and Path bars so I can see file sizes and numbers of items along with the path for the folders I’m viewing. Not going to need it right away but I’ll want it on soon so easy to fix them both while I’m in there. And a quick trip to Finder Preferences to show hard disks on the desktop like God intended.
 With my dessert eaten, time for some some more vegetables, loaded up CrashPlan for my offsite backups. Now that I switch out Macs as often as most people change shirts, I knew that it would be easy peasy to tell CrashPlan to simply adopt the most recent backup on my old (1.5 month old) Mac to the new one. This means not having to start from scratch on backups. Wile I was in there I realized I was backing up stuff that didn’t need to be backed up. For example, since I have Photos on this Mac set to only optimized images, why would I need them backed up? Now the REAL images on my MacBook Pro are a different animal. I also realized I’d been backing up Dropbox and iCloud – both of which are backed up by my “real” Mac.
 Time to get some metrics going, so off to download iStat Menus. I have to confess that it wasn’t any of the really cool features that made me notice it was missing – it wasn’t my network speeds, or my CPU load, or fan speed, it was the fact that my tiny little calendar icon was missing! I turned on the other metrics of course because before long I knew I’d want a visual indicator of when Photos was chewing up all of my CPU speed.
 By this time my menu bar was getting a bit crowded looking especially on this small 12″ screen. Now that I’ve got so much glop in the menubar that I can’t see them all, time to install Bartender, a great little app that helps you organize your menubar apps into a second row and even hide some menus entirely. When I went to install it my license key wouldn’t work, but the folks at Bartender got back to me quickly on that. Turns out a major upgrade to Bartender had come out and I’d missed the memo. They didn’t make me upgrade, but they did tell me about Bartender 2, and gave me a link to download the old version. I love this app so much I gladly paid the giant fee of $7.50US to get the upgrade.

 And finally in my top list of first apps, I had to install both DropShadow & AppDelete. These go together because I use them so often I keep them in the toolbar of every Finder window. I can be anywhere I have an image and just drag it up to DropShadow to make a nice shadow or border for the website. AppDelete is great to have in the toolbar too because you just drag the app you want to nuke onto it and it launches AppDelete and you can kill it from there. I needed it already even though I’m only doing essential apps because Charlotte had me reinstalling Bartender and I wanted to make sure I got rid of all the plists and such.
I really had fun going through that process. I wonder whether I’ll be smart enough to simply follow these steps from the blog post when I end up having to get MacBook #4? Remember I’ll be back with an assessment of those applications YOU think pass the first five apps you need test.

I enjoyed this post Allison. For a number of reasons. (1) This is the first time I’ve read your blog… this article was forwarded by a friend. (2) I now know what you look like… having listened to you over on ScreenCastsOnline. (3) I have a 12-inch MacBook — but I haven’t had any issues with it. (4) I’m a fan of getting rid of cruft and this is the only way to do it properly. There are some pain points that you left out. My photo library is 300 GB so I don’t do iCloud Photo Library. And the ‘gotcha’ that would have gotten me is the apps that require them to be uninstalled on the old machine before they can be installed on the new machine. Also, Adobe and Microsoft apps can be a challenge. If you like DropShadow take a look at Picturesque on the Mac App Store. Also, instead of AppDelete and AppZapper, I now use CleanMyMac. It’s a gorgeous app that does so much, including uninstalling apps. But I do miss that satisfying ZAP sound effect from AppZapper. Also, thanks for the Bartender tip.
Hi Allison,
My name is Eva Schweber and I work for AgileBits, the folks who make 1Password.
Thank you for such a great post! Setting up Macs can be such a challenge and I am so glad that 1Password makes it just a little less painful. I especially appreciated your description of the Dropbox installation paradox. Fortunately, I almost always have a second device around when I need to install 1Password on something new.
Best wishes!
Eva Schweber
Good Witch of the Pacific Northwest @ AgileBits
support.1password.com