 Have you ever seen those cool photos of the night sky where you can see the trails of the stars in arcs around the North Star? I love those shots and have always wanted to get one, and this week I succeeded. I’d like to back up and set the stage for you.
Steve and I drove to Julian, California this week with our good friends Diane & Bill to stay at a remarkable place called Observer’s Inn. Michael Leigh built Observer’s as a two room inn combined with an observatory. This sounds crazy and it kind of is, but Michael is a self-taught astronomer with research-grade telescopes and a passion for teaching people about the solar system.The Inn itself is spectacular, two giant rooms with gorgeous king-sized beds and lovely quilts and private baths, plus there’s a large living room area lined with bookcases filled with astronomy books. There’s even a dining room table which in our case was perfectly suited for binoculars, laptops, iPads, iPhones, chargers, cameras and tripods. Michael even puts out a bowl of Milky Way bars for you. Get it? Milky Way? He said he used to have Mars Bars but can’t find them easily any more.
With the room comes a discounted price of $20 each for a one hour astronomy lecture, and if the skies are clear, the chance to look through his telescopes at the universe. He produces a level of wonder about the stars that is infectious. For example, we got to see Andromeda, which was my favorite thing he showed us. He pointed out that something, a photon in this case, left Andromeda 2.5 million years ago and entered my body (as light). Isn’t that seriously amazing? I had never thought about it that way before.
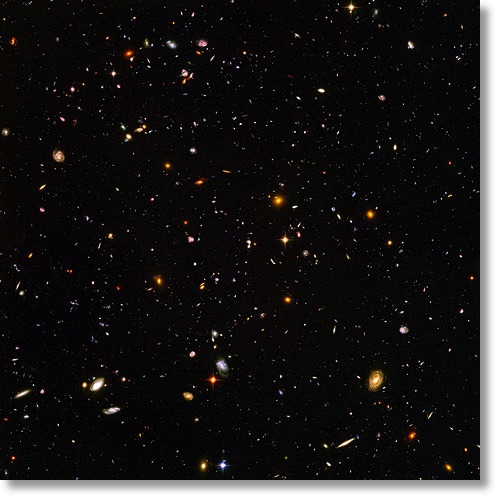
 Next he showed us a bottle with grains of sand in it. He asked us to look at just one grain. Then he told us to imagine holding that single grain up at arms length. That area of the sky you can cover with that single grain is how wide the field of view was to create the Hubble Ultra-Deep Field Image taken over the course of four months in 2003/2004. In that single grain of sand at arms length field of view, they found approximately TEN THOUSAND galaxies!
I would have been happy with just the stay at the Inn, and the astronomy talk was spectacular on top of that. To add to the fun, Diane and I decided to try and take star trail photos that night.
If you look at a star trail photo, your first question might be, “how long did you leave open the shutter?” I turns out leaving the shutter open for a long time doesn’t work, because it lets in too much light so everything gets blown out. Instead you take a series of longish exposure shots and blend them together into one image. To get the full circular trails you’re talking about combining hundreds or thousands of images. Photographers have to take these hundreds of photos off of their memory cards, import them into their computers, pull into tools like Photoshop or other specialized applications to align and then blend them all together.
 That’s not what Diane and I had to do. We have the Olympus E-M10 micro-four thirds camera, which has the ability to take this kind of photograph built in using a setting called Live Composition.
Live Composition is found by setting the mode to manual. That means you have to set the aperture, white balance and ISO all on your own and of course use manual focus since the camera can hardly be expected to automatically focus on infinity. Once you’re in Manual mode, you turn the shutter speed dial down and down and down increasing the exposure time as you go. Once you get really long it suggests Bulb mode which many cameras have that allow you to press the shutter once to open, and a second time when you want it to close. But you’re not done yet. Another dial down and you get Live Time which is a very cool feature I enjoy on the camera. This one is like Bulb, but it lets you view on the display how the image is exposing so you know when to tell it to stop.
Finally one more click of the dial and you’ll see Live Composition. As you’ll learn as I go through this, having this setting built in is really powerful but you still have to make a LOT of decisions to make it come out the way you want it to look.
When you dial into Live Composition, it tells you to set the exposure time. This might sound confusing, but you need to tell it how long each of the zillion photos will be exposed. I found a great blog post at atmtxphoto.com where the author, Andy, explained how he chose his settings for his star trail photos with the E-M10. His photos are extraordinary, so we used his settings as a baseline.
Andy used a 20 second exposure and set his ISO to 800. The ISO is going to control how much light gets to the sensor during that 20 seconds and he explained that 800 was about as high as you could comfortably push the E-M10 without introducing a lot of noise.
But there’s more to taking a photo than just setting these dials to the right number. Victor Cajiao had a great interview with Nick Page on his Terratech podcast (at terratech.tech Where Nick explained a lot about how to take great photos of the stars. Nick talked about the composition of the photo and how a photo of just stars can be pretty boring. He suggested getting something in the foreground like a structure or a tree to help give it context. He talked about light painting the tree with a flashlight, and suggested doing it from the sides to get a more interesting effect.
So I’ve got Nick and Andy’s advice working here, but we can’t forget all the work Bart did teaching us about taking photos of the night sky. He talked about setting your white balance, specifically when he talked about shooting the moon. He said that all of the light on the moon is from the sun, so you want to set the white balance to sunny, and all by myself I extrapolated that since the sun is a star and we were taking photos of stars, we should set our white balance to the sunny day setting.
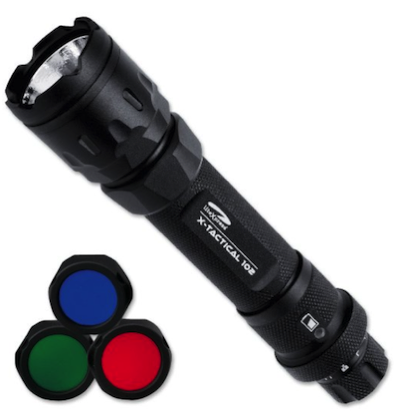
 Last piece of the puzzle was our new shiny matching (but mine in red, Diane’s in black) $60 Manfrotto Compact Tripods. Oh I lied, one more piece, Steve bought me a little red flashlight specifically for night photography and star gazing, and not just so that I wouldn’t fall down walking around in the dark (thought it worked well for that) but he got me one with a red filter on Bart’s recommendation so that we wouldn’t have trouble adjusting our eyes from a bright white light.
We set up our cameras pointing about 90° from the north star on the advice of our astronomer Michael, not because showing the stars rotating around the north star wouldn’t be awesome, but because we didn’t want to stand around in the cold waiting as long as the close in stars would take to make good arcing trails.
The E-M10’s Live Composition Mode has basically 3 steps to it. Once you’ve told it how long to have the shutter open (in our case 20 seconds) you push the shutter release once, and it takes a 20 second baseline photo. From that photo it measures the light in the scene. This is a critical part of the process because the camera is only going to record what light has changed from this original image. I have no clue how it figures that out, but it’s the magic sauce behind Live Composition.
Once you have that baseline photo, the camera tells you to hit the shutter release again. In the viewfinder, it shows you a live view of the image being created and it shows you a counter. You can see the number of shots it has taken, and a counter showing the 20 seconds counting by. I love having the live view because you can tell if you’ve botched something up before wasting all that time waiting to see how it comes out. I’m so spoiled – remember film and waiting days to get it back? I can’t be bothered to wait MINUTES now!
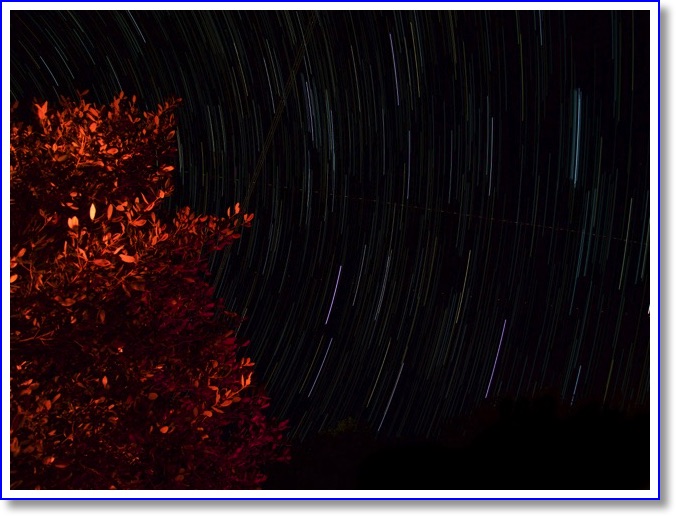
Partway through the exposures, Diane and I took our little red flashlights, and like Nick suggested, we light painted the tree from opposite sides for about the length of one exposure. Remember, the camera is taking into account what’s changed, so that one exposure of red light worked perfectly.
When the photo looked good to me on the viewfinder, I hit the shutter release one final time to tell it to stop. I really wish I’d been alert enough to look at the display the final time, but I forgot so I can only estimate how many images it took. I think it was around 20 minutes, and with 20 second exposures, that would be around 60 images. When you tell it to stop it takes about a minute to combine all of the photos together.
Think about how much math that little processor in the E-M10 is doing. If I had to take 60 photos from my memory card, drag them into my photo app, stack them up together into layers, align them and then merge them down…that would take me at LEAST a half hour. How does it do it in one minute? Again, the secret sauce.
I put the image I got from all of this in the blog post along with a link to a full sized version so you can see how cool it came out. I should explain that you’ll see some diagonal dotted lines across the star trails – those are actually aircraft lights going by which was unexpected but kind of cool. I really want to go back out into the wilderness and try this again because it was so much fun! I live in the city so if I did it here, I’d get about 4 trails and a LOT of light pollution. Maybe I should do it just for the comedy.
Or maybe I’ll try it next with fireworks on the 4th of July. I’ve tried to take long exposure shots from my daughter’s back yard, but if I leave the shutter open long enough to get a good light trail, the fence and the trees in the yard get lit up by ambient light. With Live Composition I could do a bunch of shorter exposures and make the camera do the heavy lifting! I still can’t believe that a $500 camera can do all this.

It’s a lovely photo and I am very happy that you outlined the process. That’s why I like the NosillaCast – you learn something interesting each and every episode and it isn’t always just about the Mac