 I’ve mentioned before that I do video screencasts for Don McAllister’s ScreenCasts Online subscription podcast. He lets me pick the topic (with veto powers) but this time he probably should have talked me out of it.
Video screencasting is tough work but it’s made easier by the fantastic application Screenflow from Telestream. It captures your desktop video and audio source(s) and has a fantastic editor. Like I said, it’s really hard work but it’s fun.
Applications I Demonstrated
This week I thought it would be interesting to demonstrate two apps that allow you to use your iOS devices as accessories for your Mac. Duet Display allows your iPhone or iPad to work as a secondary display. This is wicked cool, especially when you’re away on travel and don’t have your dual monitor setup (if you’re that spoiled). I’ve used the iPad Pro as a second monitor to the 12″ MacBook and it’s glorious.
The second application is called Astropad and its purpose is to allow you to use your iOS devices as a graphics tablet. This means you can use your favorite application on the Mac as though it’s running on the iPad. It works on the iPhone, iPad with Bluetooth styluses and iPad Pro and has full support of the Apple Pencil. Astropad is targeting the market that can’t justify or afford a Cintiq graphics tablet.
Normally when demonstrating an iOS application we can use an app like Reflector to allow us to Airplay the iOS display back to the Mac and record with ScreenFlow. But think about it, I’m going to be demonstrating an app that reflects the Mac screen onto the iOS device. I tested it just for grins and giggles, and as expected it was like looking into a hall of mirrors, with the image getting down to an individual pixel in the end. That meant live video was required for this screencast.
Video
Now to the video production. All Steve and I had to do was figure out how to record an iPhone an iPad Air, an iPad Pro, an Apple Pencil and a Mac, all without jarring changes to the scene for the viewer. I mention Steve because of course this isn’t just a screencast, it requires external video cameras. I could capture the video of my Mac using ScreenFlow of course but we also needed video of the iPad as well as my hand gestures.
We started with Steve’s prosumer Canon video camera on a tripod. This is the camera we use for all of our NosillaCast video interviews. We ran a test and he was able to capture the entire scene with the Mac on the left and the iPad Pro on the right. It looked pretty good. Then we tried to zoom in on one device or the other in ScreenFlow … and it looked horrible. Not anywhere near readable. That’s when we remembered his camera is 1080p and my produced video is 1080p, so I simply cannot zoom in to make the text more readable.
Then Steve remembered that his snazzy new iPhone 6s does 4K video! Yes, we live in a world where the phone in his pocket produces better than video from his 4-year-old prosumer video camera. Crazy times.
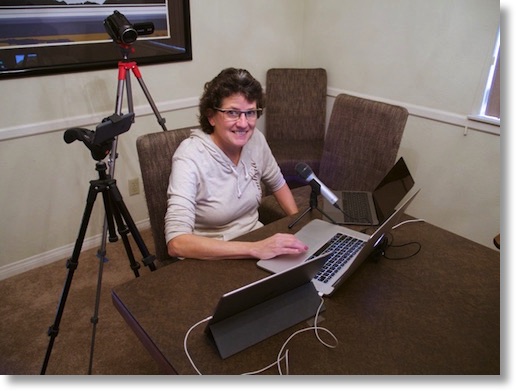
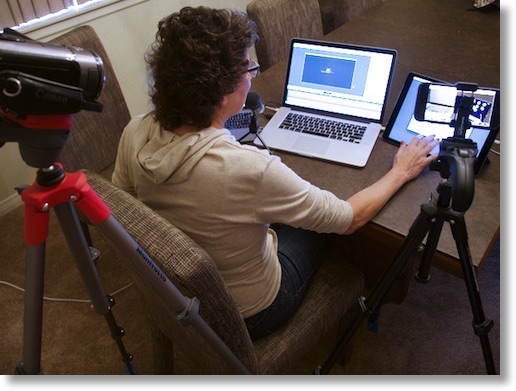
Good thing we have two identical tripods from Manfrotto, right? And remember the Square Jellyfish Tripod adapter for phones? Well we used that too.
Steve decided we’d use the 4K iPhone footage for the wide angle, high quality image of everything from the Mac to the iPad to my hands, the ScreenFlow recording for really high video quality on the Mac, and that left the “real” video camera free to be optically zoomed in just on the iPad screen, giving us a high quality image without resorting to digital zoom.
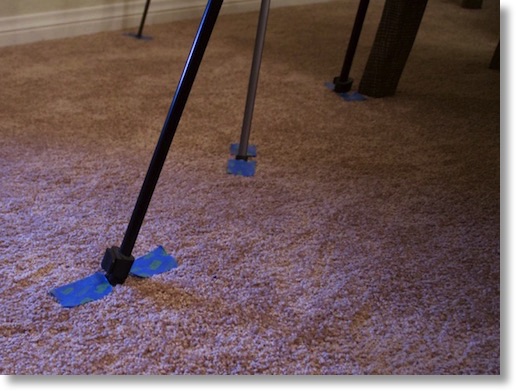 Being engineers, we used blue painter’s tape on the floor to mark the locations of all six legs of the tripods, and clear tape on the table to mark the locations of the Mac and the iPad. If I had to take a break and needed to use a device, or come back the next day we can’t have a jarring change in the video.
Audio
One more thing – none of this works if my audio sounds like doodoo, right? I realized that with my fancy new Shure MVi digital audio interface I could bring my big girl mic downstairs to the dining room where all of this was set up but I decided we needed to simplify something in this mess and use my travel mic, the Audio Technica ATR-2100 that supports XLR but also works great over USB.
When we did the recording, Steve had me do a big clap where both cameras could see it and all three microphones could hear it. That allows me to line the video tracks up correctly.
Editing
Now to pull the videos into ScreenFlow. The screen capture footage was already in ScreenFlow, but the iPhone footage and the camcorder recording turned out to be an additional challenge.
The Canon camcorder records all videos into one file called AVCHD. So if Steve took 5 recordings, there’s just that one AVCHD file. I can’t pull the whole thing into ScreenFlow, so instead I was able to open the AVCHD file in QuickTime, and choose one video recording at a time to export to my disk. At first I just did a Save in QuickTime and chose .mov format, but I noticed when I brought them into ScreenFlow that, if I had a lot of hand movement, my hands would get weird wavy lines through them. Definitely not what I was looking for. I went back to QuickTime and chose “iPad and AppleTV” as the format and it made them .m4v files that didn’t have that weird problem.
Next is the 4K video from the iPhone. While ScreenFlow can import 4K video, it couldn’t see the iPhone as a disk when it was connected. No problem, I pulled the video off the phone using Apple Photos, simply exported as full size onto disk and then I was able to import into ScreenFlow.
ScreenFlow Production
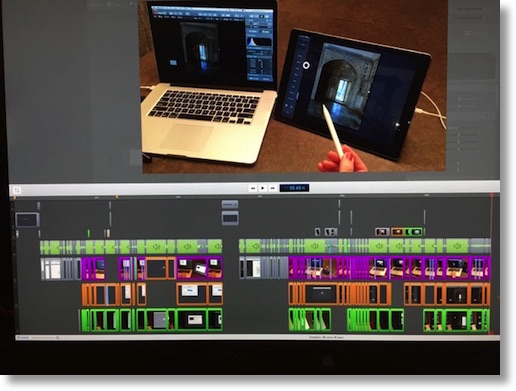
Now it’s time for some real fun! ScreenFlow is a fantastic editor as I mentioned so I was looking forward to this part. I was able to pull all three sources into the timeline and color code them so I could keep track of which one was which.
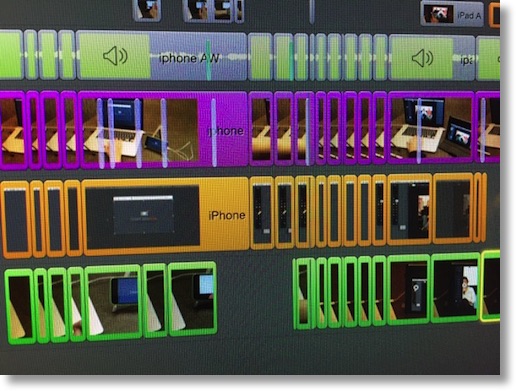 The topmost video is the one that will show in the final produced video, so I put the iPhone’s 4K video on top and then aligned the videos by looking at the three audio wave forms. The iPhone and camcorder streams had the audio embedded into the video track, so after aligning them I told ScreenFlow to extract the audio and then I simply dumped their audio tracks.
It was great fun to switch cameras, adding a fade out on the main 4K video track and a zoom-in video action on the camcorder footage. This is where ScreenFlow shines. I also discovered video actions that allowed me to match the footage better, such as brightness and contrast, and maybe more importantly, white balance. Setting these adjustments allows me again to keep from making the changes so jarring to the viewer. ScreenFlow makes it easy to pick up and paste adjustments (individually) so once I got a clip looking the way I liked it, I was able to set all of the clips from that camera to have the same lighting.
And then I noticed I was out of disk space…
Conclusion
I loved doing this project even though it took a lot of time. I learned so much about the capabilities of our tools. Without a challenging project like this I never would have learned to stretch myself to learn.
