 Last July I told you the story of my neighbor’s 2012 MacBook Air that suffered an early death when her baby daughter knocked a glass of water over into the keyboard. The power key was shorted out such that shortly after the Mac successfully booted up, it would shut itself down. I tore that thing down to the bare metal and couldn’t fix it because you can’t disassemble the keyboard from what they call the top case. It’s an odd name, but it’s the top half of the bottom half of a laptop. At the time, prices for a replacement top case were so high it wasn’t worth fixing the Mac. It was only a 128GB model and an i5 so not worth too much. My neighbors said they had a friend who would sell it for parts for them so I gave it back, but it really bugged me that I had to give up on it.Fast forward to a few weeks ago when my friend Diane tells me that her 2010 MacBook Air has a bum display. The right half of the screen is blank, and the place she took it to get diagnosed said it would cost $600 to get it repaired. I had an idea – what if my neighbor hadn’t sold theirs off for parts yet – maybe I could make a Frankenstein Mac? I called my neighbor and as I suspected they hadn’t sold it yet. Diane offered them $200 for their waterlogged Mac and we had a deal.
Note that I did all this not knowing whether the parts were even compatible but it sounded like fun, so why not give it a try? Worst case I waste my time and Diane’s $200, but she thought it sounded worth the bet.
I went to iFixit (of course) and printed out the instructions for both MacBook Airs. I don’t often print things out but when doing something as complex as removing every single piece out of a MacBook Air and tearing its monitor off, I invoked the Dave Hamilton process. He tapes every part and every screw to the corresponding instruction page, and when you have to put it back together, you simply go through the instructions backwards and the parts will be easily identifiable. I’d ripped my neighbor’s Mac apart four times trying to fix it but I was sure I’d forget a step if I didn’t follow his process.
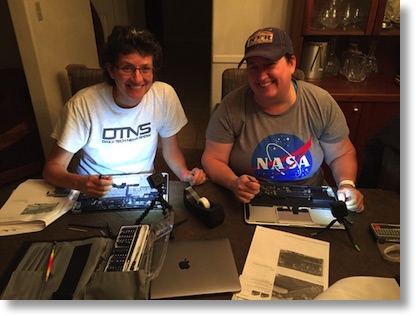
Next it was time to enlist some help. I bribed Pat Dengler (yourmacdoctor.com) into coming over to help. I offered her a Moscow Mule (a really good drink Kyle turned me onto with vodka and ginger beer and lime) and Steve said he would grill her steak. In all truth she would have done it just for the fun of tearing a Mac apart but she accepted our bribes.
First of all, Pat and I had a blast doing this. I have to say that Pat was a recalcitrant employee, constantly questioning whether she REALLY had to tape every part down. She’s such an anarchist, when we tore the glass off of an iMac at her house to get to the hard drive, she didn’t track ANY of the parts!
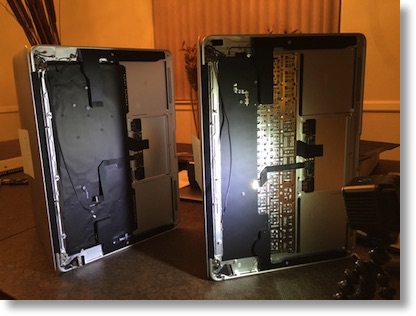
 To get to the point that we could swap the monitor from my neighbor’s Mac to Diane’s, we had to remove the logic board, RAM, I/O board, battery, the fan and had to disconnect a whole lot of teensy weensy connectors. Once you’ve got all that out, you take four final screws out that let you pull the display off. We took a photo of the two Macs right before they got their displays yanked, and there’s nothing left in there except the speakers.
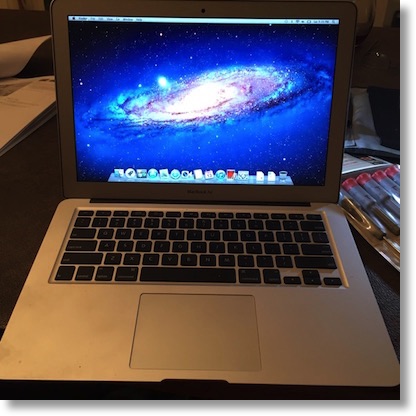
Diane’s Mac would be the host machine receiving the new display so we used those instructions to put it all back together. And guess what? It worked! We were pretty darn proud of ourselves.
The next day I had a thought, though. Diane’s Mac is pretty old, circa 2010, so it’s an Intel Core 2 Duo but it has a 256GB SSD. My neighbors Mac is a 2012, and it’s an Intel Core i5, so much faster, but it’s only got a 128GB SSD. I thought, what if we could put the Core i5 Logic board in Diane’s new Frankenstein machine but keep her 256GB SSD?
 It was time to go back in. I pulled it all apart again and the first thing I checked was whether Diane’s 256GB SSD would fit properly into the newer i5 logic board. Sadly the connector was different. Too bad. It would probably still be better to have an i5 even if it only had 128GB of RAM, especially since this Mac would just be used for some very light travel needs.
I pulled the Core 2 Duo out of Diane’s Mac and was delighted to find out that the i5 fit perfectly with all the connectors and screws being perfectly lined up. But then I noticed that the cable that goes from the logic board to the I/O board had a slightly different connector. Ok, we can work with that, I’ll just take the I/O board from my neighbor’s Mac along with the cable and we’d be in business. The I/O board has the power connector, USB and I think the audio connector on it.
I took a look at the two I/O boards and they were almost the same, but remember Apple changed the power connector in that timeframe? Not a problem we can use the new power adapter too. By this time you’ve realized that pretty much the only original part in Diane’s Mac is the top case, right? I guess we hadn’t swapped the speakers but that was about it.
But … it didn’t work. Apple had moved the screw hole that holds the I/O board in place just an itsy bitsy bit over to the left and down, just far enough that the power connector wouldn’t fit in through the case and the USB port didn’t line up. In the words of John F Braun – a big fist shake to Apple for that one!!!
I asked Steve to just cut the I/O cables in half and tape them together but he wouldn’t do it. Then I asked him to drill a new hole in the I/O board so the holes would line up, but he wouldn’t do that either. He did make us a darn good steak dinner though.
It wasn’t all sad news at the end though, I sold the SSD, the logic board and the I/O board for $248 on eBay!
