I love photography apps and I’m finding some interesting ones. Today I’d like to focus on CameraBag Pro from nevercenter.com/…. It’s available inside Setapp, or you can buy it for $40 directly from the developer. Never Center also has CameraBag (without the pro) for $20. CameraBag is a photo editor, while CameraBag Pro can do the same types of edits on video as well as photos. CameraBag works on both Mac and PC.
I am seriously impressed with this software and don’t understand why it’s so inexpensive. Let’s take a look at how CameraBag works and what sets it apart.

Like most photo editors, CameraBag works on a series of adjustment sliders for light and color. But the way CameraBag presents the adjustments is unique. You load a photo (or video) into the main window, either by dragging or using the menu or hitting the O key. Along the right side are two tabs, one for adjustments and one for presets. So far it sounds like every other photo-editing app, other than the fact that the text and tabs are vertical rather than horizontal. But that’s pretty much where the similarities end.
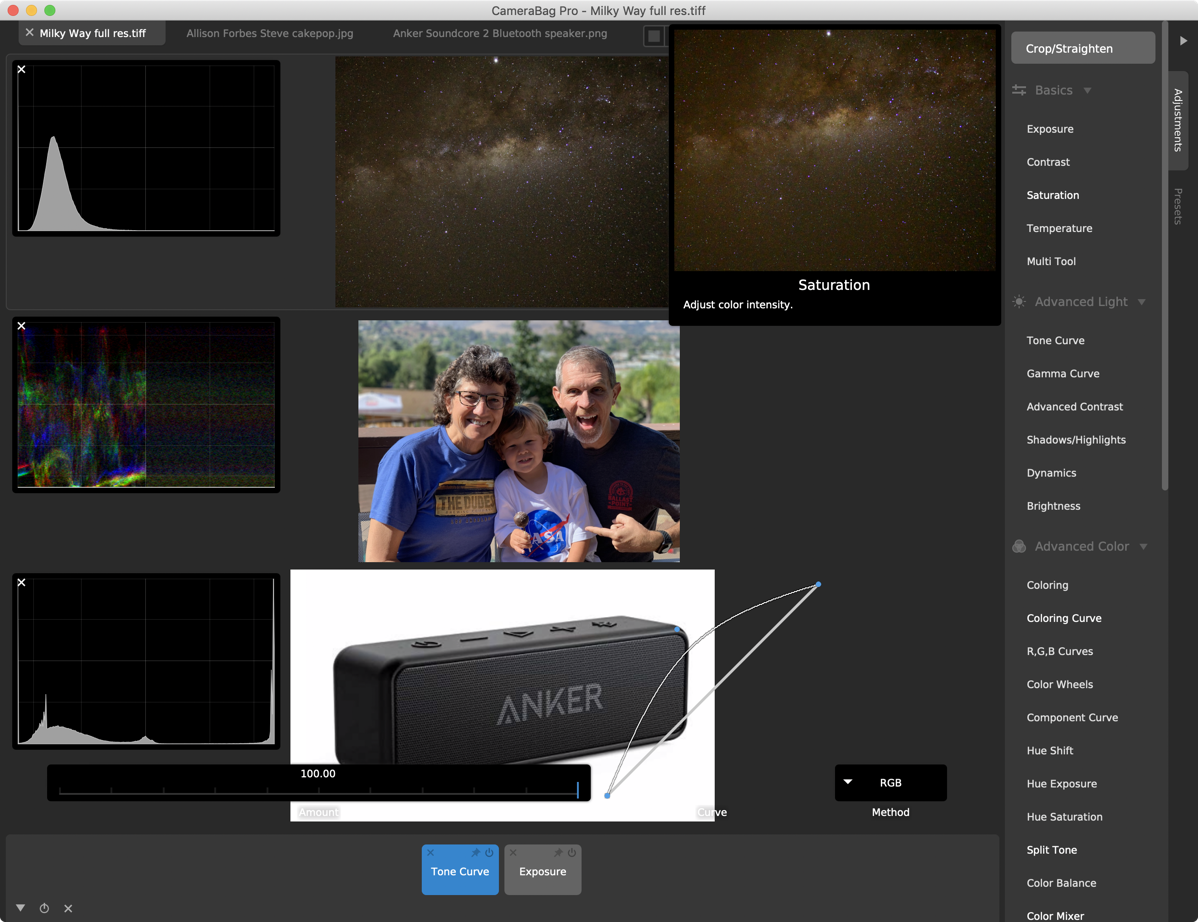
Let’s look at the Presets first because it will make it a bit easier to explain the interface. With the Presets tab selected and an image on screen, as you slide over the different preset names, you’ll see a very large thumbnail pop out in the top right showing you how that preset will work on your photo. It is lightning fast in showing you the previews, so it’s very easy to skip past ones that are of no interest until you find the look you desire. If you don’t like the hover over previews for the adjustments, you can turn that off in the menus.
Many higher-priced photo editors have a very few number of presets, but for $20 with CameraBag you get an enormous collection of presets. They’re collected in little drop downs so you don’t have to load a whole new set each time you change looks. There are 9 in Black & White Essentials, 14 Black & White Film, 20 under Classic Photography, 35 under Color Correction and after that I got tired of counting! But we have categories of presets for Color Essentials, Film Grain, Film Stock Motion, Film Stock Still, Film Techniques, Film Tone, Filtered Black & White, Mattes, Monocolor and Pop Art! This is a huge number of presets.
Adjustments

In addition to the presets, there are a plethora of individual adjustments. They are the usual suspects such as exposure, contrast, saturation, etc. Many of the Adjustments are animated. Let’s say for example you hover over the Exposure adjustment, the large preview thumbnail will change over time from high exposure to low exposure and back. These animations are not gimmicks, they really show you whether the adjustment you’re hovering over is the one you need.
When you select an adjustment in CameraBag, it places a small tile at the bottom of the screen. Let’s use Exposure as a really simple example. When an Exposure tile is added, you’ll see a heads-up slider on screen that says Amount and a little slider with 50.00 above it. Obviously, you simply slide that slider up and down to affect Exposure.
The tile that gets added by selecting an Adjustment is interesting. It has an X to remove the adjustment entirely, and an on/off button to temporarily remove the adjustment and add it back. As you add adjustment tiles, you can reorder them which is really cool. You may want to adjust your color before you boost saturation and with CameraBag you can rearrange adjustment tiles on the fly to do just that.
You can also pin adjustment tiles but for the life of me I can’t figure out what pinning accomplishes. With a tile pinned, you can still slide the order, you can still turn it on and off, you can delete it with the little X, and you can even change the adjustment values. I did quite a bit of searching online and could not find out what a pin is for. If anyone else figures it out, let me know.
In addition to the controls you’ll find in just about any image editor, there are many that I’ve never seen before. It’s not that no other editor has them, it’s that they are presented in such an interesting way. For example, one is called Coloring Curve.
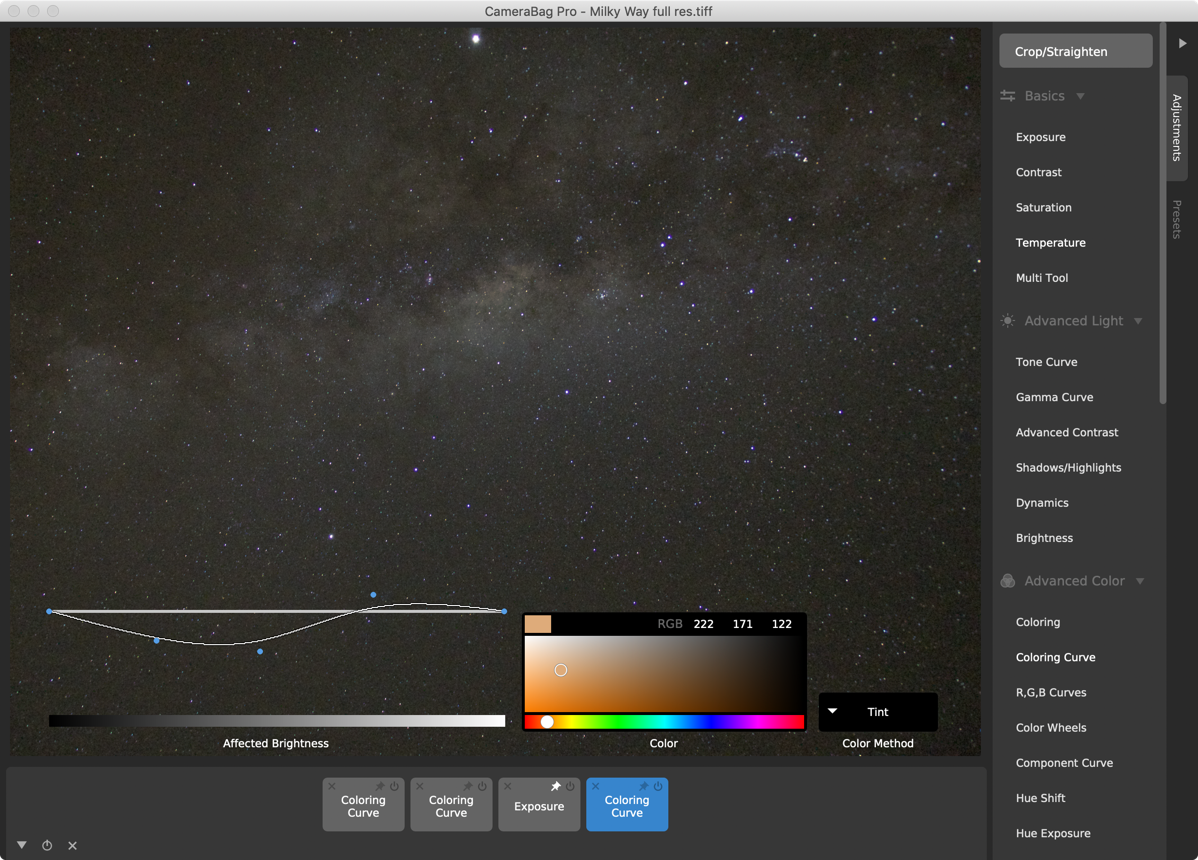
When you add a Coloring Curve Adjustment, you’ll get a graph on the left to change the adjusted brightness. You can add points to this curve and see the changes real-time. To the right of the graph, you have a color space graphic and to the right of that is the Color Method.
I played with the Coloring Curve on a photo I took of the Milky Way in Chile. I changed the Color Method to Tint, and it showed that I had a very orange tint to my image. I slid the selection dot around on the color space to the left, and adjusted the brightness curve, and I was able to immediately remove the orange color cast while keeping the other colors of the Milky Way. As I said, I never saw an image editor with this style of controls before.
Mask adjustment tiles look different from the rest. They have little arrows to the right of them, and an on-screen popup tells you to place them to the left of an adjustment you want to affect.
If you have a set of adjustments that you really like to combine together, you can even save these as your own custom preset. Maybe you like a little boost of saturation and a smidge of sharpness added to all of your photos, that can be your very own preset.
You can nest tiles together by selecting several and then right-clicking to see menu options. I’m not 100% certain why you’d want to nest adjustments, but I suspect it’s possible you’ve got several that are working together in the exact order you have them and you’d like to preserve them as a set.
There’s one thing about CameraBag that I think is a bug, but it’s possible it’s a feature. If you open an image in a folder with other images and then apply some adjustments, you can hold down shift-right (or left) arrow and CameraBag will show you the next image in the folder and apply the same adjustment. I say that it might be a feature because this might be a way of applying the same image adjustments to multiple images without having to recreate the adjustment tiles and their values.
I say it might be a bug because I can close the current image, and open a new image in a different folder and the Adjustment tiles stay on the bottom of the screen and are applied. In order to clear the tiles, you have to delete them or quit and reopen CameraBag. Like I said, might be a bug, might be a feature!
Zoom
When I first started using CameraBag, I thought you could only zoom to fit or zoom to 100% because that’s all that’s shown under the View menu. I had tried pinch to zoom in and out and it didn’t do anything. Then I figured out that a 2-finger drag actually zooms in and out smoothly.
Quicklook
I’m going to jump back to the Presets again to talk about another unique feature of CameraBag. At the top of the list of Presets, it says Quicklook. When you tap the + button next to Quicklook, you’ll see your image in very large thumbnails of every single Preset by category. No need to flip through them, they’re all presented so you can scroll to find the one you want!
Scopes

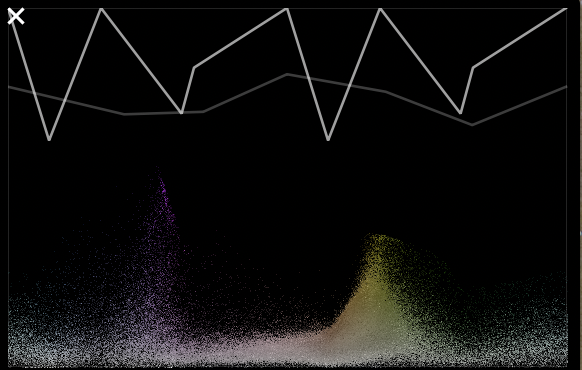
CameraBag has 5 different scopes available to see what the adjustments are doing in color space to your images.
Under the View menu, you can choose a luminance or RGB histogram, a luminance or RGB waveform, or a chrominance chart. You can use the number keys 1-5 to turns these scopes on and then flip through them. I feel compelled to confess that I don’t know how to use these scopes but they look nifty.
Tabs

In CameraBag you can open multiple images at the same time in separate tabs. But you can also view the tabs at the same time, either side-by-side or one above the other. You can apply Adjustments to either image simply by tapping on the one you want to change, and you’ll see the appropriate tiles at the bottom of the window for that image.
What’s that you’re asking? Can you do more than two images? Why yes you can! I added 20 tabs and CameraBag kept adding the images to the view.
Now here’s something I don’t understand at all. CameraBag is wicked fast. The image I used for much of my testing was an uncompressed 96MB 16-bit TIFF image and every adjustment I applied happened virtually instantaneously. I thought at first that these adjustments were maybe only creating a preview and I’d have to hit apply or something to make the adjustments on the real photo, but there’s no apply button.
I then thought maybe when I saved the images, it would take a long time as it did all the math. But no, saving is super quick too. Speaking of saving, CameraBag lets you save over the original using command-S, or you can simply use S and it chooses Save As and lets you choose the format.
What Can’t CameraBag Do?
There are two fairly major features not included in CameraBag that I would like to see. The first is noise removal. I guess I’d rather they not include it if they can’t do a good job of it. I also couldn’t find any selection tools in CameraBag so there’s no way to apply an adjustment to just part of an image.
Without these two features, I think CameraBag will be a tool in my tool belt of photo apps but can’t be the only tool I use.
Video
I mentioned upfront that there’s CameraBag which does just photos, and up to now I’ve described features you get with CameraBag. But CameraBag Pro allows you to use the adjustments you’ve come to know and love for photos, including all of the presets, on your videos. CameraBag Pro is what’s included in your Setapp subscription.
With a video file open, you can hover over the adjustments as with photos and see instantly the kind of modifications the adjustments will apply. When you add the adjustment you see it on a still frame and you can drag a slider to see that adjustment applied in different areas of your video.
I opened a 26second 4K video from my iPhone to see if I could stress my system with CameraBag Pro. I applied the Toy Saturated preset and then asked it to export at 720p. It took 34 minutes on my 2016 4-core i7 MacBook Pro. When it finished, I realized I’d fed it a partially slo-mo video and it actually preserved the slo-mo effect after applying the adjustments!
If you want to see your video before committing the time to have it exported, you can view a 3-second video preview that takes far less time. In preferences you can change how long to make the preview and the resolution for the preview.
CameraBag even has batch processing for photos and videos. First, you set up your Adjustments and/or Presets on any image or video. Then select Batch Processing, and it asks you to select a folder, select an export format for photos (TIFF, JPG, PNG and quality settings) and then an export format for videos (h.264 or ProRes with some options, and finally an export folder. And then it goes to town making all your adjustments. Pretty darn cool.
Bottom Line
The bottom line is that for $20, CameraBag is an amazing app that provides an amazing number of tools in a unique interface. I found it the easiest app I owned to really make my Milky Way image pop the way I wanted it to. I did have to go over to Affinity Photo to apply a noise removal filter, but other than that I was really pleased with what it could do.
For only $20 more you can have CameraBag Pro and apply these same adjustments to videos as well, which is just crazy to me. I don’t do a lot of video editing but even if I only need it a couple of times that’s a great price. And of course, I have CameraBag Pro with my $10/month subscription to Setapp.
I kind of wish Never Center supplied a manual for CameraBag because I find it easier to do a search for a specific feature (like that elusive pin on the adjustment tabs). Instead, they have mostly videos online which are probably a great way to learn.
Overall I absolutely love CameraBag Pro and will definitely be using it to enhance my photos and maybe even a video from time to time.

What surprises me, pleasantly, is that it is opening RAW files from very recent cameras. I wonder whether there is a list of cameras it will open? I can’t find anything on their website.
The only limitation I have found is that the sharpen slider is simpler and less refined than on other applications.