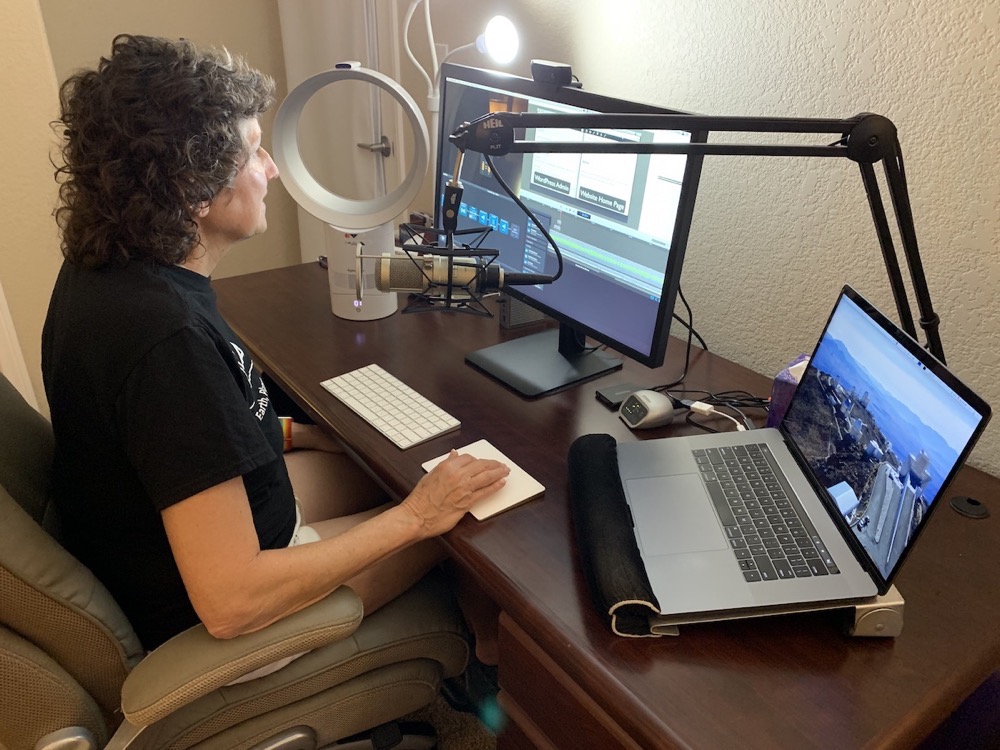
I’ve recorded the NosillaCast from our bedroom for the first 13 years, but after we did a remodel and repainted the house, I decided to move into one of our spare bedrooms. This change has some great advantages.
The best thing about having my own room is I can work/play on my Mac late into the evening even if Steve has turned in for the night. I like having my own space too, just to have my own space.
But this move came with a significant downside. It never occurred to me how quiet my bedroom was since it’s on the back of the house, away from the street. Sure there might be a yappy dog from time to time, or some construction going on at a neighbor’s house, but I didn’t have the street noise of cars going by. My new den is on the front of the house and there’s lots of traffic noise.
For some reason, I also seem to notice the sound of the occasional plane overhead in this front room where I never noticed it in my bedroom. Los Angeles International Airport is north of us by 7 miles so maybe the south side where my bedroom is located is insulated enough by the house.
I’m not a serious audiophile, but I do think having clean recordings for you makes the listening experience much more pleasant. The street noise hasn’t been a big enough problem for the audio podcast but there is one place where it’s unacceptable.
Don McAllister and his editor JF Brissette are both very serious about having zero noise when I record ScreenCastsOnline tutorials. I remember early on I even had the window open and Don noticed the birds outside. When a plane goes over, JF can pick out the very slight hum on my recordings, even with the front window closed. It was time to find a solution.
I contacted the most awesome Shai Yammanee. Shai is a performer and records a lot of his own audio under very complicated situations so I knew he’d be a great resource as well.
Shai and I talked about building a little booth to put my microphone inside of using foam and such, or buying such a device. But I have to be able to see my monitor and all of these solutions would block my vision completely.
We then talked about trying to pack acoustic foam panels into the windows but that came with even more challenges. Most of the time I don’t want the window blocked. In fact most of the year I keep it open for the lovely ocean breeze. Installing and removing foam panels was not going to work.
Sound Isolation Blankets
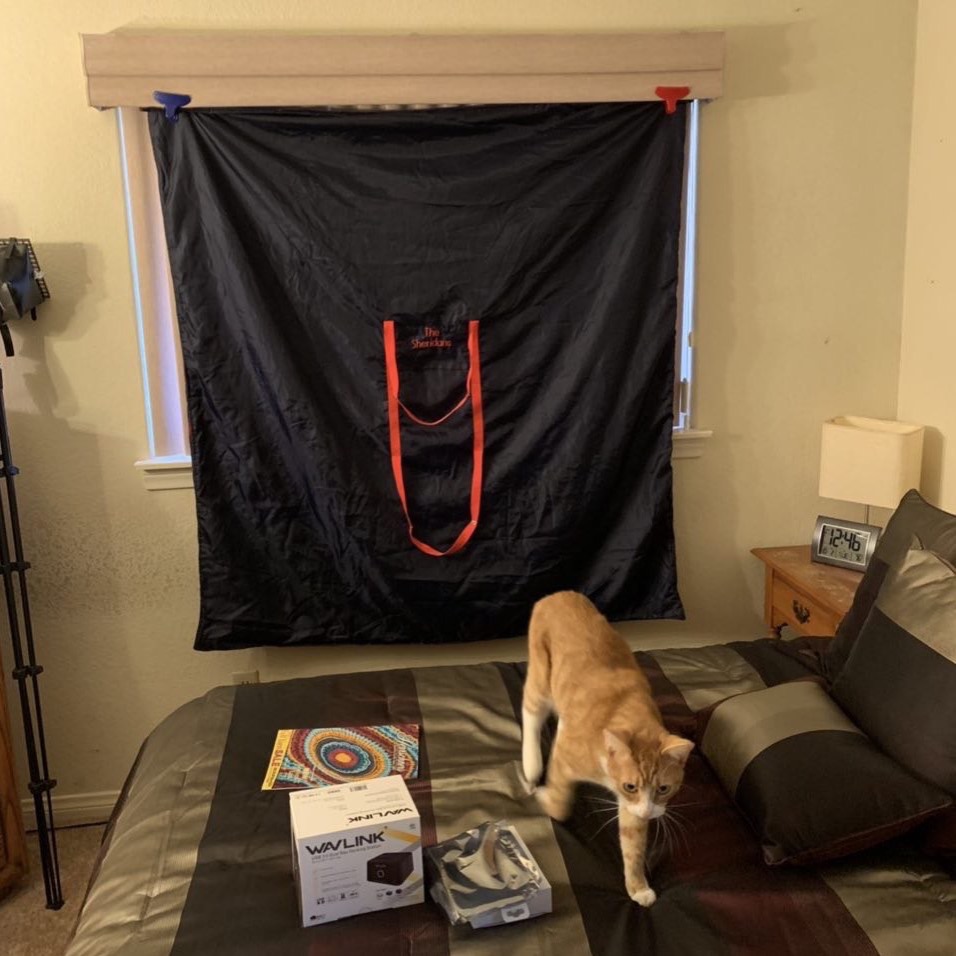
Eventually, we landed on the idea of using sound isolation blankets hung over the inside of the window. The advantage is that they’d be more easily removed and they’re actually made to solve this type of problem.
I tested the viability of this idea by trying to hang a normal blanket on the curtain rod in the bedroom to dampen the sound. I used a high-tech item called a “chip clip”. I put a link in the shownotes to the device I’m referring to as an Amazon Affiliate Link so you can see what I mean.
While attaching a blanket to a curtain rod using chip clips was difficult to do, and while the blanket was not big enough to cover the window, the reduction in room echo and external noise was dramatic. I knew we were onto something.
I spent a LOT of time perusing official sound websites looking for the perfectly-sized sound-insulation blanket and hoping it would come with some way to hang it. I finally gave up and put the idea on my Christmas list, hoping Steve would figure it out for me.
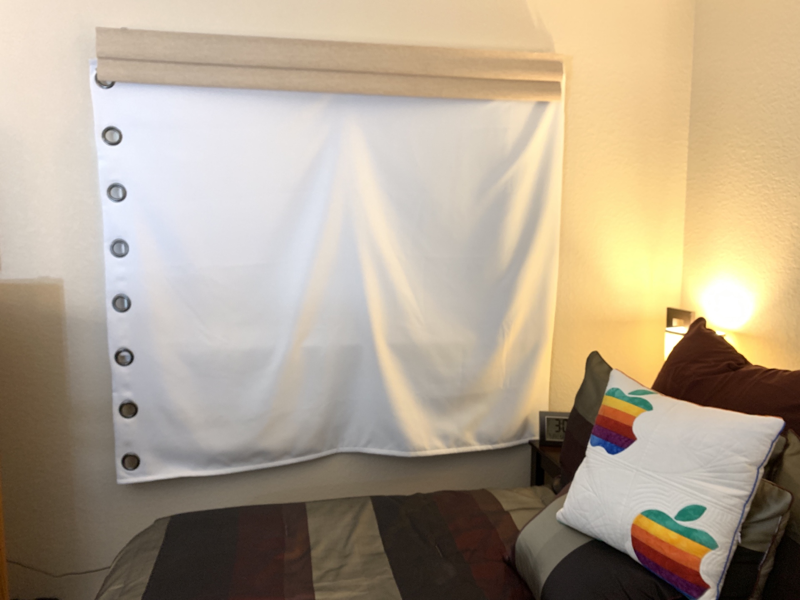
The great news is he found something close to what I wanted and then he modified it. He bought the Soundream Sound Insulation Curtain from Amazon for $99. The hard part had been to find something pretty close to the size of the window. The blanket he found was 57×95 inches which was perfect for the window AND came with nice big grommets along one edge, which we figured we could use to hang on hooks on either side of the window.
The only problem was that the grommets were spaced along the short, rather than the long edge of the blanket. Not to be deterred, Steve hunted around until he found a local cobbler who would agree to install new grommets along the correct edge.
The blanket is rather industrial looking and doesn’t hang exactly straight because we added an extra hook and grommet in the middle, but it covers the window and makes a huge difference in the audio for Don’s tutorials. I am thrilled with the deadening of the audio now.
Steve even put two removable hooks on the back of my den door, spaced perfectly so I can hang the blanket out of the way when not in use. It’s so clean and tidy, which really makes me happy.
Hot!
But there’s one problem. With the window closed and the sound isolation blanket, my den gets really really warm. I live in a very temperate climate, but I get very annoyed at being hot. While recording, I always wear my Bose over-the-ear headphones, which make me even hotter. Because we live in a temperate climate, we don’t have whole-house air conditioning.
Last year I did a review of the $83 Rowenta VU2660 fan. It’s a lovely fan, especially because it has a setting called “Silent Night” which is really quiet. Remember that audio quality is the most important thing I’m dealing with here, so adding fan noise would completely defeat the purpose of putting up the sound isolation blanket.
I found though that the only way I can use the Rowenta fan, even on Silent Night, is to position it down below the desktop and point at my legs. If I point it up any higher than that, my very sensitive microphone will pick it up. Sometimes I’d point it on me while editing and then use the remote to turn it off while recording, then use the remote to turn it on again, rinse and repeat.
But the whole time I was doing this, I was lusting over the best fans, those made by Dyson. Dyson products are really expensive, but I don’t know anyone who has bought one of their products and later regretted it. Who can forget my story about the Dyson V7 Motorhead cordless vacuum cleaner? Sure it was $300, but I LIKE vacuuming now!
I know someone who bought themselves the Dyson Hair Dryer for $400. Now that’s coconuts. But guess what? She loooooves this hairdryer.
So I’ve been lusting over the Dyson fans, but they normally run around $300. My $82 Rowena was doing a good job, and I really didn’t need a new fan. But the Dysons are so cool looking. I lusted for years.
Then on Prime Day, Amazon had the Dyson Air Multiplier AM06 Table Fan on sale! They said it was normally $299 as I remembered, but that one day only, the deal of the day would take $109 off, bringing it down to $190!
We’re all sophisticated Amazon shoppers here on the NosillaCast and we know that you have to check the facts. I looked up the AM06 Table Fan on the Dyson website and discovered that it was a discontinued model. That didn’t bother me but it did make me doubt that I was really getting such a good deal. I kept researching and found the AM06 table fan at Best Buy for $299 so I knew this was a real deal.
I still want to tell you about the fan, but I’d like to add some more context to the pricing before I do. I just checked the Dyson AM06 Table Fan on Amazon and it’s actually only $235.20. I saved $45, not really $109, but that means it’s more affordable for you if you’re interested.
About the Dyson AM06 Table Fan
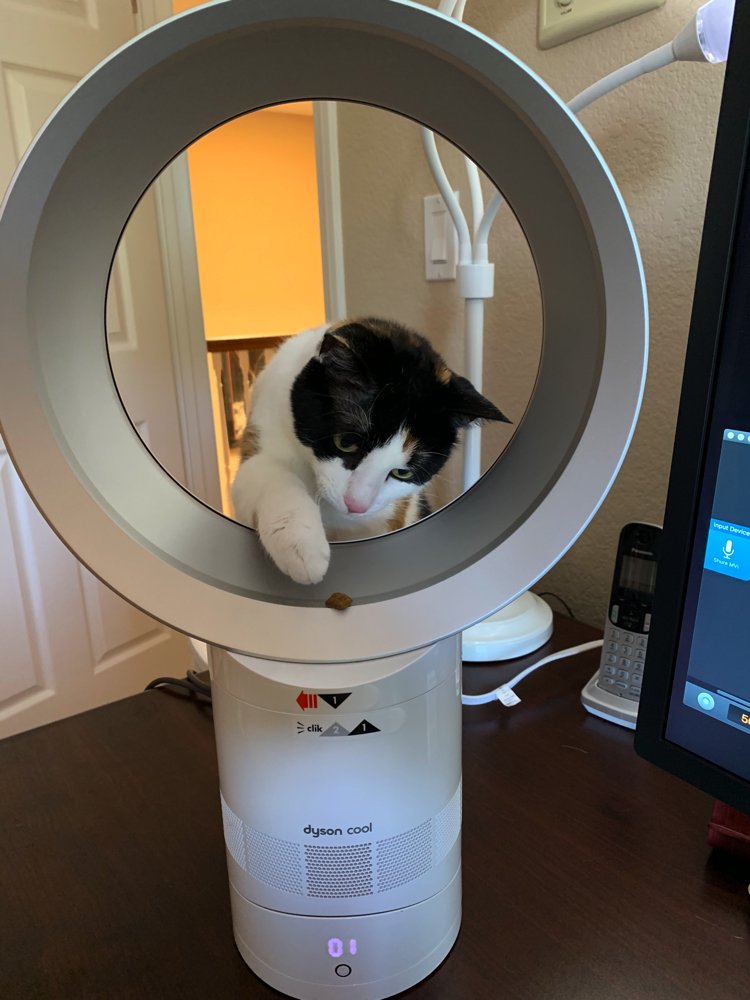
I’m going to finally give a spoiler, and say that this is an AWESOME fan. Perhaps the most amazing things about Dyson fans is that they have no visible fan blades. I’m sure there’s something spinning around in there making the air move, but all you see is a one-foot diameter hollow circle on top of a six-inch diameter stand. I convinced my cat Ada to put her paw through the fan while it was running just to show you guys exactly how safe this fan actually is.
Speaking of cool, let’s talk about how well the AM06 provides cooling. I put the fan on my desk, with the circle facing me. The fan stands 19 inches tall at the top, so the center of the circle is exactly at my face height.
On the front of the fan is a power button, and when pressed you’ll see a hidden LED showing you the fan speed, from 1-10. The AM06 comes with a very small remote control that allows you to turn the fan on and off and control the fan speed. I learned from reading the manual (yes, I read the manual) that the remote is magnetic so you can stick it to the top of the fan and you always know where it is. That’s important since I don’t think you can control the fan speed without it.
There’s also a button on the remote to allow the fan to oscillate back and forth. Personally, I find oscillation on a fan really annoying. I want the fan on ME. All. The. Time. But if you go for this kind of thing, the AM06 has it for you.
I mentioned that I have the fan facing right at me, but I discovered again by reading the (very short) manual that you can tilt the entire fan up and down. It’s not obvious that you should be able to do that but it works quite well.
If you like to have a fan to go to sleep but don’t need it running all night long, you can use the remote to set a time from 15 minutes to 9 hours before it turns off.
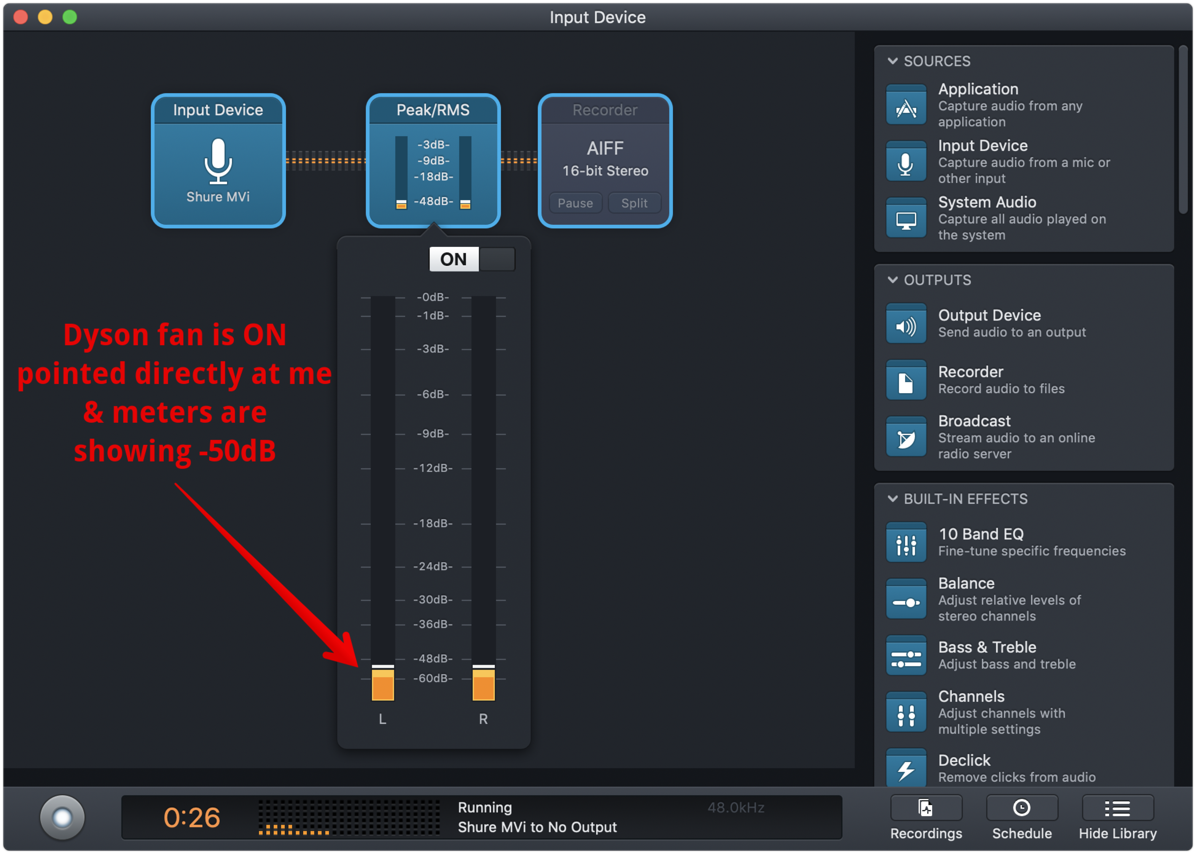
With the fan so close to me on the desk, I can turn it to level 1 and I have the slightest, most delightful breeze blowing on my face. I use Audio Hijack from Rogue Amoeba to sweeten and record my voice and it also has meters showing my audio levels.
When I’m actually recording, I like to keep my voice between -6 to -9 decibels (or dB) from full scale. This makes for a nice strong voice with my audio well above any noise, and yet is not peaking which creates a harsh grating sound. I closed my windows and fired up my Dyson fan and the Peak/RMS meters in Audio Hijack showed a background noise level of just -50dB.
I’m sorry David, but we’re going to have to quickly review decibels and how they’re on a logarithmic scale. We’re going to talk about perceived loudness here, not power for you electrical engineers in the crowd. A 10dB decrease in audio levels corresponds to a halving of perceived loudness.
Remember I said my audio is between -6 to -9dB. Let’s call it -10dB to make the math easier. If the noise of my fan was at -20dB that would be half as loud as my voice at -10dB. But the noise of the fan was at -50dB which means the Dyson fan is actually 1/16th as loud as my voice. That is super wee tiny quiet!
Bottom Line
The audio isolating blanket Steve had made for me has allowed me to make a huge step up in audio recording for ScreenCastsOnline. I wish I could promise I’d use it for my shows but until and unless someone complains I probably won’t!
I am super happy with my new Dyson AM06 fan with Air Multiplier (whatever that is). I’m really pleased that I got a good deal on it and even more pleased that it will keep me cool during the hot summer months while allowing me to maintain high audio quality during recording of the NosillaCast, Chit Chat Across the Pond and ScreenCastsOnline. Plus, Steve is happy because I gave him the almost as awesome Rowenta fan with Silent Night mode.

