I entitled this article “Increase Engagement on Twitter Using Image Descriptions” partly to be click baity but also because this tip will do just that. If you’d like to reach a larger audience with your tweets, then how about making your images available for those using screen readers? Maybe you think it’s not worth the trouble because A) it’s too few people to worry about and B) it’s way too hard.
Let’s get rid of the first myth – according to the World Health Organization https://www.who.int/blindness/publications/globaldata/en/ there are 39 million people who are blind in the world today. Another 246 million are visually impaired. So yeah, lots of people who you aren’t reaching today if you don’t add descriptions to your images.
Now on the second part, I’m going to confess something. I thought it WAS too hard. I think it did used to be hard but it’s trivially easy now. I am embarrassed that I haven’t been doing it before but I figured if I confessed and taught you how to do it, then I would have to finally get around to it.
I’ll walk you through a couple of the apps on iOS and Mac and if you’re using a different app or a different operating system I’m sure you’ll be able to translate and get this to work for you. I’m not joking when I say this is easy, it’s only a matter of recognizing the words to know what to look for.
It’s important to note that your image descriptions will not show by default for people not using screen readers. It would be really lame if you post a funny picture or meme and everyone sighted also saw your text saying, “this is a guy looking backwards at a girl while holding hands with his girlfriend and the caption says…” That would take the fun out of the whole thing.
In web pages, the term for the descriptions screen readers can see is alt-tags which means “alternative text”. Some apps use this term but some use more human-friendly terms. Let’s jump in straight away and talk through the super quick and easy steps to add text descriptions to your images.
Official Twitter App for Mac and iOS
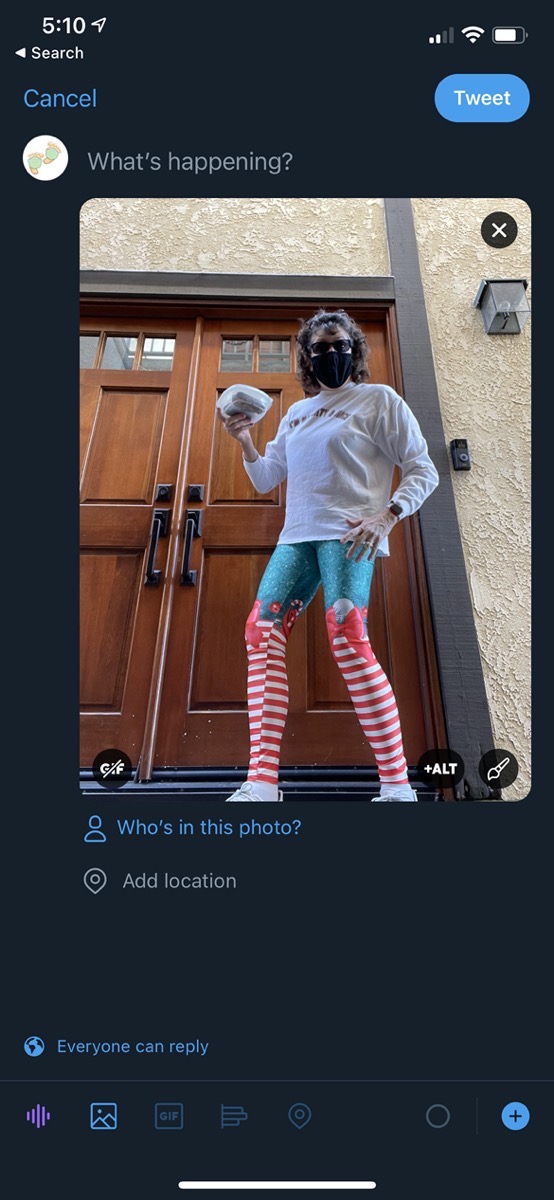
The official Twitter app for Mac and iOS makes it super obvious how to add an alt-tag. When you add an image, there will be a title overlay in the bottom right of the image. You’ll see a paint brush which lets you add dopey filters, but right next to it is a little black button with the white letters +ALT.
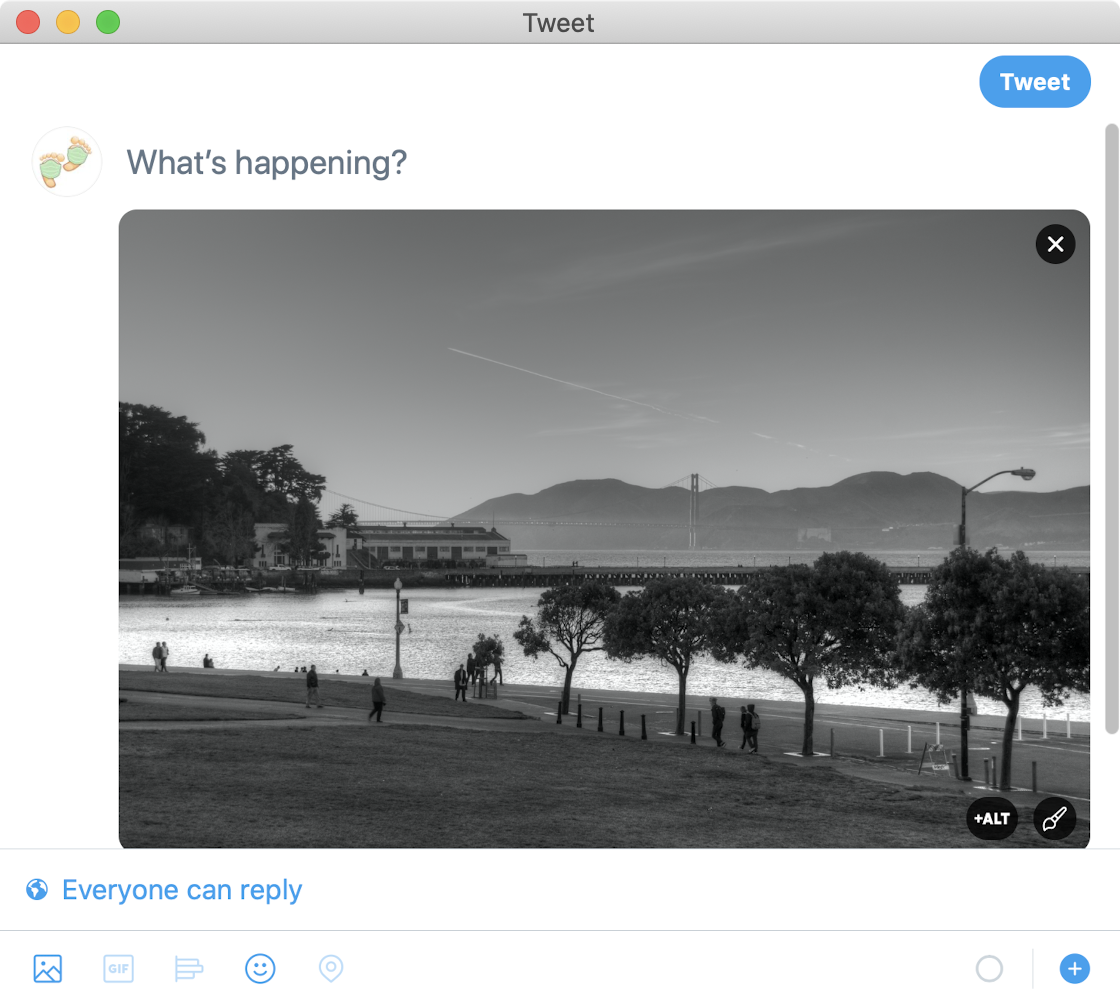
In an attempt to be helpful, the Twitter app pops up a window entitled Add Descriptions where they explain what these descriptions are and why you’d want to add them. They say “Good descriptions are concise, but present what’s in your photos accurately enough to understand their context.” I think that’s great.
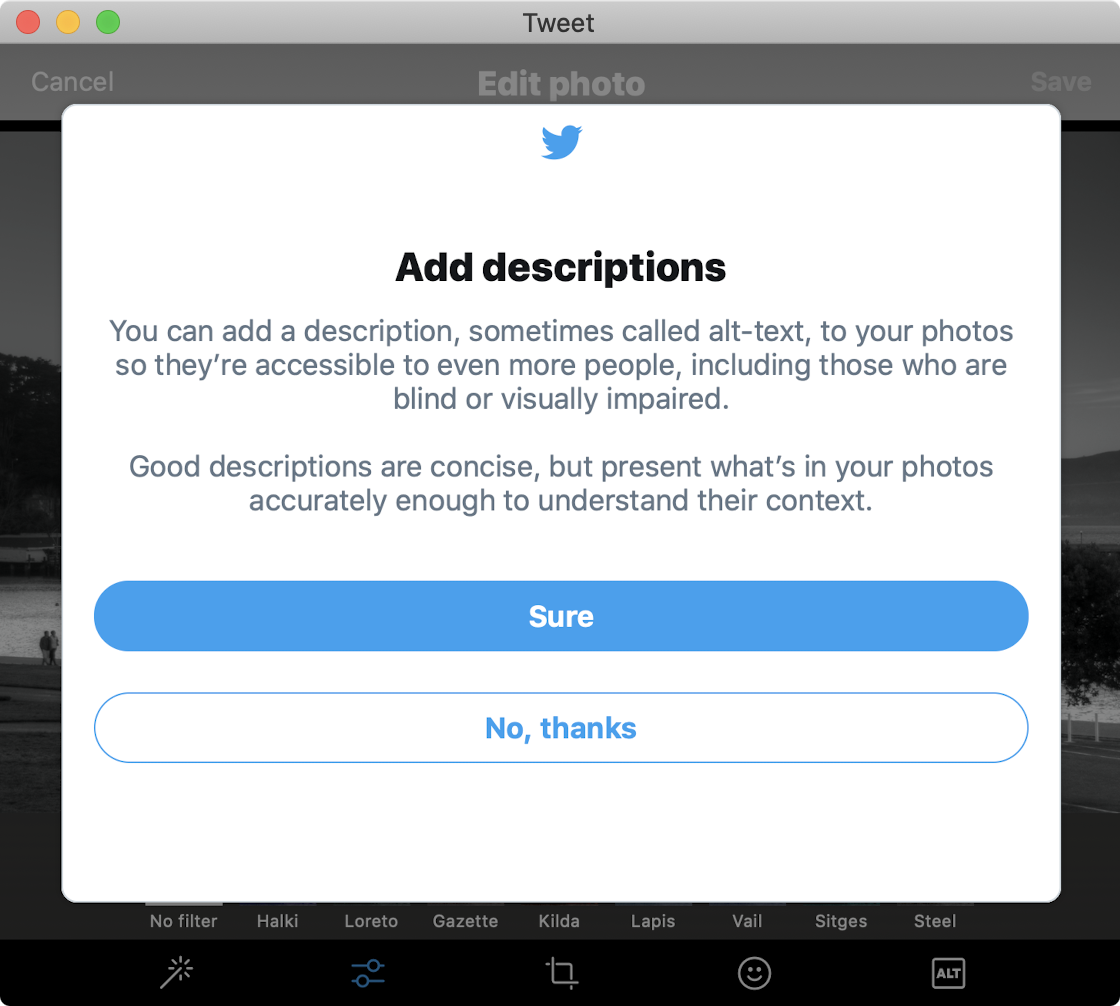
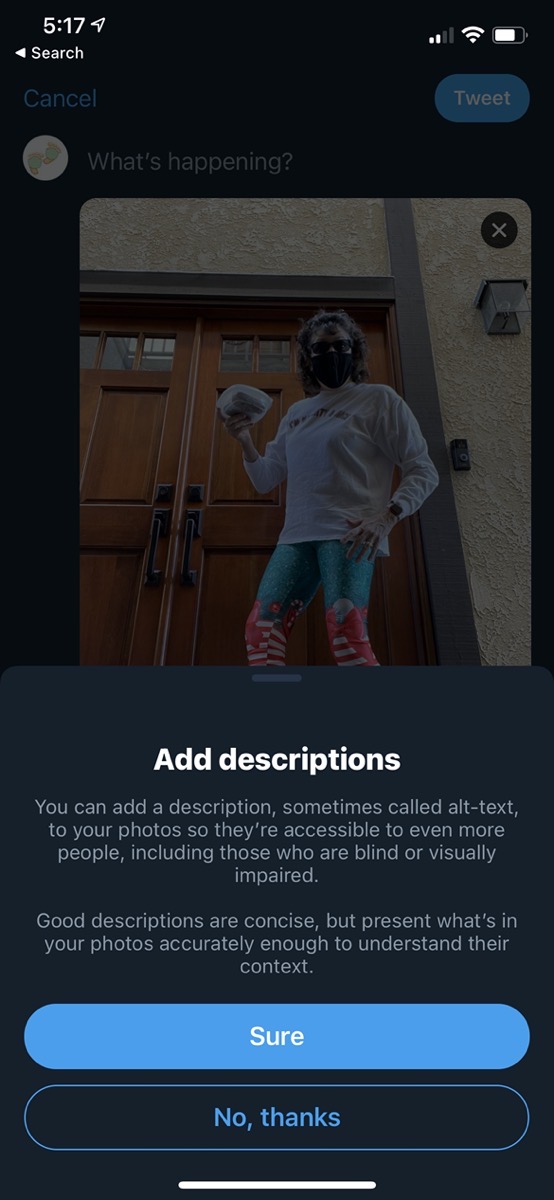
At this point you’ll see two buttons, one that says Sure, but also one that says “No, thanks”! I get why you want to let people back out if they hit it accidentally, but I sort of wish they didn’t give people the option. Once you tweet an image with an alt-tag on each device you own, the Twitter app for that device will remember you know what you’re doing and won’t bother you with that popup again.
After that it’s clean sailing. Your cursor will be blinking in a field that says “Describe this photo…” And it shows you that you have used up 0/1000 characters. You probably don’t want to type 1000 characters but it’s good to let you know you’re not limited to 280 characters like in the Tweet. They also have a link to learn more about alt text which is a nice touch.
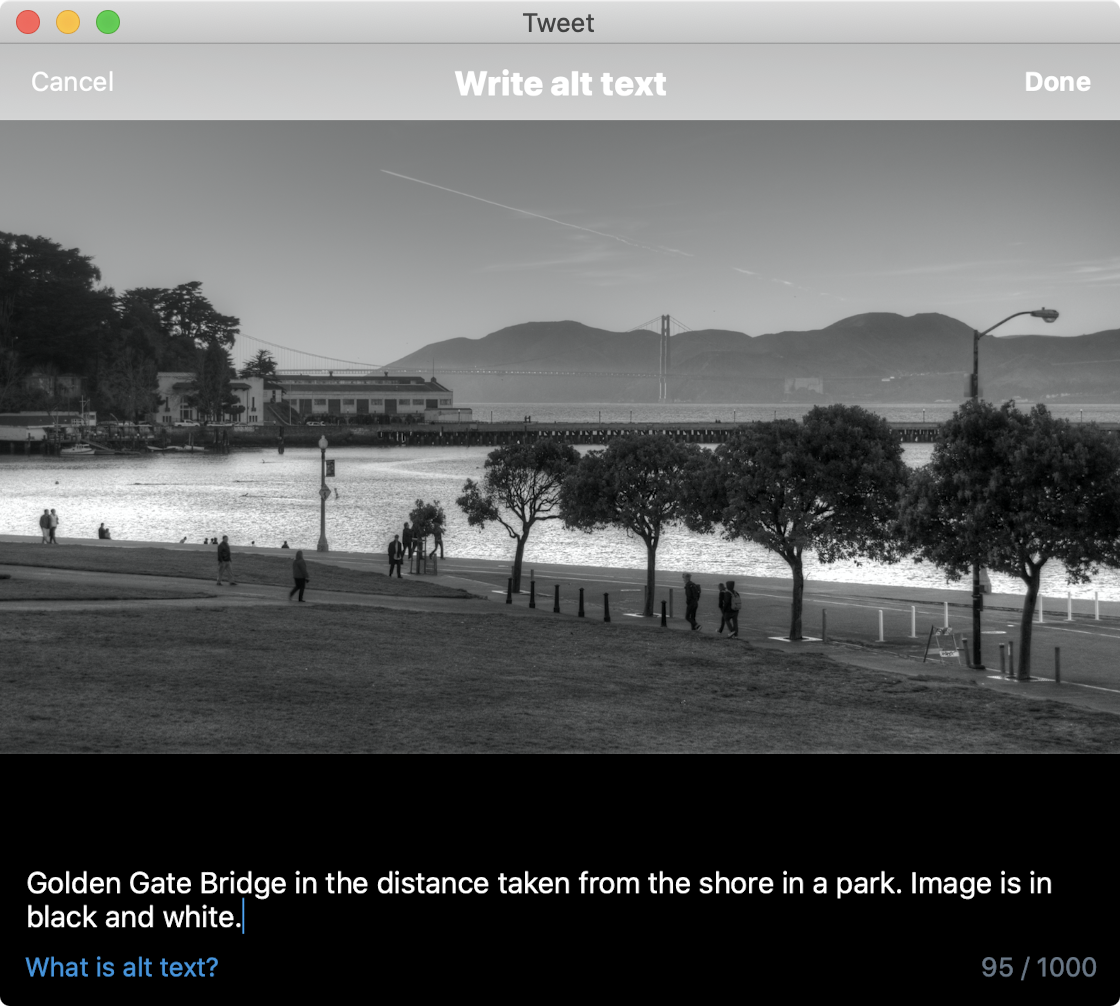
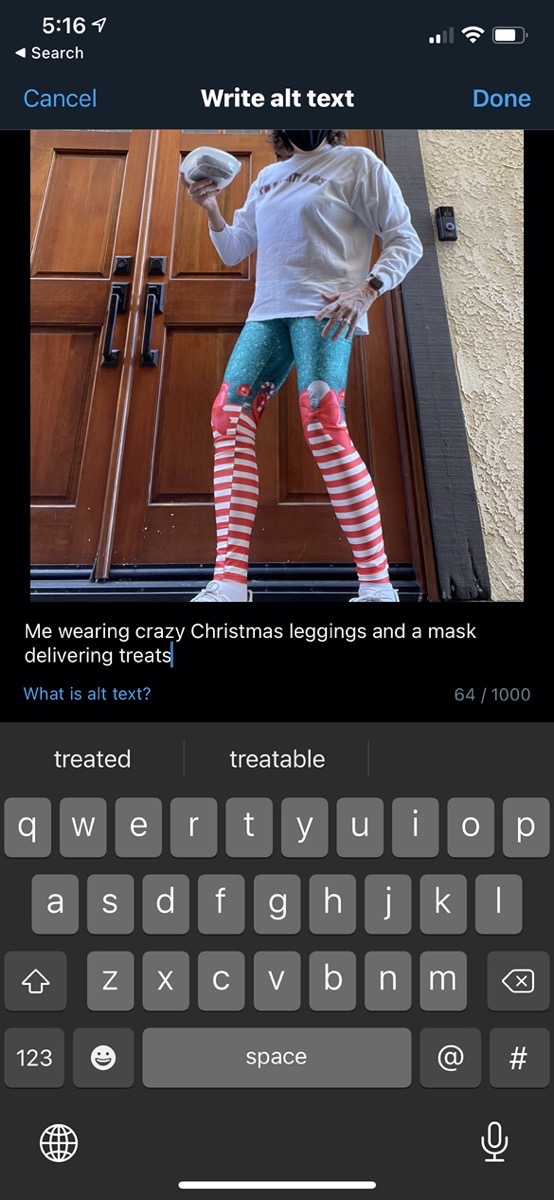
Once you’ve written your description, tap Done in the upper right and get on with writing your witty tweet.
To recap, on the official Twitter app, after you pop in your image:
- Tap the ALT+ button
- Type your description
- Tap done
How easy is that?
Tweetbot for macOS
I’m a big fan of Tweetbot on macOS and iOS/iPadOS. They don’t make it quite as obvious, but it’s actually fewer taps because they don’t have that Sure/No Thanks page.
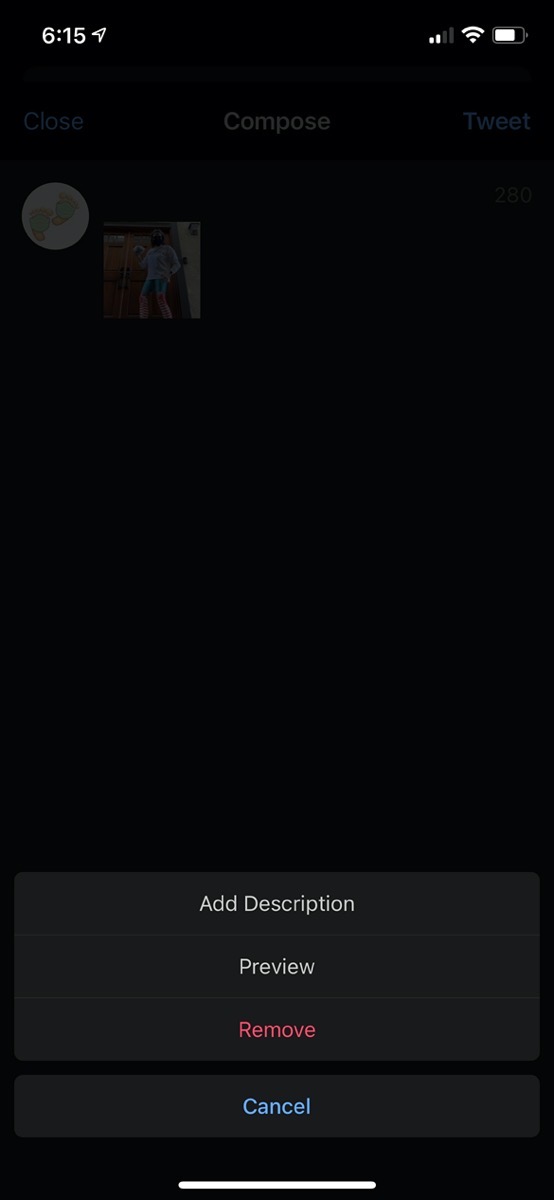
Drop in an image into Tweetbot just like you normally would and simply tap on the image. You’ll see Remove Image and View Image, and below that it says Add Image Description. I think it’s good that it’s in plain speak, but you don’t get any education on why you would want to add an image description and what will happen when you do.
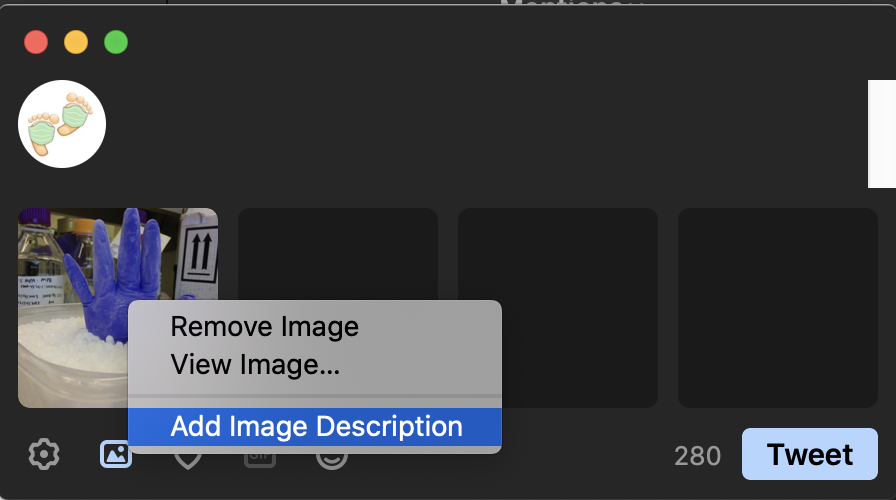
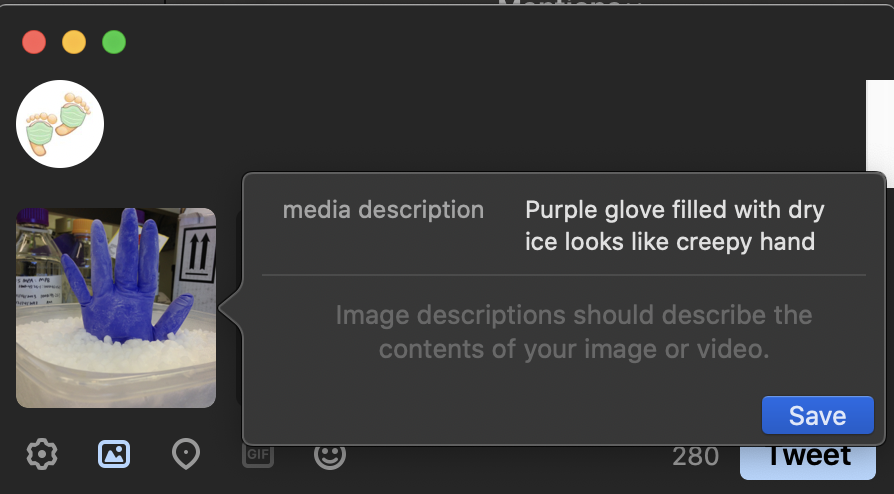
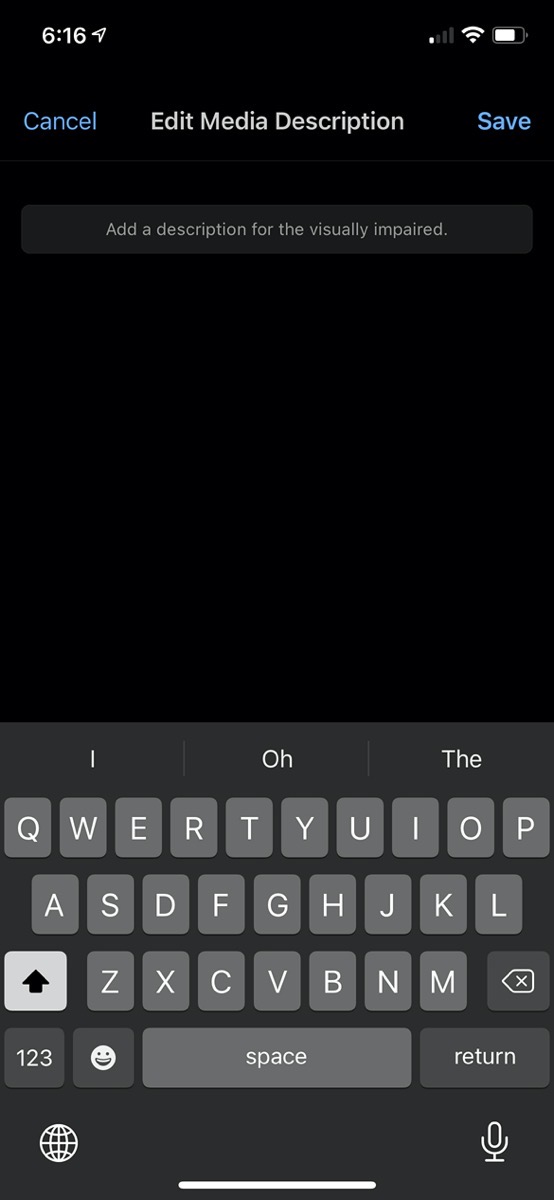
Next you’ll see “media description” where you can type and below that, on the macOS version they say “Image descriptions should describe the contents of your image or video.” I don’t think that even vaguely helps explain what you should write and how you should be concise but descriptive. Interestingly on iOS they at least say, “Add a description for the visually impaired.”
To recap – on Tweetbot for Mac, after you pop in your image:
- Tap on the image
- Select Add Image Description
- Type your description
- Tap save
I always like to test things I’m teaching, and I thought I made a mistake in Tweetbot. After I added the description of me wearing crazy elf leggings into a Tweet, I went ahead and posted it. I turned on VoiceOver on my iPhone and “looked” at the image, and what I heard surprised me. It said, “Image, Adult costume, door.” Technically that was correct, it was an image, I am an adult, and interpreting my crazy leggings as a costume was pretty astute, and I was standing in front of a door. But I added an alt-tag, so why did it figure it out on its own instead of reading out what I’d written?
I switched over to the Twitter app on iOS and it read my real description. That got me thinking that those using screen readers shouldn’t use Tweetbot because it doesn’t read the real descriptions. But then again, until enough of us add descriptions maybe that’s a good plan.
Bottom Line
It’s shockingly easy to add descriptions to your images, so why not add them? We spend all this time carefully crafting the tweet itself to fit inside the limit and to try to sound clever, why not throw in an extra 15 seconds to give at least 39 million more people the opportunity to recognize your cleverness?
Don’t tell anyone, but sometimes I put Easter eggs in my image descriptions. Why not have a little fun while you’re at it?

