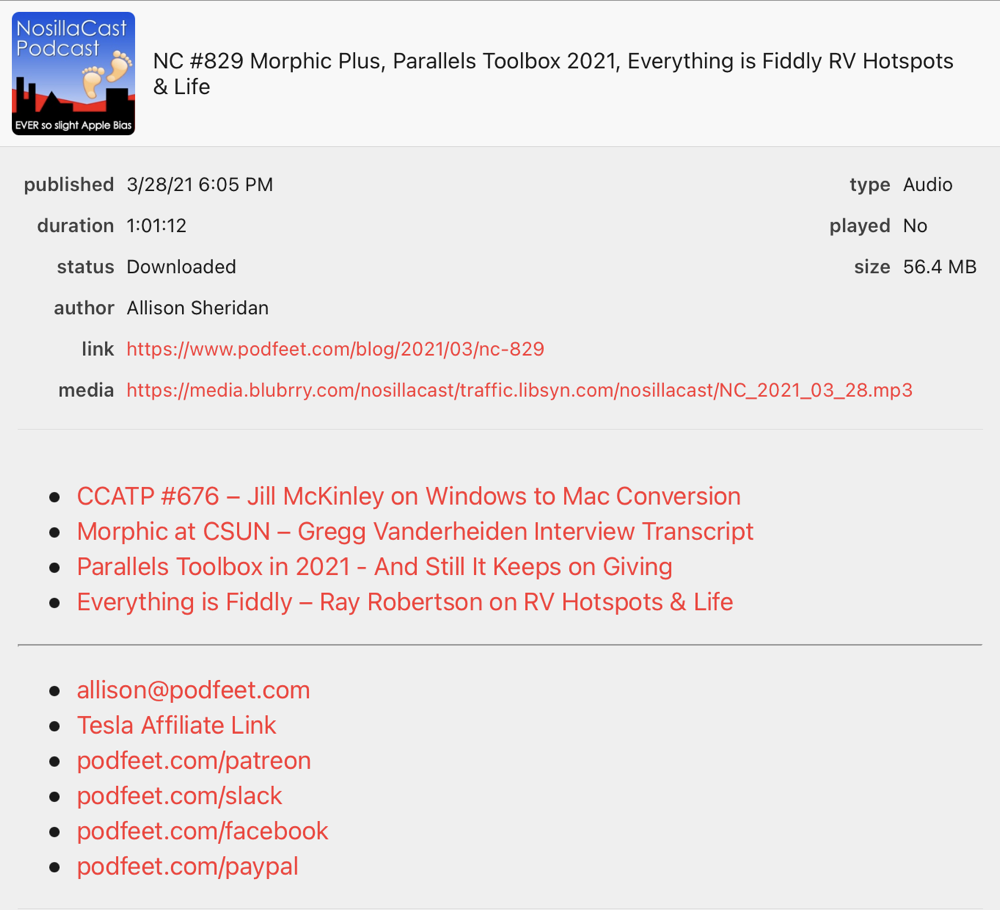
Have you ever noticed that when you’re listening to the NosillaCast in your podcatcher of choice that you also get a list of the links to each blog post article that’s in the show? You can simply tap those links to get right to the content, see the images, and follow links within the articles.
In the old days, I wrote one giant blog post for each podcast, and these posts were around 5000 words long. Years ago, I decided to break it up, and let each article be its own blog post. It was a great decision for so many reasons, but one commitment the listeners asked of me was that I promise to collect the links to all of the blog posts for the week and put them in the final blog post for the podcast episode.
It’s not hard to collect the blog post links (I wrote a little Automator Service that makes it quick and easy), but adding them to the podcast feed so you’d see them in your podcatcher is an annoying, error-prone, and labor-intensive effort. By labor-intensive, I don’t mean it’s all that hard each time, but when you realize I’ve done it hundreds and hundreds of weeks in a row, you can see how it can get tedious. This process was crying out to be automated, and that’s exactly what I did this week. I’m very proud of my little self for figuring out how to do it so I’d like to tell you about it.
The Manual Process
Let’s walk through the manual process first.
Writing Blog Post in MarsEdit

I write the shownotes for the podcast episode in an application called MarsEdit from redsweater.com/…. As you undoubtedly know, this post includes plain text of my introduction, the week’s blog posts with links, and also things like the pledge break and ending text that are full of other links.
The blog posts (and Chit Chat link) are distinct from the rest of the text because I make each of those a heading, which makes them easy to jump to with screen readers and visually they stand out because they’re big and bold, and underlined so you can tell that they’re links.
I do most of the writing in a language called Markdown which lets you, in a very human-readable way, do things like create a heading. For a heading level 4, which is what I usually use for the blog posts, I simply put four hash marks at the beginning of the line, followed by a space. The Chit Chat link is usually a heading level 3 with 3 hashes, and I might randomly use another size from time to time.
The links themselves that follow the hash marks are actually written in HTML. I know I could write my links in Markdown but HTML gives me more control over things like whether they open in a new tab or drive you away from my website. The important thing to know is that HTML links start with <a and they end with </a>.
So while in MarsEdit, the unique blog post links are on a line with some number of hashes followed by a space, then there’s the URL.
Writing the Feed in Feeder
The tool I use to create the feed for the podcasts is called Feeder from reinventedsoftware.com/…. My goal with the shownotes inside the feed, and hence inside your podcatcher is to give you just the links in a nice bulleted list, followed by the top few links I think you might want available: my email, my Tesla affiliate link, our Slack and Facebook community links, etc.
To make this consistent each week, I wrote a TextExpander snippet that creates what’s called an unordered list with a <ul> tag (which creates the bullets), and then plops in all of the spam links at the bottom. This TextExpander snippet leaves my cursor ready to put in each list item (the blog posts).
But then comes the super annoying, manual, and error-prone process of copying each link from MarsEdit and plopping it into Feeder. First, in Feeder I have to use yet another TextExpander snippet to put in the bullet itself, which is called an <li> tag. Then in MarsEdit, I have to very carefully select the URL by grabbing everything from the <a to the </a> at the end of the line, but not grabbing the space before it or the hashes. Command-C to copy, command-tab to switch to Feeder, command-V to paste. Now I need to get out of that <li> tag, add a line feed, and add another <li> tag for the next blog post bullet. I actually wrote a third TextExpander snippet to do that for me. Rinse and repeat for every single blog post you see in your podcatcher.
Obviously, this is not hard, and it doesn’t even take that long, less than five minutes a week. But realize that I have done this annoying little exercise literally hundreds and hundreds of times! Heck, I’m sure you were bored just hearing me describe it once, can you imagine doing it every week? Hopefully, now you understand my motivation to automate this task!
How to Automate?
I had a vision of a single keystroke doing all of this work in one-fell-swoop. I know a lot of tools, but I wasn’t sure which ones to use for this kind of task. So I threw it out to the Programming By Stealth Slack channel. I had to be very careful how to word the question or else the super helpful folks that follow that channel would have just solved it for me, which would take all the fun out of the project.
I gave them the barest outline of the problem and asked them how they’d start attacking this automation challenge. I got feedback from Allister, NuclearJon, Mike Price, Michael Westbay, and Caleb Fong, and the consensus was that the tool I should use was Keyboard Maestro and a mysterious command called sed. I loved that they didn’t solve it for me and left me with just these two clues.
The Solution Path – Keyboard Maestro & sed
In Keyboard Maestro you add building blocks together to accomplish your task. My plan was that I’d start with the MarsEdit blog post open in the editing mode, have Keyboard Maestro select the text, copy it, then some magic would occur in the middle, it would bring the waiting Feeder window to the front and paste in the glorious links.
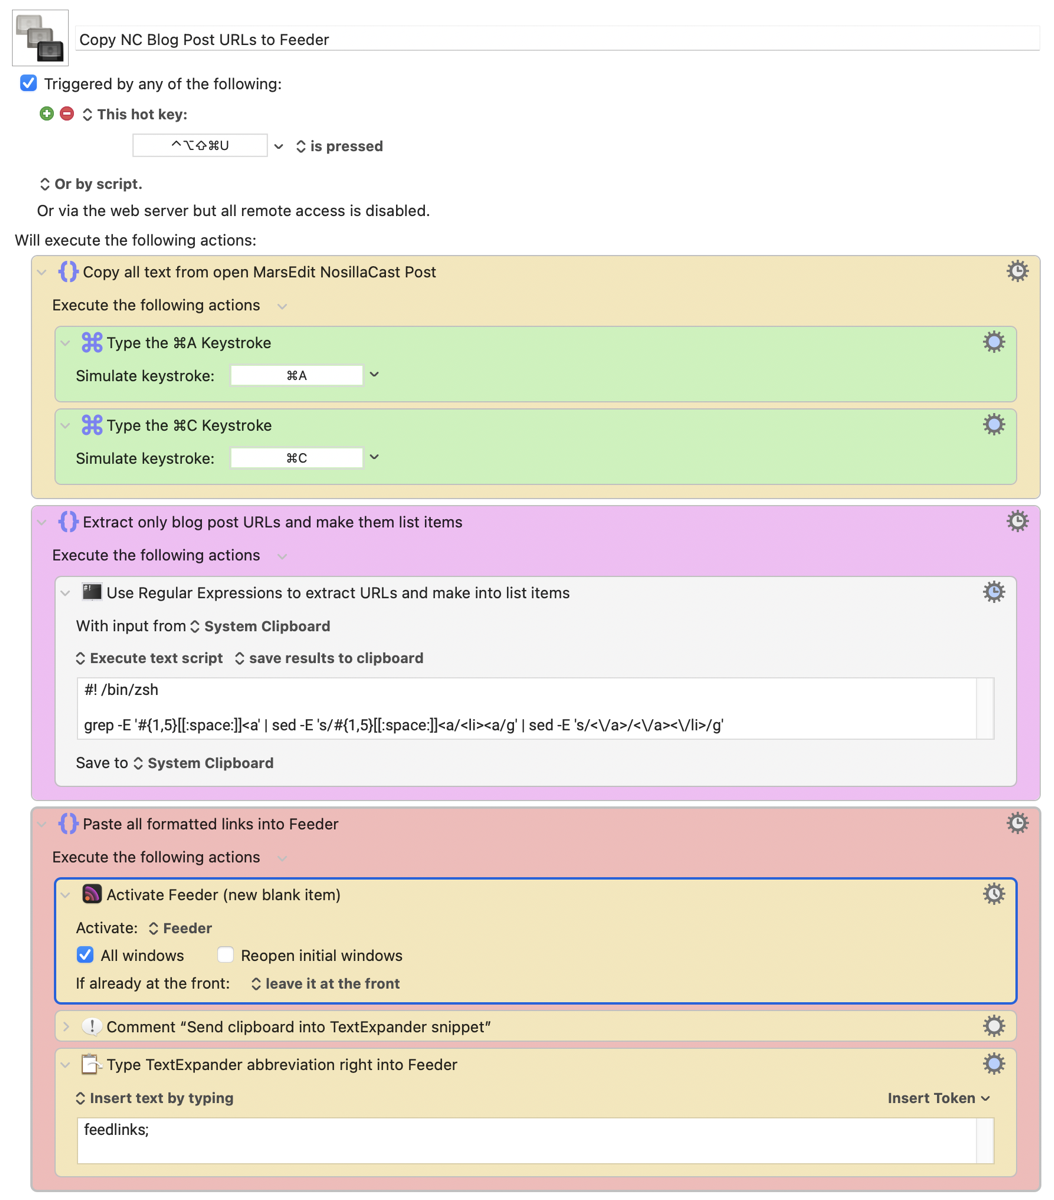
I easily built that structure in Keyboard Maestro adding keystroke blocks for the select all, copy and paste, and then put in a script block for the magic part.
In Taming the Terminal installments 17 and 18, Bart taught us how Regular Expressions can let you find patterns in piles of text using the grep command. It’s a super arcane language with all kinds of crazy characters to work with, but when you need to search for a needle in a haystack of text, Regular Expressions are the right tool for the job. The main thing to know about Regular Expressions is that you’re searching for patterns not specific text. In the task at hand, I’m not looking for a predefined blog post name. I’m looking for any link that is preceded by some unknown number of hash symbols and a space all on the same line. This is where Regular Expressions shine.
I’ve only had a very few opportunities to use Regular Expressions so I’m not at all fluent in the language. Luckily there are a lot of tools available that allow you to test out your Regular Expressions on a representative bunch of text. A while back, Helma turned me onto a tool called Patterns in the Mac App Store to help with writing Regular Expressions. It’s $2.99 and it’s really helpful.
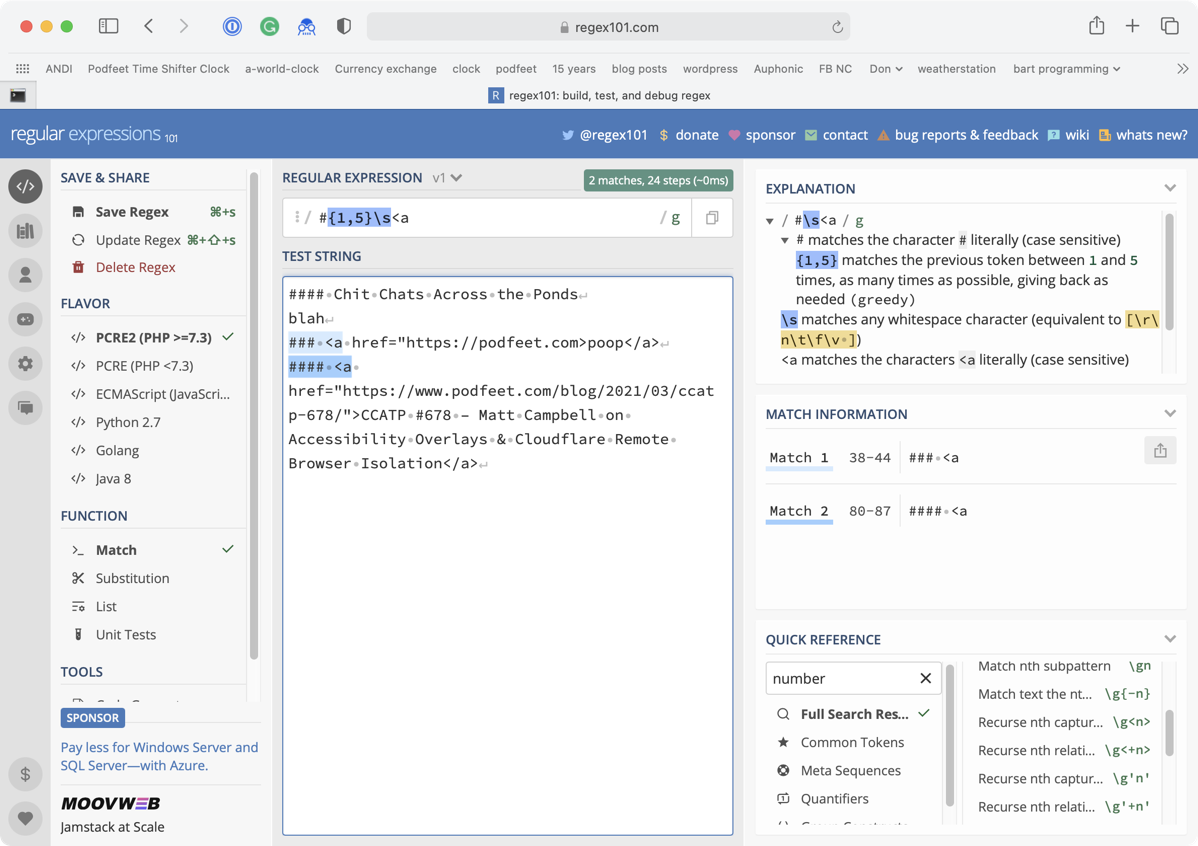
I got pretty far using Patterns but I couldn’t remember all of the arcane codes. Patterns does have a help file with all of the codes, but there’s no search within that file. I switched over to a great website called regex101.com/…. You not only can test your code against a glop of text, it has a fantastic search section on the same page to look for the right commands. You can even save a link to your work so you can come back to it later. With a little bit of help from Helma learning about POSIX-compliant Regular Expressions, I had what looked like a working grep command to find the correct lines in my post:
grep -E '#{1,5}[[:space:]]<a'
I’m now armed with a Regular Expression that can find all of the instances of lines with links within headings on my blog post. That’s great, but I need to change the format of the lines. I need to get rid of the hashes and the space, and I need to add the HTML tags to make the links into bullets.
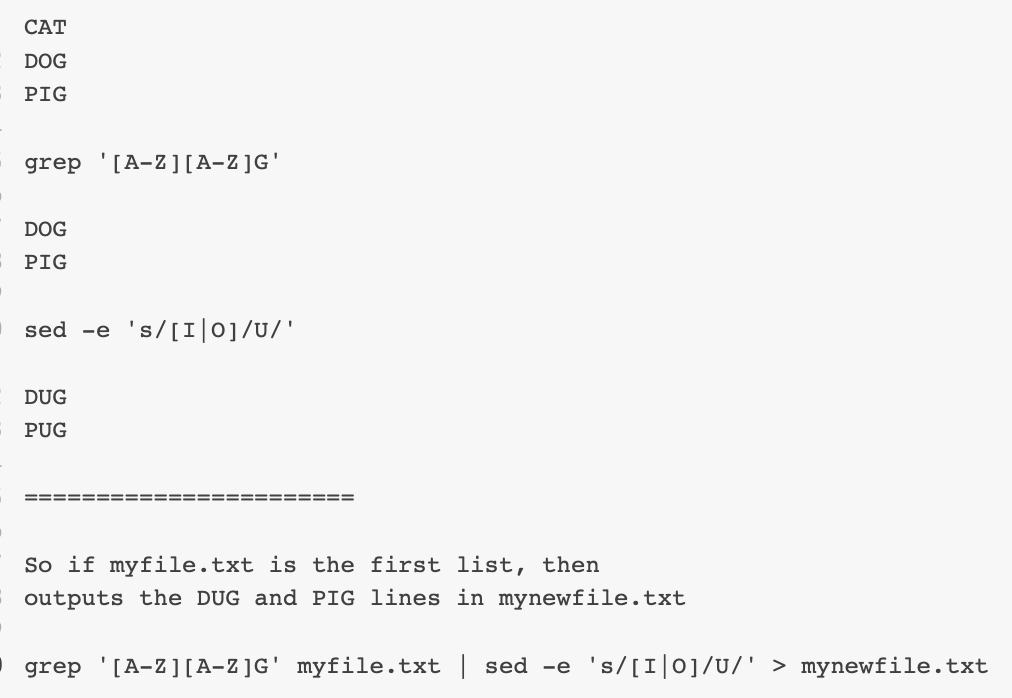
Remember that the Slack folks suggested that this mysterious sed command would come in handy, so I went to the googles to see what it was about. It turns out that while grep will find the text you’re looking for using Regular Expressions, the sed command will allow you to modify the text you’ve found and it also uses Regular Expressions. That’s good news because I don’t have to learn yet another set of commands.
I studied a bunch of examples of sed online and I got things sort of working, but not quite right. It was time to annoy Allister Jenks. He was the one who told me to use sed in the first place so this was all his fault. I was super vague with Allister in my explanation of where I was stuck (again to keep him from solving my problem) and he was still able to give me the bits I needed. He created a super simple example of how to use grep and sed together to find and replace text. It allowed me to easily see where I’d gone wrong and got me back on the rails.
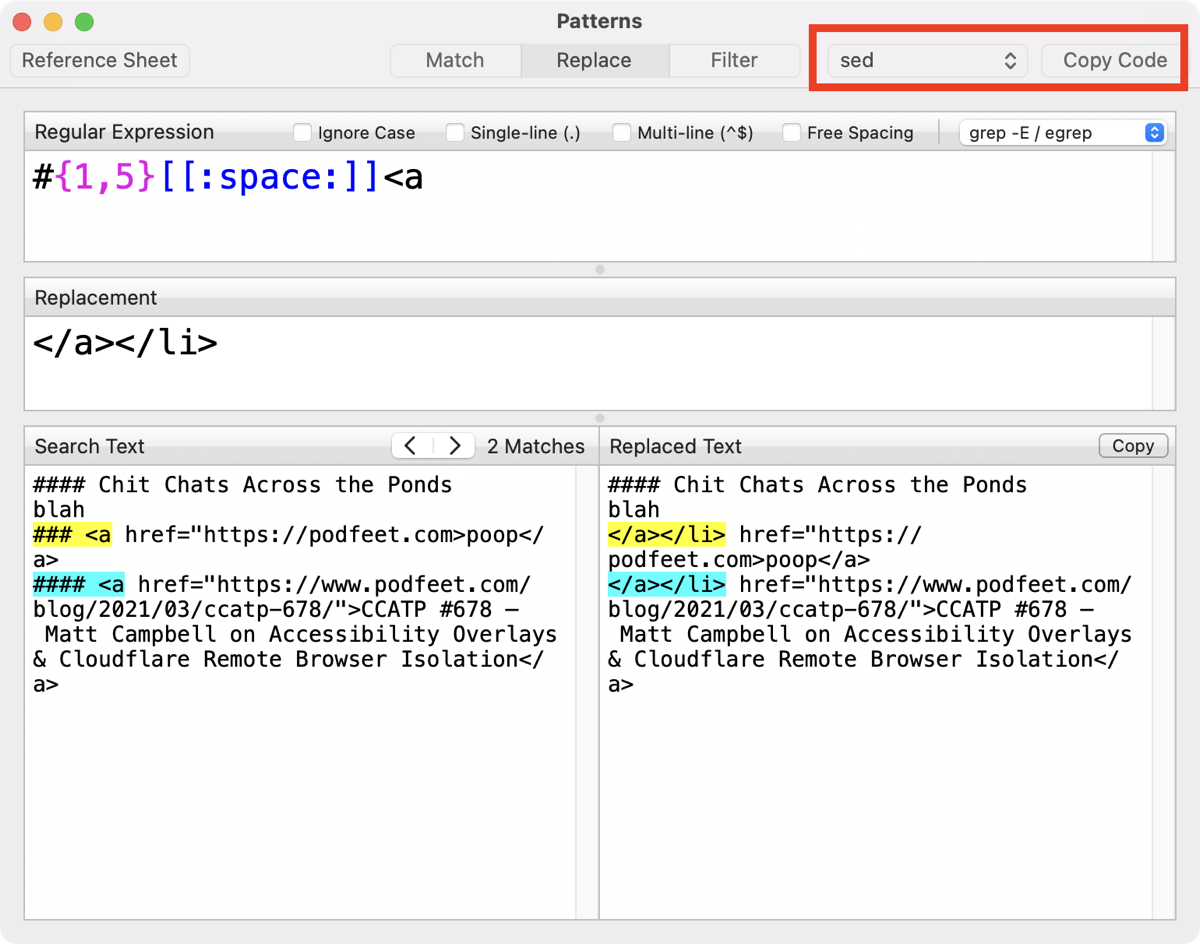
Once I had things working in the test environment of the Patterns app, it was time to break out of the sandbox and test the code in the Terminal on some real files. One reason I really like the app Patterns that Helma recommended is that when you get your grep OR sed command working in that little sandbox environment, you can click a button and copy either the grep or sed command and then paste it in the Terminal or in a shell script.
Now Bart started teaching me shell scripts probably around 1972 (or at least it feels that long ago), but this was actually the very first time I ever wrote a shell script all by myself. I actually used my physical copy of the Taming the Terminal book to look up how to make my shell script executable!
When I finally got that all working, I pasted the shell script into Keyboard Maestro. I don’t want to oversell this shell script – it was two WHOLE lines. One line to tell it which shell to use, and the second line was the Regular Expression. But I’m still very proud of it.
grep -E '#{1,5}[[:space:]]<a' | sed -E 's/#{1,5}[[:space:]]<a/<li><a/g' | sed -E 's/<\/a>/<\/a><\/li>/g'
At this point, my Keyboard Maestro macro could copy the text from MarsEdit, and manipulate it so it was in the right form, and then paste it into Feeder. Technically I had now met my own requirements specification for this task. Once you get an automation working, it is impossible not to see that you could do even more.
Remember I use a TextExpander snippet to set up Feeder first with the bulleted list tag and my spammy links? What if I could have Keyboard Maestro execute the TextExpander snippet too and only THEN drop in my copied and manipulated links? That would be even cooler.
One of the many building blocks in Keyboard Maestro allows you to type text, so I can just tell it to type my TextExpander abbreviation, which would then expand the full snippet into Feeder. The beauty of this is that I can continue to maintain my TextExpander snippet with updated links over time, and the Keyboard Maestro macro will always have the latest version.
I thought I learned everything TextExpander could do when I developed a video tutorial on it for ScreenCastsOnline, but I learned something new. You can put a placeholder in the middle of your snippet for the clipboard. Since the clipboard has my fancy extracted links, I was able to have them land right where I wanted them in my unordered list.
In the end, my Keyboard Maestro macro turned out to be very simple. My early versions were very complicated with if/then/else blocks, saving text out to multiple text files, and more. I told Bart it was like I started by building a set of monkey bars, but when I was done I realized all I needed was a ladder!
Bottom Line
Bart told me he was worried about learning Keyboard Maestro because he’d be too tempted to automate everything, whether it saved him much time or not. This very simple macro took me around 7 hours and 5 people’s help to accomplish over the course of three days, and it will save me less than 5 minutes a week. That means my time investment will pay off in 19 short months!
But I’ll be less annoyed, and I learned a lot so the next time I need grep or sed or Keyboard Maestro, I’ll begin by standing on a better foundation to do even more. I don’t take for granted that I have more time than most to spend learning, but I gave up watching TV every night this week to get this done and I think it was time very well spent! As promised, there’s a link in the shownotes to my amazing macro, AND I even put in a video demo of the macro in action.


Best reference to sed – https://www.grymoire.com/Unix/Sed.html. Great content!