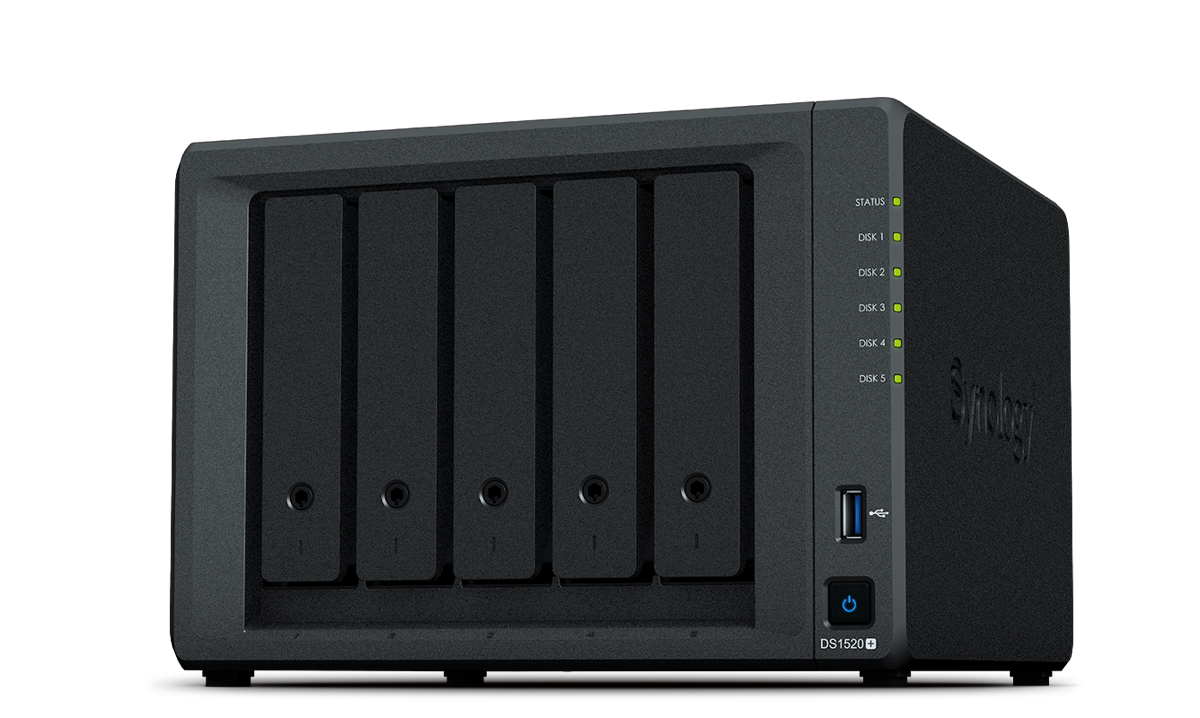
Synology – Not Just a Bunch of Disks
When people look at the pricing of a Synology, the sticker shock is really shocking. I think there’s a couple of reasons why. The enclosures themselves are expensive. Filling the enclosures with drives is very expensive because you have to buy more than you would think to get the protection of mirrored data. On top of all that, I’m betting that when most people hear about Synology they think of it as just a bunch of mirrored disks to back up their data. Even if they do know that the Synology platform is a rich ecosystem of applications on a very capable server, they probably think to themselves that they won’t really use much, (if any) of that capability.
I know this to be true because it’s how I felt when I looked at Synology pricing. Somewhere along the line though, I kept hearing about cool things you could do with them and I decided to take it on faith that I would figure out how to justify such an enormous expense.
A Synology really is a server, not just disks. They come with a vast amount of software to do many amazing things, and I’m sure I don’t understand 10% of what they’re capable of accomplishing. What I do know is that it’s a mistake to underestimate what your Synology can do.
This week I solved a problem with Synology, and when I was done it was such an obvious solution that I felt like a dummy not thinking of it before. But I’m not a dummy, I just didn’t know it could do what it is now doing for me.
The Problem to be Solved
Steve and I store all of our sensitive financial and health data on our Synology. We don’t want it on our local computers, especially our laptops, and even on a desktop, we’d run the danger of accidentally having it sync to iCloud or Dropbox or Google Drive. It’s actually hard to find a folder on our computers that’s not synced these days. A Network Attached Storage device was the perfect solution.
Since the NAS has mirroring, my data is protected from the most common catastrophe, that of a single failed disk. But I wanted more of a backup than that, so I set up my old Drobo as a backup for the Synology. I’ve got that all automated and it works well. With that backup, I am now protected from disk failure and from a complete meltdown of the Synology (which has been known to happen). But it doesn’t give me an offsite backup.
As our climate change continues to ravage the world because of our inaction, I’m watching fires and floods and tornadoes, and I live in earthquake country, so not having off-site backups is getting dumber and dumber. I haven’t done it though, because it’s too hard.
I know I could create a sparse, encrypted bundle and put the data in there and ship it off to a cloud service, but a non-automated backup is a bad backup. I couldn’t figure out how to automate it.
I finally wrote a post in our Programming By Stealth channel in our Podfeet Slack where all my little automation nerd friends hang out asking for their help in creating an automated solution.
Synology Can Do It
As soon as I got finished writing up the post, it occurred to me to do an online search for “how to do an encrypted offsite backup from a Synology”. It turns out Synology has the tool and the offsite service to solve this exact problem.
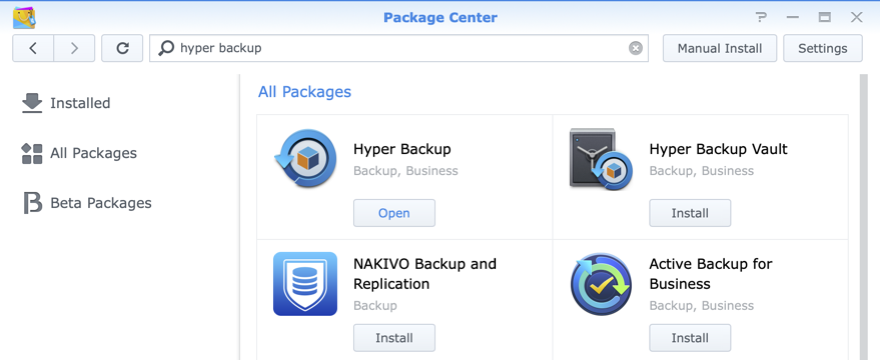
Synology provides a built-in tool called Package Center where you can download official Synology apps or vetted third-party apps. It’s a lot like the Mac App Store because you can get apps outside of Package Center too, but you’ve got a vast set of options inside Package Center.
Synology Package Center includes software written by Synology called Hyper Backup that can back up your data on your Synology to connected USB drives, remote NAS devices, file servers using tools like rsync, and webDAV. They also have support for backing up to cloud services such as Dropbox, Google Drive, Amazon S3, Microsoft Azure, and several more I’ve never heard of before. When you look at the options in Hyper Backup, if you don’t notice the scroll bar you’ll think Hyper Backup only supports Dropbox and Google Drive, so be sure to scroll down if you want to view all of your options.
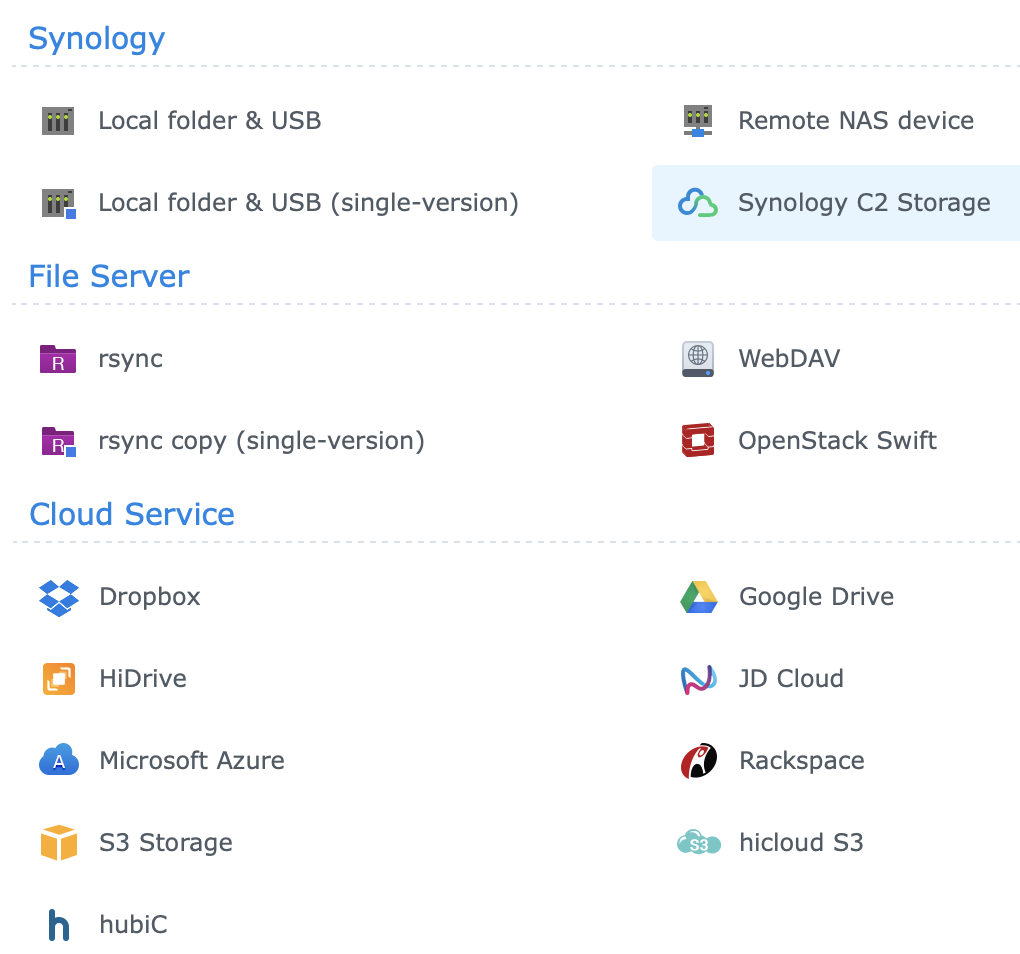
Having all of these different cloud services as options is great, but the most important thing about Hyper Backup is that by default it is encrypted in transit to the server (and you cannot disable that option) and you can also choose to enable client-side encryption. This is exactly what I needed. I don’t care who you are, I don’t trust you to take my data and encrypt it for me in your cloud. Allowing the Synology to automatically do the encryption locally before backing it up to the cloud is exactly what I want.
But that’s not all. Synology also has its own cloud storage service called Synology C2 Storage. I’ve never paid for online like Amazon S3 or Wasabi because I always looked at the enormity of data we have for all of Steve’s video files and it was going to be hundreds of dollars per month.
But if I only really need to back up this one Financial folder, it turns out it’s really inexpensive. Synology C2 has a plan for $60/year for a TB of data and allows daily backups and keeps 11 backup versions stored over 30 days. $60 a year isn’t too bad, but when I used Synology’s Storage Analyzer to look at my Financial folder, I discovered it’s less than 8GB so 1TB would be overkill.
Synology has two smaller plans, the lowest of which is 100GB for $10/year. This might not be the best dollar-per-gigabyte rate in town, but it’s only $10! Would you pay $10/year to get this kind of data back in case of a disaster? I sure would.
I signed up for the least expensive plan and was delighted to find out that there’s a free 30-day trial so I marked my calendar to cancel it if I changed my mind before the 30 days was done.
Test First!
Before jumping right to backing up this precious data to the cloud, I did some experiments. I created a volume on my Synology for testing and put one little text file in it. Then I walked through the tutorial steps in a great knowledge base article from Synology to see how Hyper Backup works.
It’s actually incredibly easy to set up a backup to any service or server you like. I was going to walk you through the step-by-step process, but then I realized the knowledge base article I referenced already does that, and did a better job than I would anyway. Instead, let’s talk through the experience of running the backup and recovering the data.
I created a backup task for my one volume with its itty bitty text file in it and set it to back up to Dropbox. I ran it once unencrypted and then discovered you can’t change it to encrypted after the fact. No big deal, gave me a chance to practice by creating a new backup task that was encrypted.
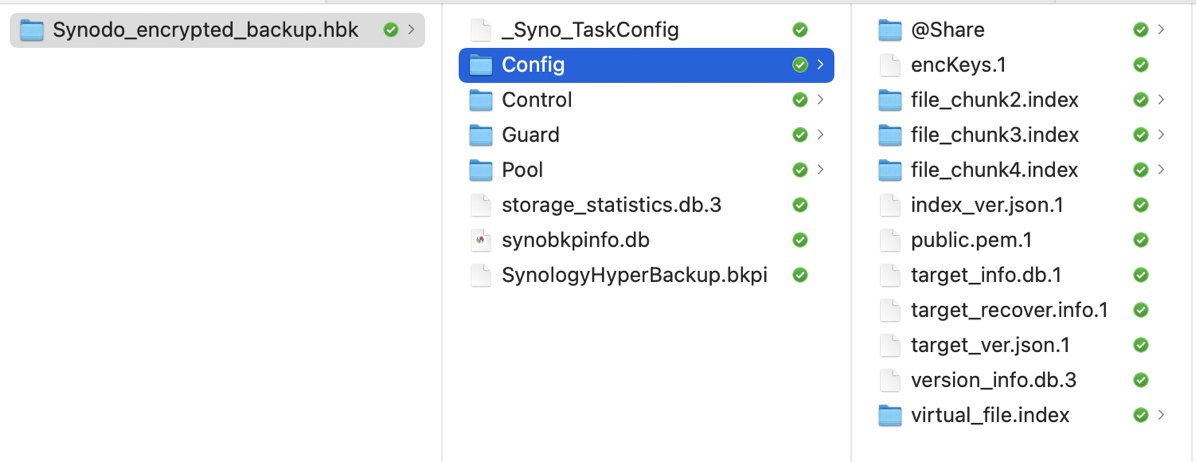
I had hoped that when I looked in Dropbox at my backup, I’d see the same little folder with its little text file in it, but instead, I saw glop. And by glop, I mean a bunch of database files and folders with names like Guard and Pool and Config, and SynologyHyperBackup.bkpi. Like I said, glop! I’m ok with a database but I vastly prefer when I can see the files. In this case, I’ll be encrypting them so I wouldn’t be able to see them anyway so I’m not going to fret about it.
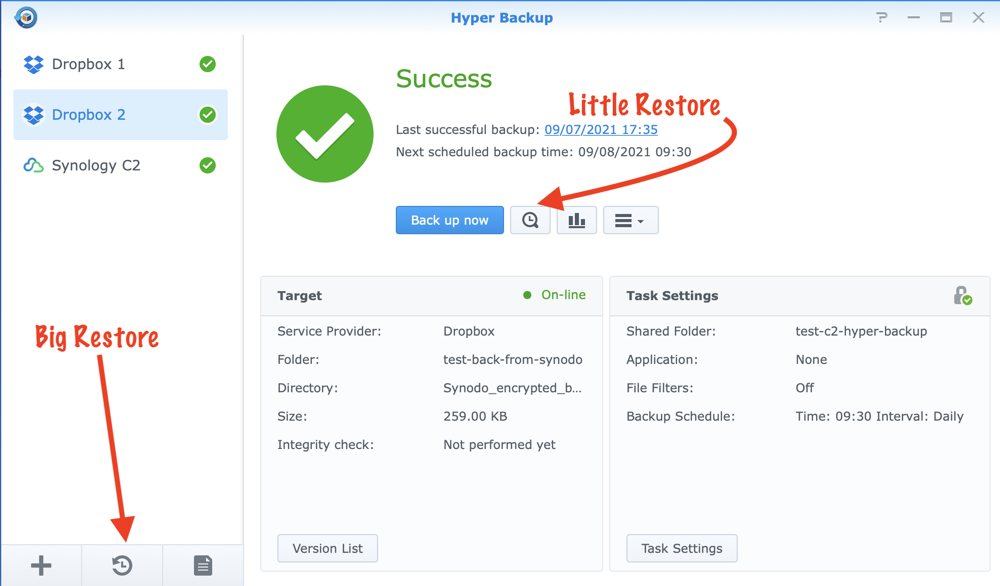
I went back to the Synology, purposely deleted my one little text file (and emptied the recycle bin). In Hyper Backup I found a giant Restore button, which restored the entire directory. In my case it was the same as restoring a file, but it got me to wondering how you restore just one lost file.
A quick jaunt to the Internets and I learned that there’s a little restore button too. The big one looks like a “turn back time” icon, while the little one is a magnifying glass with a clock face. A little bit confusing – the icons could easily have words because they have plenty of real estate, but at least if you hover you can find out what they mean.
Speaking of not knowing what the icons mean, I’m afraid Hyper Backup is not accessible through VoiceOver. Much of the Synology interface is accessible but definitely not Hyper Backup. Angry fist shake at that.
Back to my experiments. I deleted my little file again, and then tried the little magnifying glass to choose just the file I wanted back, and it worked perfectly.
I ran the same experiment but this time told the backup task to encrypt locally before uploading to the server. I was prompted by Hyper Backup for a password to encrypt the files and then was warned that it would be my own darn fault if I lost that password. I put the password in 1Password to be safe and clicked OK.
Then something surprising happened, I got a popup asking if I’d allow downloads from this Safari tab. It downloaded a .pem file, which contains the encryption certificate, in case I forget the password. I’d never seen that before.
When trying to restore a file using Hyper Backup, you have the option to type in your password, or you can drag in the .pem file and it will give you access. Now I have to figure out where to store this encryption certificate file. I could put it in 1Password, but I already have the password stored there so I feel like it should be in a second place.
I tested dragging the .pem file into the window to restore my encrypted file and it worked a champ.
Let’s Do This Thing
After my success with the ease of using Hyper Backup with my little tests, I created a new backup task, pointed to Synology C2 offsite storage, pointed at my Financial volume on the Synology, checked the box for client-side encryption, and hit go. It started to go really quickly so I went for a half-hour walk and sometime before I got back it was completely finished. It could not have been easier.
Bottom Line
The entire process to set up an encrypted, offsite backup of my Financial data took far less time than it took to craft my message to the Slack community asking them how to do it.
The bottom line is that the Synology platform is not just a bunch of disks. It’s a powerful, capable server with so many goodies inside it I can’t wait to learn more.
