Jill from the Northwoods sent in our Dumb Question for this week. She asked:
My friend has 90k photos on her current iPhone and is worried about when her new phone comes soon. How can she migrate her phone over without the hours of backup and restore time and still get her photos back? She does have iCloud and does sync the photos with the space-saving feature turned on.
This is a great topic and one that is near and dear to my heart. Just like Jill’s friend, I also have 90K photos (90,922 to be exact). The short answer is that Jill’s friend has nothing to worry about.
The long answer requires me to start with some explanation of how this magic happens. It’s a valuable thing to talk about because I constantly hear people worrying and trying to manage their Photos library when they really don’t have to. I’m going to go through some fundamentals first which will be known to some but I’m certain not all of you.
Manual Management of Photos and Video
You can choose to pay no money to Apple for iCloud storage for your photos and videos.
While paying no money always sounds like a great starting point, it’s important to realize the ramifications of that decision. First of all, you’ll have to manually back up your photos. If you don’t, and you lose or break your phone, those precious moments you captured of your baby, puppy, or hot fudge sundae are gone forever.
Backing up isn’t hard, and if you’re disciplined enough to follow a rigorous schedule to back up your phone, more power to you. Most of us don’t have the energy or time or discipline to do that.
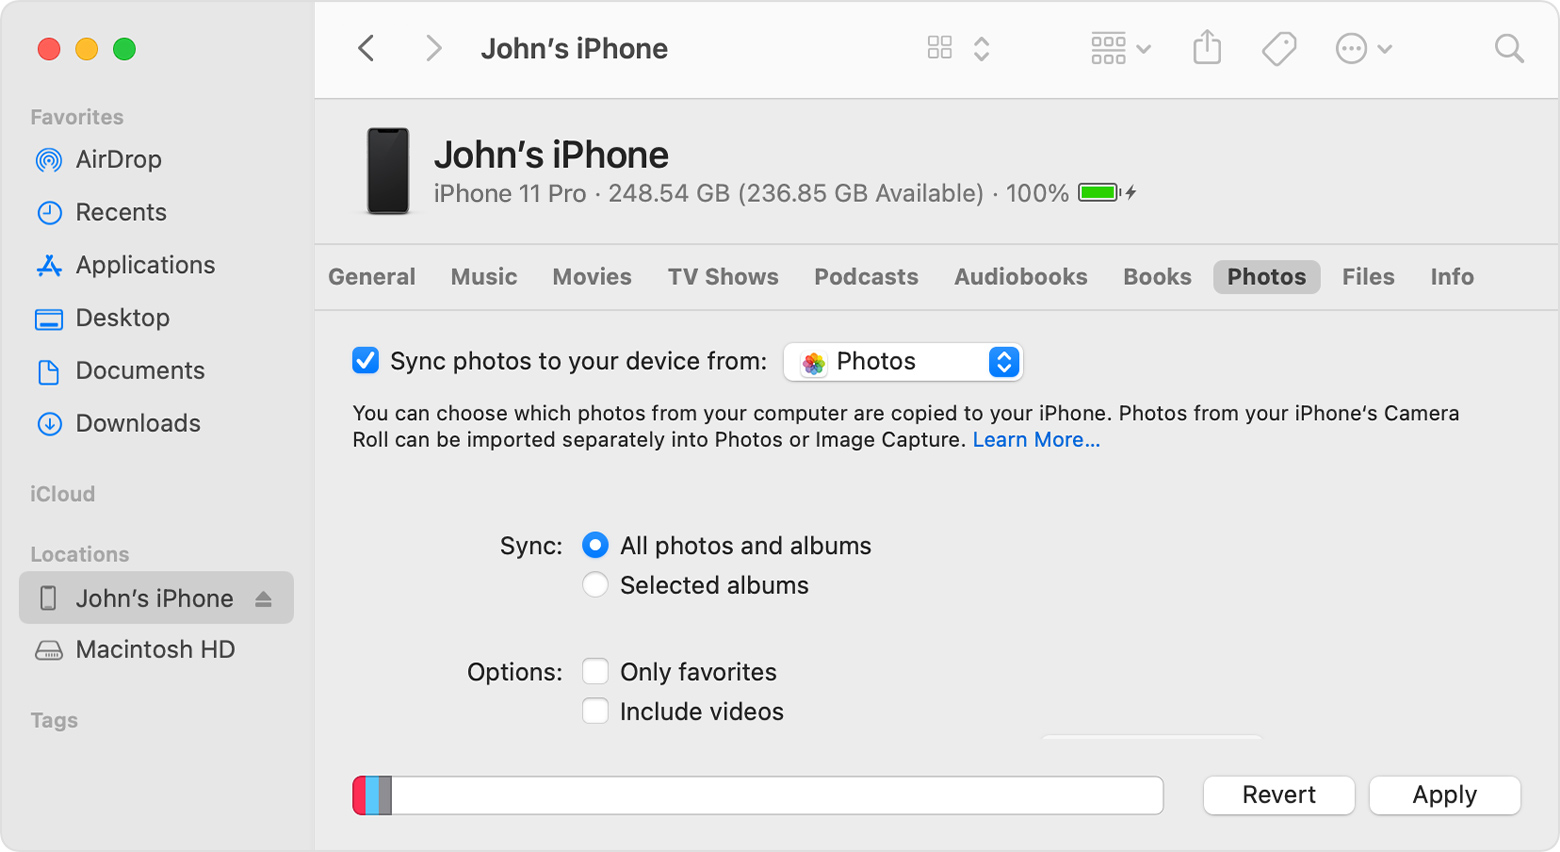
I’m not a Windows user so I can’t explain how it works on that platform, but on the Mac, you connect the iPhone via a lightning cable and you’ll see it in the left sidebar of any Finder window under Locations. Apple has a dandy support article in which they explain that you can then use the Photos tab in the resulting Finder window to sync photos from your device to your Mac.

The second problem you’ll have to deal with is manual management of your photos on your phone. If you aren’t paying for iCloud storage I’m guessing you don’t want to pay for streaming music services either, so you need space on your phone for your music as well as images and videos. The photos themselves aren’t that big, running around 2MB each, but those videos add up really quickly. I took a 6-second video today and it was 42MB!
The task at hand becomes figuring out how to remove photos and videos from your phone. All Macs come with a built-in utility called Image Capture. You can find it inside your Applications folder in another folder called Utilities. With your phone connected to your Mac, opening Image Capture will show you all of your photos and videos. In Apple’s dandy support article, they explain that by default any items you import locally will, by default remain on your iPhone. In the Image Capture toolbar, you can select “Delete after Import” instead.
So now you have to decide which photos to keep on your phone. Do you want to delete everything once a month and start fresh? Or do you want to keep the photos of your baby golden retriever so you can show her off to your friends when they try to force photos of their grandchildren on you? It’s starting to sound like a lot of work, isn’t it?
iCloud+ and iCloud Photo Library
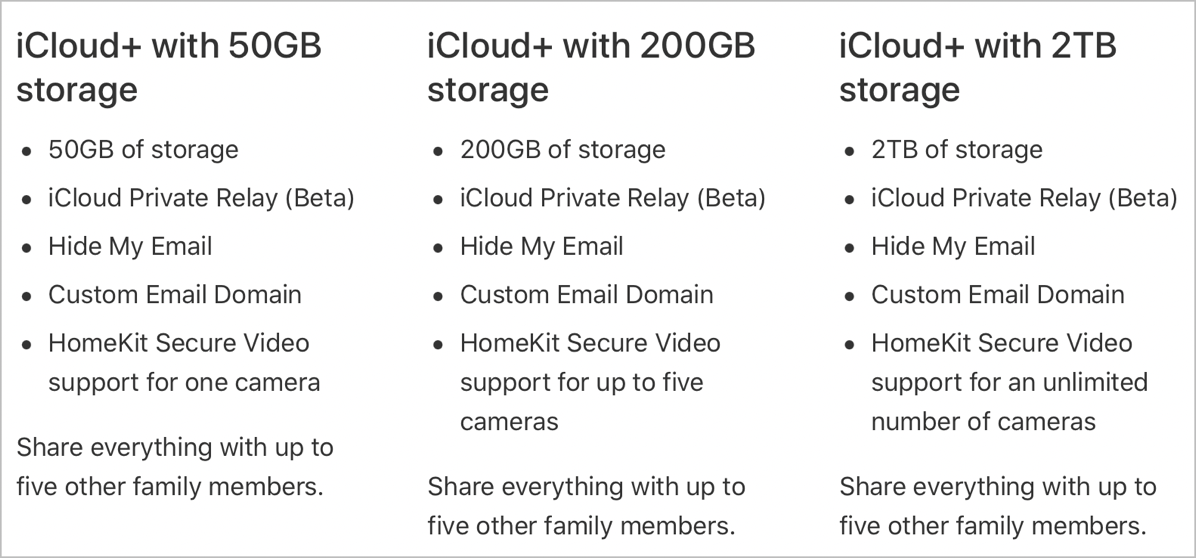
I swear I’m not paid by Apple to sell you on iCloud+, but I am a true believer. Even if you don’t take advantage of some of the privacy features you gain with iCloud+, just the advantages of having Apple manage my photos for me is worth every penny. Beyond the storage, you get the ability to hide your email from websites where you register, you can have a custom email domain, and you can even store HomeKit Secure Video, and those videos do not come out of your iCloud+ storage allowance. You can share all of these features and the storage with up to five other family members.

Pricing varies by country but in the United States the pricing is:
- 50GB: $0.99
- 200GB: $2.99
- 2TB: $9.99
Jill’s friend and I are on the crazy-pants end of things with giant Photos libraries, so we need to pay the $10/month for 2TB of iCloud+, but most of the people I talk to fit in the 200GB of storage. Remember that this storage allotment is also used to back up your iPhone and iPad if you have one of those too.
With iCloud+ you now have the option to turn on iCloud Photo Library. With it enabled across all of your devices, you can now see all of your photos on your iPhone, Mac, and iPad. You don’t have to pick and choose which ones live where, they all live everywhere. If you delete a photo you took of your ingrown toenail for your doctor, you can delete it and it disappears everywhere and you’re not in danger of it showing up in a slideshow on your Apple TV. If you make a crop and adjust the lighting to get just the right feel to your photo of your hot fudge sundae, all of your devices will get the improved image.

with Optimized Images
So far that’s pretty great, but there’s another reason to use iCloud Photo Library. On your smaller storage devices, you can tell iCloud Photo Library to optimize storage. To quote Apple’s dandy support article about this feature,
With Optimize Storage, smaller, space-saving photos and videos are kept on your device while all of your original, full-resolution versions are stored in iCloud. And as long as you have enough space in iCloud, you can store as many photos and videos as you want.
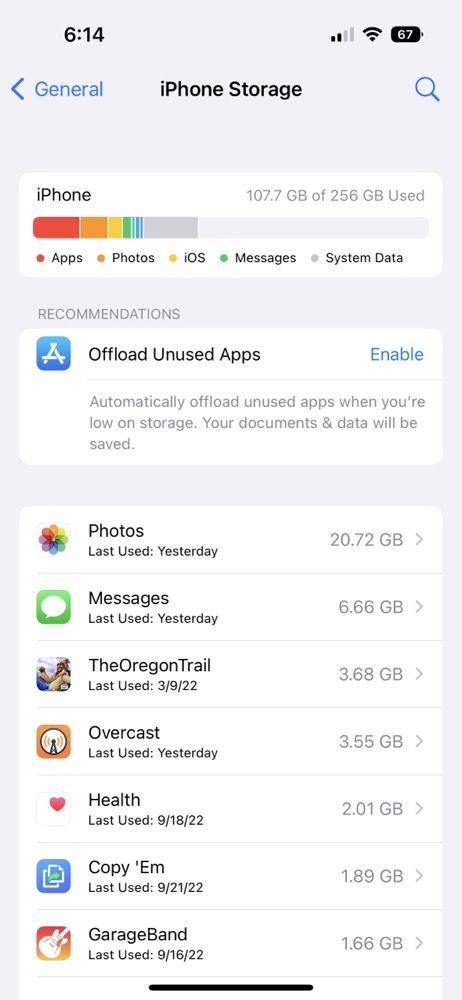
They really are not kidding. My 90K photos and video take up 984GB on my Mac in full resolution, but my iPhone is only 256GB. On the iPhone, my Photos Library only takes up 20.72GB!
This means that I can bring up scanned-in photos of my mom and dad’s wedding in the 1940s, or pictures of Lindsay and Kyle as babies, or photos I took of Tesla this week, and they’re all there all the time. With broadband Internet, I never know which ones are downloaded on the fly and which ones were already there in full resolution. I imagine if you have low bandwidth it would be noticeable, so that might be a reason to go down a different path.
I do recommend that on one computer, you do choose to download originals and not use optimized storage and that you back that computer up to an external drive and maybe even offsite backups as well. I trust Apple up to a point to keep my photos safe, but I will always keep full backups of my own.
When You Get a New Phone
No what was the question? Oh right, Jill’s friend is getting a new iPhone and is worried about hours of backup and restore time. Her friend has nothing to worry about. I can speak from experience on this having just transferred all of my data from my older phone, (including the 90K image photo library) to my new iPhone 14 Pro without waiting hours.
In the old days, I used to sync my phone to my Mac, and then restore all that data back to the new phone using a cable to my Mac. It seemed to me that it would have to be faster than downloading from iCloud, but for some reason, it takes far longer. I heard John Siracusa on the Accidental Tech Podcast telling a story of how he did it the old school restore from the Mac method this year, the world of hurt having to sign back into everything and tailor things back to the way they were. Sounded a lot like me describing my nuke and pave process.
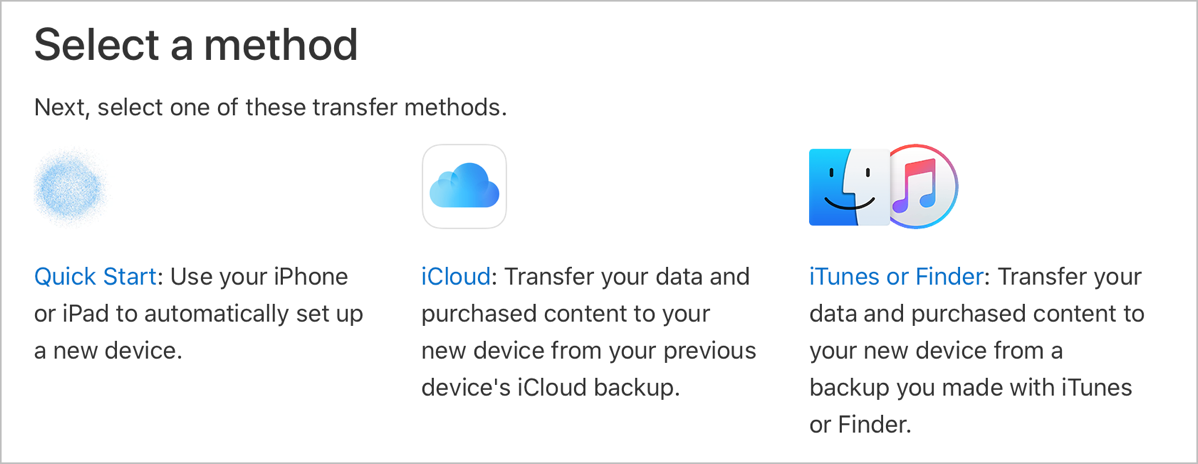
I’ve used the restore from iCloud backup path in the past, following Apple’s dandy support article on the process, and it worked really well and was significantly faster than the cable method to a Mac.
But a few years back when I turned on a new phone, it offered a new option.

The option I favor now is referred to as QuickStart by Apple, but you might also see it called Transfer Directly from iPhone. You get a cool swirly thing on the new phone, you point the old phone’s camera at the swirly thing, and the two phones make the transfer happen. I heard Casey Liss on the Accidental Tech Podcast say that both phones are tied up for anywhere from 1-3 hours but in my experience, that’s not at all true.
It might have taken a half hour at most, and after that, the new phone was usable while it continued to download the applications from the Internet. I didn’t check my Photos Library during this part of the process but I know that as soon as I needed to see any photo it was already there.
Before you start the process, I highly suggest you ensure that iCloud Backups are running on the old phone and that you run one final backup before you start. On the old phone, open Settings, tap on your name at the top, select iCloud, and then under Device Backups make sure iCloud Backup is turned on. The day you’re going to transfer your data, it’s not a bad idea to tap Backup Now so you’re certain to have a fresh backup.
Then simply turn on the new phone and follow the instructions.
Even though I have 90K photos on my phone, the process of moving from my previous phone to my new one was absolutely painless. To Jill’s friend – you really shouldn’t be worried!
Deciding on What Size Phone You Need
The last thing I want to mention is that you may not need as much storage on future phones as you think you do. If you open your current phone to Settings ? General ? iPhone Storage, you can see how much of your total storage you’re using. I take all of my videos in 4K HDR, and we’ve mentioned a few times how big my Photos Library is and yet I’m only using 108GB of the 256GB on my iPhone.
I have a theory. I don’t have evidence to prove it, but I bet if I had a 512GB iPhone I’d be using a lot more of the storage. I’m guessing Apple would take advantage of that breathing room and stretch out a bit. I also wonder whether if I had a 128GB iPhone Apple would squeeze my 90K photos into those skinny jeans and I’d never know the difference.
I keep thinking that these enhanced photographic capabilities will make me need more storage, but because of the magic that is iCloud Photo Library I still fit quite nicely in the 256GB model.
Thanks, Jill (and her friend) for this awesome Dumb Question. I hope the details behind all of this help some of you make good decisions on how to manage your Photos Libraries.


This is the best description I’ve seen of how all of this works! Nice writing, Allison!