A few months back I reviewed PhotoReviewer, a superb app for triaging photos, and teased that I might just talk about where it fits in my workflow in more depth. So, right now I’m going to try to explain my workflow clearly, with some extra detail on the RAW processing with DxO software.
To be clear, I am going to talk about how I deal with photos from actual photo shoots, taken in RAW on my micro four thirds camera. For me, this is normally bird photography, but it certainly is not my everyday photos that are on my iPhone.
The problem I’m solving here is wanting a workflow that optimises 6 things:
- import RAW photos,
- triage many photos, with the ability to zoom in and compare sharpness,
- process the RAW photos with great image quality, particularly regarding noise,
- helps me cope with the huge numbers of files and their archived backups,
- edit the photos in a non-destructive manner,
- enjoy the photos where I want them, with my wife.
And it needs to be financially sustainable as I head towards retirement. For me, that means no subscription model pricing, but that’s personal to me.

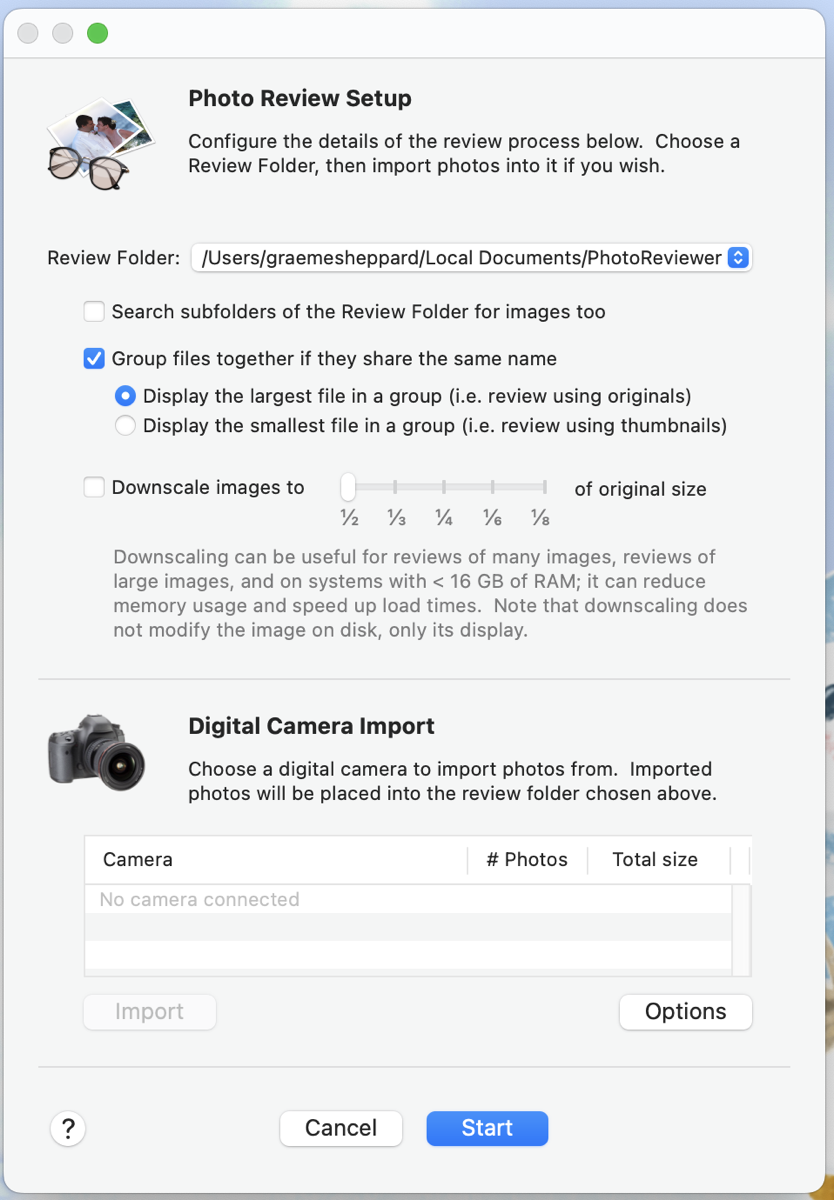
Step 1 is to get the photos onto my computer. For this, I can just open PhotoReviewer and use its import dialogue box and get going. The images are copied to the correct folder and I can move onto,
Step 2, which is the actual triage I described before. This triage puts all my photos into either the Vetoed or the Approved subfolders. Now I want to get onto processing the Approved photos, which is:
Step 3. I’ve finished with PhotoReviewer, so Command-Q quits the app, and with that trigger Keyboard Maestro starts another script. The script first checks to see how many approved photos there are in the Approved folder, then asks if I want to process them. I click yes, and the script opens the Approved photos in DxO PureRaw 2, my RAW developer of choice.
DxO make two interesting products, PhotoLab, now at version 6, and PureRaw at version 2. I have a particular problem with my photography in that I like taking photos of birds, and I like walking in the jungle, which means very little light. I also said I like walking, so I have an amazing little micro four thirds camera, with a 300mm lens on it and a 1.4x extension on it. This gives an incredible 840mm-equivalent focal length that I can use handheld all day, albeit limited to a max of f/5.6, and therefore high ISOs.

I want to squeeze out the most from this setup, and I am constantly looking at new cameras to see what their ISO is looking like now. I’m sorely tempted, but then I thought again about what software could do for me.
I found that for much less money than a new camera, the magical algorithms from DxO can remove noise so effectively from my RAW images that I have easily gained a whole stop from the best I’d managed before. And I’m only using the auto settings.
Not only can DxO remove noise exceptionally well, but it does so without losing detail or colour definition from the image, at least to my level of caring. What I get from this is, like I said, a whole extra stop, which I spend by pushing my default ISO on my Olympus OMD E-M1 to 3200. That’s pretty high for this camera, and I shoot with it all the time. Every single photo. Even in daylight.
The images have beautiful colour, smooth bokeh, and great detail. So, there are two flavours offered by DxO.
PhotoLab is a library software and I used it for a while for the trial, trying to like it, but I just found it too prone to error with tags and other things. Maybe it’s just my propensity to tinker with things, but I found my changes were getting mixed up and I just felt like I was fighting the software, so I abandoned that and I now use Apple Photos as my library by adding all my bird photos there once they have been fully edited. But that’s still to come.
Instead, I use DxO PureRaw 2, which has none of the library features but is instead simply a processor for RAW images. I haven’t played around with everything it can do, I just use the basics.
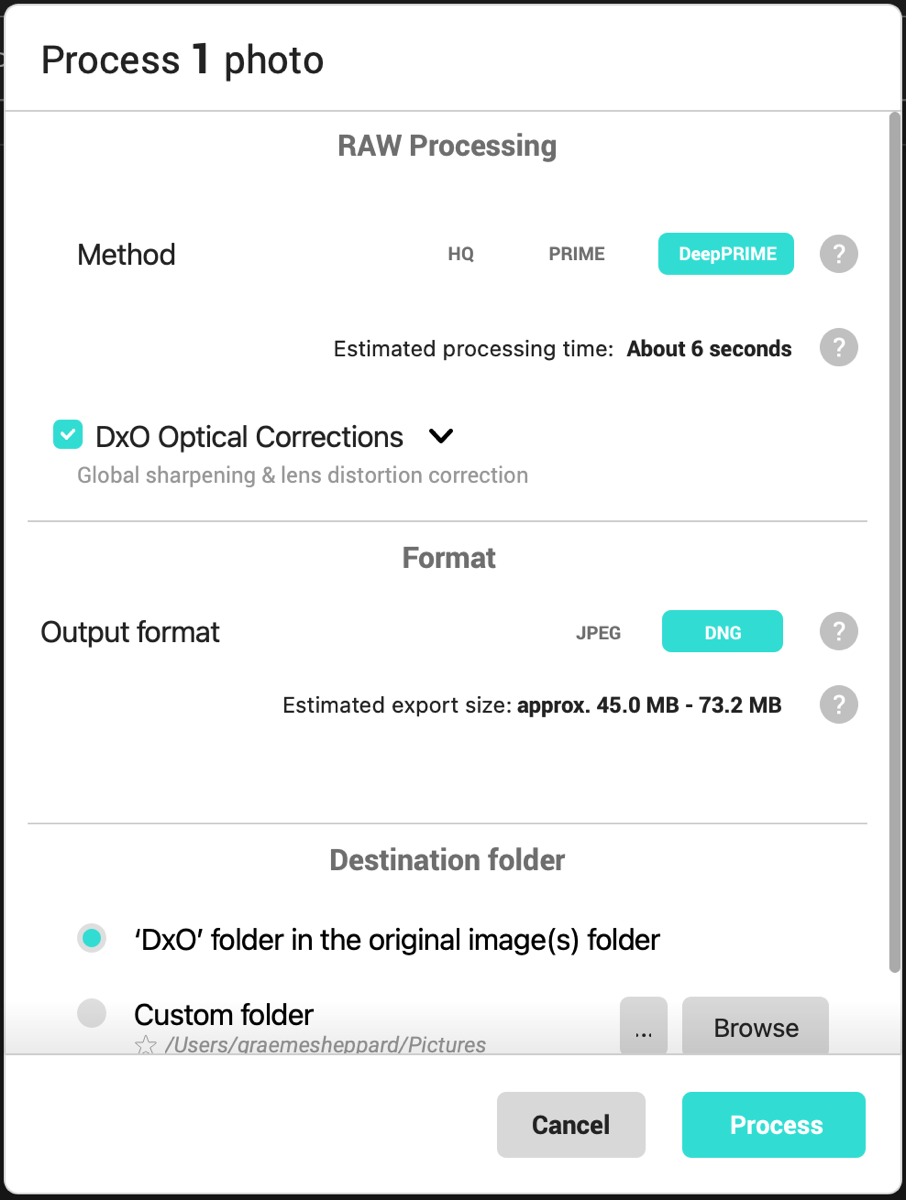
When you install the software, it installs the stand-alone app and asks if you want Finder integration. I found I didn’t ever really want to initiate things from the Finder with no interface, so I didn’t choose that option. All I do is open the RAW files in PureRaw 2, click Process photos, and then click Process, making sure the right options are still selected.
These options are to use the slower DeepPrime for noise removal, do the optical corrections, and save as a DNG file in a subfolder. It takes about 6 seconds per photo on my M1 Air, but even with 100 photos that’s barely enough time to get myself a cup of tea, and it only needs to be done once.
So, my photos are processed now, and I have folders and subfolders with photos in them, so I need some file management going on.
Step 4 is file management.
Let’s recap. From triage, I had RAW photos in an Approved folder and RAW photos in a Vetoed folder. Processing did not change this but created a DxO subfolder in the Approved folder with DNG versions in there. When I quit DxO PureRaw 2, another Keyboard Maestro script is triggered, and this one does my filing for the Approved photos. In another part of my computer, I have a folder called “Photography”, and a separate folder called “Archive”.
The Keyboard Maestro script renames and moves the Approved DNG photos, the ones I have processed in PureRaw, to the “Photography” folder, and the original Approved RAW photos to the “Archive” folder, possibly to never be seen again.

Next up comes Hazel, which is watching 3 folders for me.
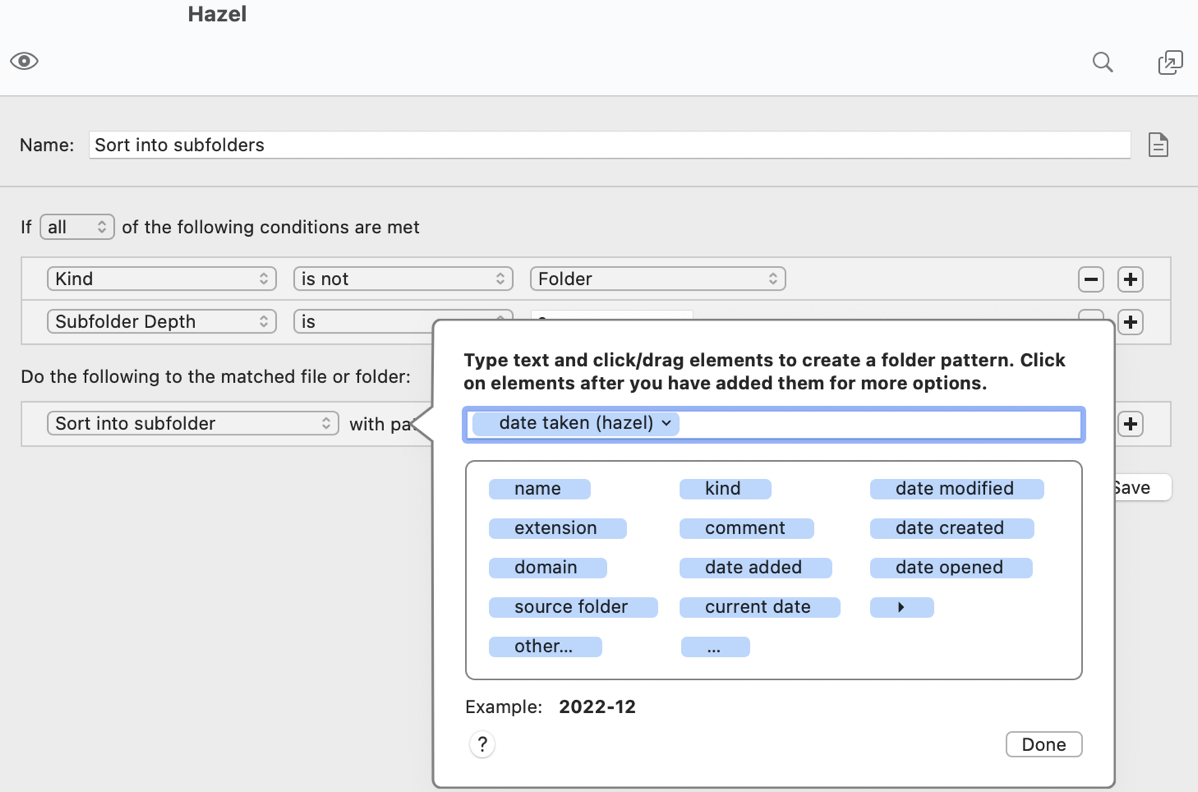
It watches the “Photography” and the “Archive” folders and moves anything that appears into a subfolder. I have these quite shallow, so inside are folders with Year Hyphen Month as names. So, “2022-11”, and “2022-12” for example. This gives me enough of a file system to find things and should be pretty future-proof.
Hazel also watches the “Vetoed” folder, which has all the photos that I really don’t want to keep. When they get a week old, Hazel clears them out for good, which gives me enough time to correct any mistakes I made.
Step 5 is editing the photos. As I have little time, this is usually just cropping and colour editing perhaps. Like I said, most of my photos are of birds and so it is usually not possible to set up the framing exactly right in-camera, so I usually crop in some more. This could be done anywhere, but I really like the Affinity apps and so I am doing it in Affinity Photo 2.
The photos I kept are not all good, they are just what I chose to keep. So, I will open the ones I like, do some editing, then save the Affinity file back into the same folder as the DNG, and export a JPEG to another folder called Exports. There’s no folder structure in there, just a flat collection of photos. These are my pride and joy, the photos I want on my lock screen, in my photos widget, and on my desktop.
So, they get imported into the Photos App. But, I have a problem, and a solution I’m not sure will scale well so, if you have any bright ideas, please let me know.
Step 6: Importing into the Photos app is simple, I can just drag the image in, or use the Share Sheet, or other methods I’m sure.
The problem is that sometimes I re-edit an image, and importing it will leave me with 2 copies, which is not great. The solution I have implemented uses Keyboard Maestro again.
The script looks at all the photos in my Exports folder, then searches through my Photos library for images with the same filename. When it finds one, it adds the photo to an album called “to_delete”.
Once done, the script adds all the photos to the Photos app, and opens the “to_delete” album for me, and selects all the images. I can then look to see if there’s anything wrong and if not manually delete all the photos in the album. It works, but it’s clunky as anything and I really want a better solution.
But, in the end, I solved my workflow problems.
- PhotoReviewer imports my photos,
- and lets me triage them.
- DxO PureRaw 2 process the RAW photos with, I think, the best de-noising software available.
- Keyboard Maestro and Hazel move the photos around and file them neatly for me, with useful filenames.
- Affinity Photo 2 lets me do my final editing.
- Apple Photos lets me see the photos, and exposes them for me in a delightful manner.
This workflow may not suit everyone, but I think the steps are important for anyone who does project-type photography to consider. Keyboard Maestro is perhaps a bit clunky for what I’m doing here, and Affinity Photo 2 has plenty of competition.
But, I really want to emphasise that I believe PhotoReviewer, DxO PureRaw 2, Hazel, and Apple Photos are arguably the best software anyone could use for the functions they serve here, and I highly recommend that anyone into RAW photography gives them a look.
Links to all the tools described here:

