Jump to Tips
- AirPlay from iOS to Mac
- Browse Versions & Option Key to See Save As…
- Option-Click Chevrons to Open/Close All
- Open Package Contents to Extract Images from Pages/Keynote Files
- Get Info to Copy an App Icon in Full Resolution
- Get Info to Change What App Opens a File Type
- Command-Delete to Delete When Closing a File
I’m back with another Part 7 of Tiny Mac Tips. This is an ongoing series I started in order to teach Jill from the Northwoods how to move from an adequate Mac user to a proficient one. In case you missed the earlier installments, I’ve included links to the first 6 installments:
- Link to Tiny Mac Tips Part 1
- Link to Tiny Mac Tips Part 2
- Link to Tiny Mac Tips Part 3
- Link to Tiny Mac Tips Part 4
- Link to Tiny Mac Tips Part 5
- Link to Tiny Mac Tips Part 6
AirPlay from iOS to Mac
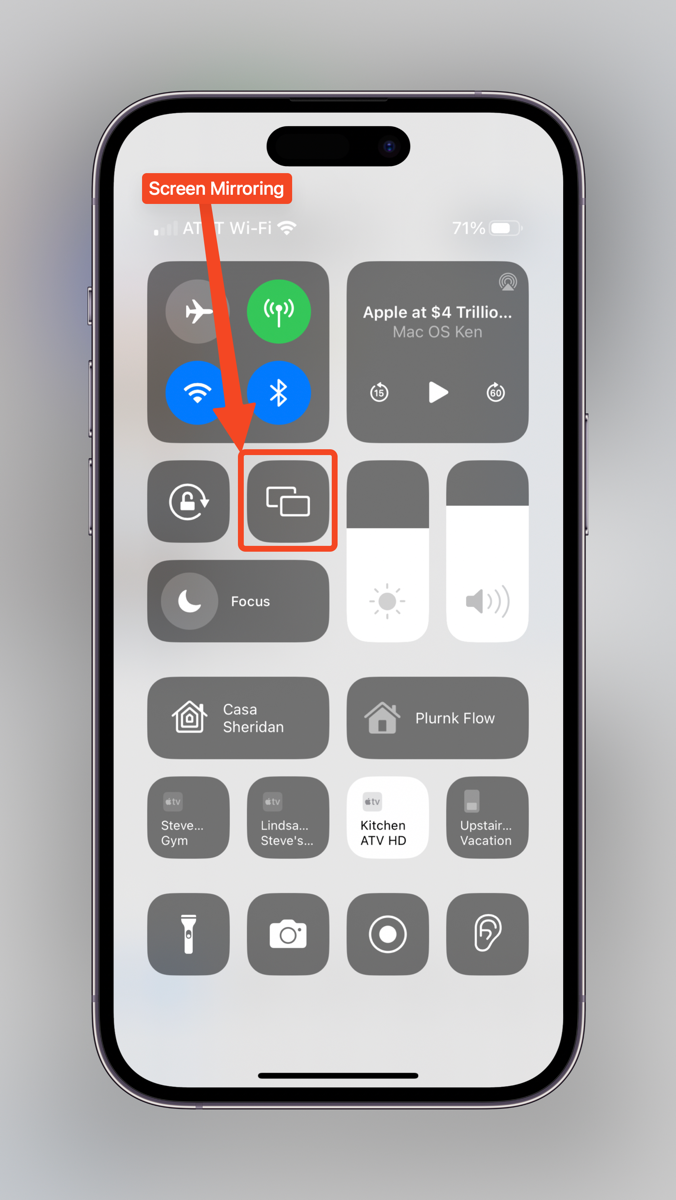
Have you ever needed to look behind a computer or entertainment console to see the connectors or get the part number of a device? If you’re like me, your solution is to hold your phone back there and try to take a photo, which hardly ever helps at all. But there’s a much cooler and more effective way to use your iPhone to help solve this problem.
With recent versions of macOS and iOS, you can now AirPlay from your iPhone to Mac. On iOS, the feature is called Screen Mirroring (because Apple just so dearly love having multiple names for the same thing.)
On the iPhone, open up Control Center, and tap on Screen Mirroring. From that menu, you should be able to choose your Mac. Instantly, your Mac’s display will be taken over with a mirror of whatever your iPhone screen is showing.
At this point, it will be Control Center. Within Control Center you can tap the camera icon to jump right into the camera. Whatever your phone’s camera sees will be displayed right on your Mac’s screen.
If you don’t see the camera app icon inside Control Center, you can access it normally, or you can add it to Control Center if you think you’d like to use it often. Open System Settings, select Control Center, and then scroll down to More Controls. When you find Camera, simply tap the green plus button to add it to Control Center. Note that you can rearrange the controls you see in Control Center using the little hamburger menus on the right.
Whether you use this little trick to see behind your desk or not, having quick access to the camera inside Control Center can be handy.
Browse Versions & Option Key to See Save As…
This tip is definitely for those who are new to the Mac platform. More than a decade ago, Apple gave us automatic versioning of our files in their native apps. As you make changes to documents using Pages or Keynote or TextEdit, these changes are being recorded in separate versions of the file.
If you want to get back to a previous version, go to the File menu, pull down to Revert To, and then choose Browse All Versions…
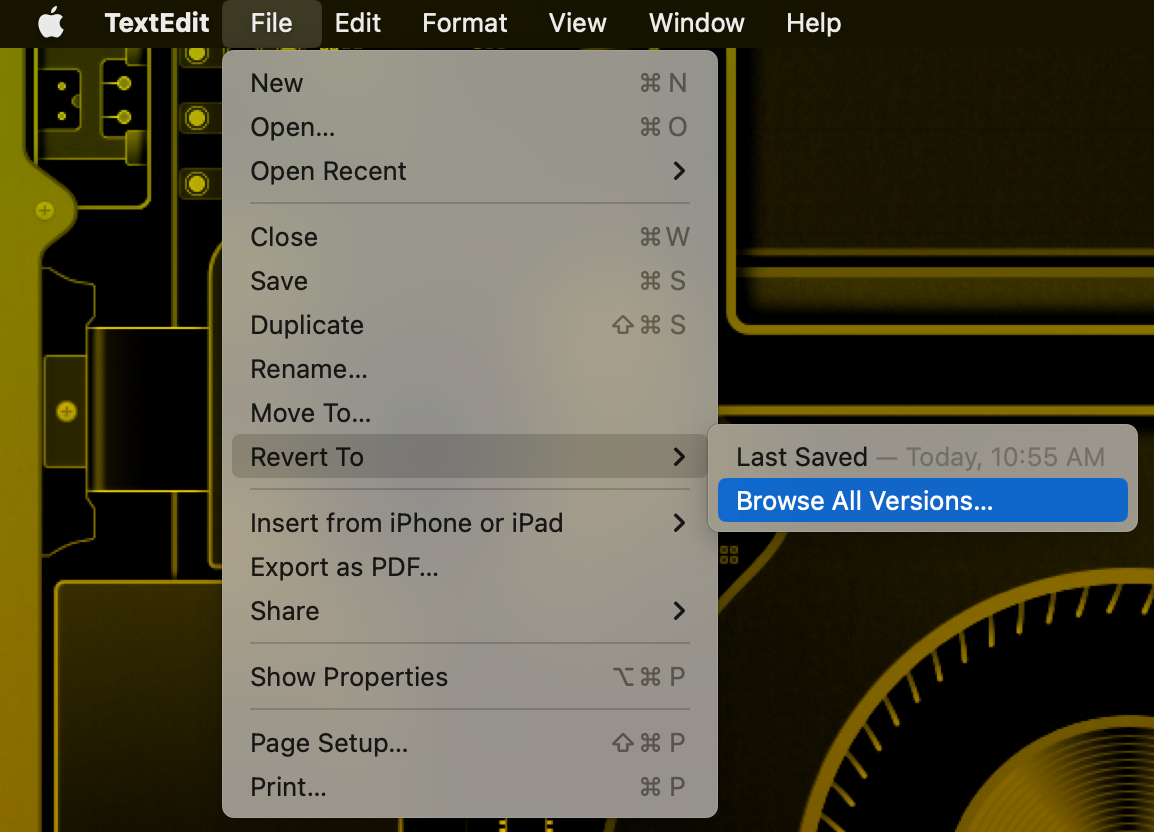
Your entire screen will change and you’ll see your document floating in space. If you’re familiar with the Time Machine interface, this will look very familiar.
On the left side, you’ll see the current version and on the right, you’ll see a stack of older versions going back in time. You can tap on the tops of the older versions or use the arrow keys on the right to navigate back in time.
If you have a lot of versions, you can actually see the date appear on the right as you go back in time.
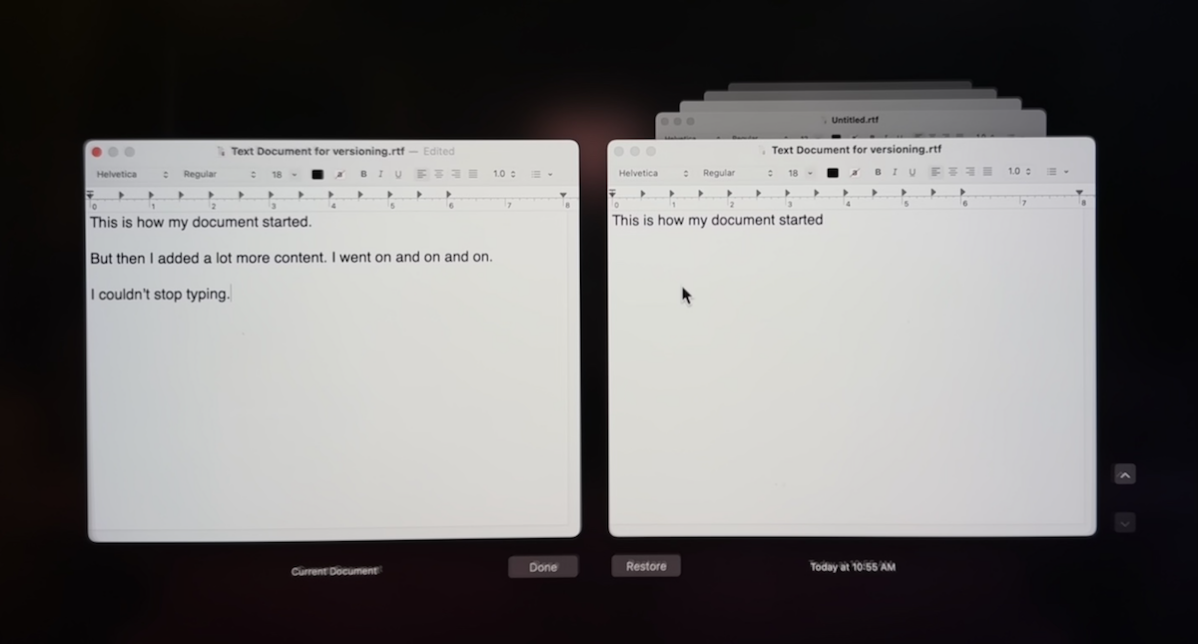
I know a lot of people really like having access to older versions of their documents and were delighted with this change. Many third-party apps now support the native macOS versioning model which is great.
But I actually never use it. Maybe “never” is too strong of a word. How about “hardly ever”, or “once in a Blue Moon”? I see the value, but I’m old school I guess. Hitting Command-S is so ingrained in my muscle memory that I forget the apps are already automatically saving and keeping versions.
The advent of versioning came at a cost to Mac users. There is a Save menu but no Save As… menu. When I point this out to the diehard versioning fanatics, they patiently explain that there IS a duplicate menu. But I don’t want to duplicate a file, I want to Save As… a file.
Luckily, the magic Option key comes to our rescue. If you open a file in an app that doesn’t have a Save As… menu under File, simply hold down the Option key and that silly Duplicate menu item disappears and changes into the Save As… menu as nature intended.
If you’re a keyboard shortcut junkie, Command-S is still Save, Command-Shift-S is that silly Duplicate thing, but add on the Option key (Command-Shift-Option-S) and you can Save As… without letting your hands leave the keyboard.
Whether you think versioning is delightful or unnecessary, knowing that the Option key is there to save the day (or the file) is a handy tip to keep in your Tiny Mac Tips toolbox.
Option-Click Chevrons to Open/Close All
While we’re singing the praises of our beloved Option key, here’s a new use I only discovered recently. It might have been on the Mac Geek Gab so I’ll throw Dave and Pete the credit just in case.
This tip can be illustrated in the Finder but it works in lots of places. In Finder, one of the methods for viewing your files is the List View. I think most people love List View but I personally dislike it intensely and prefer Column View.
The reason I dislike List View is that you have to open and close all those silly chevrons to dive into folders. I see people with 3 or 4 levels deep of chevrons open and the list gets super long and messy-looking. If they close the top-level chevron, and later open it up again, it will open back to 4 levels deep.
Let’s say you want to see everything that’s in a folder, no matter how many nested folders deep it has inside. If you hold the Option key down when you select the top-level chevron, the entire folder structure expands.
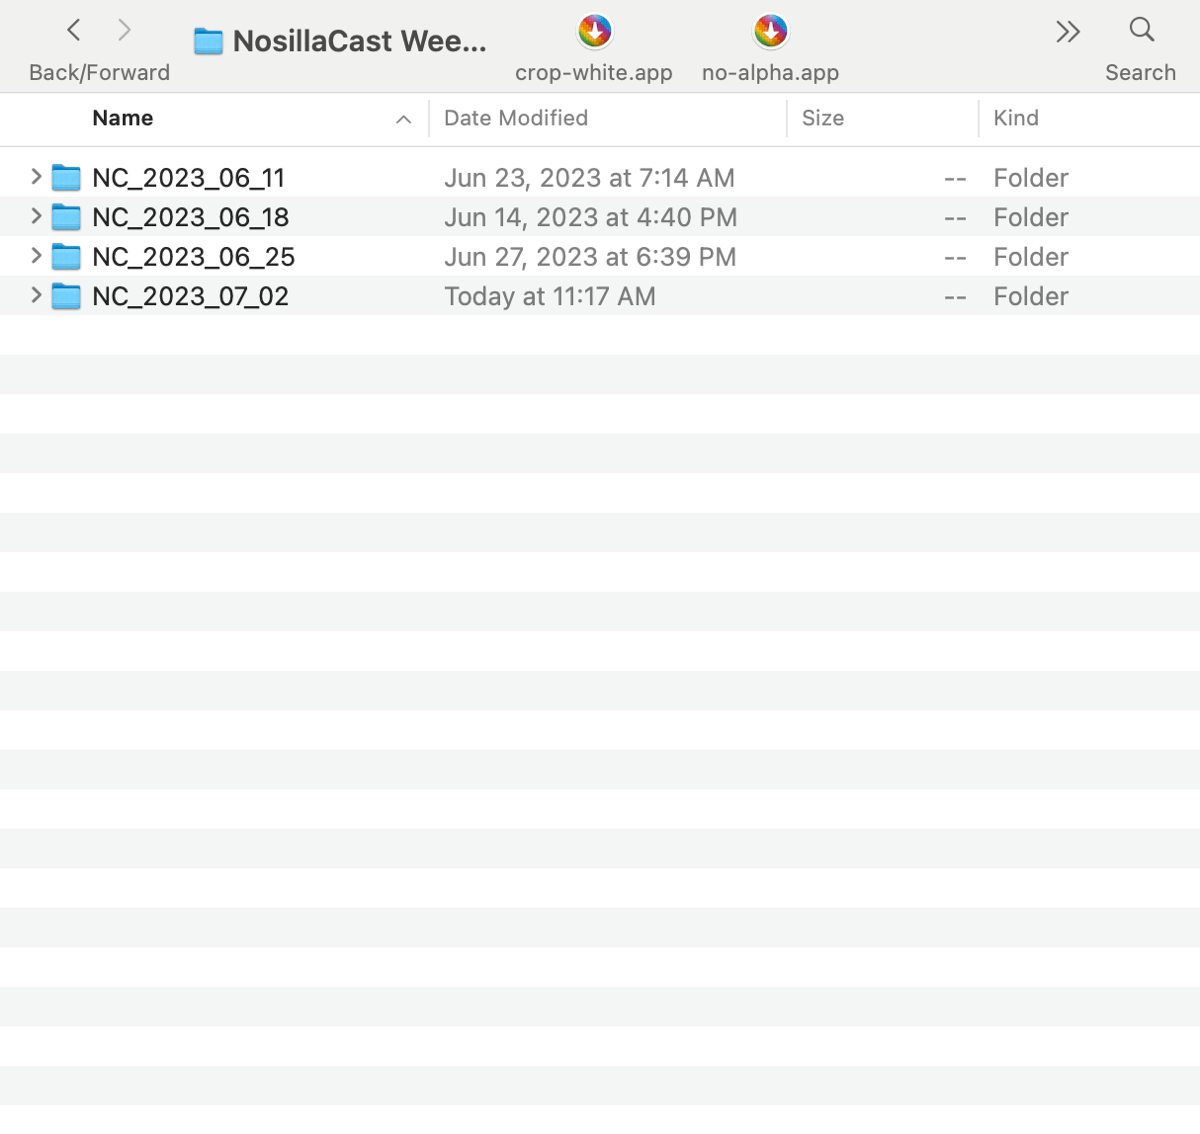
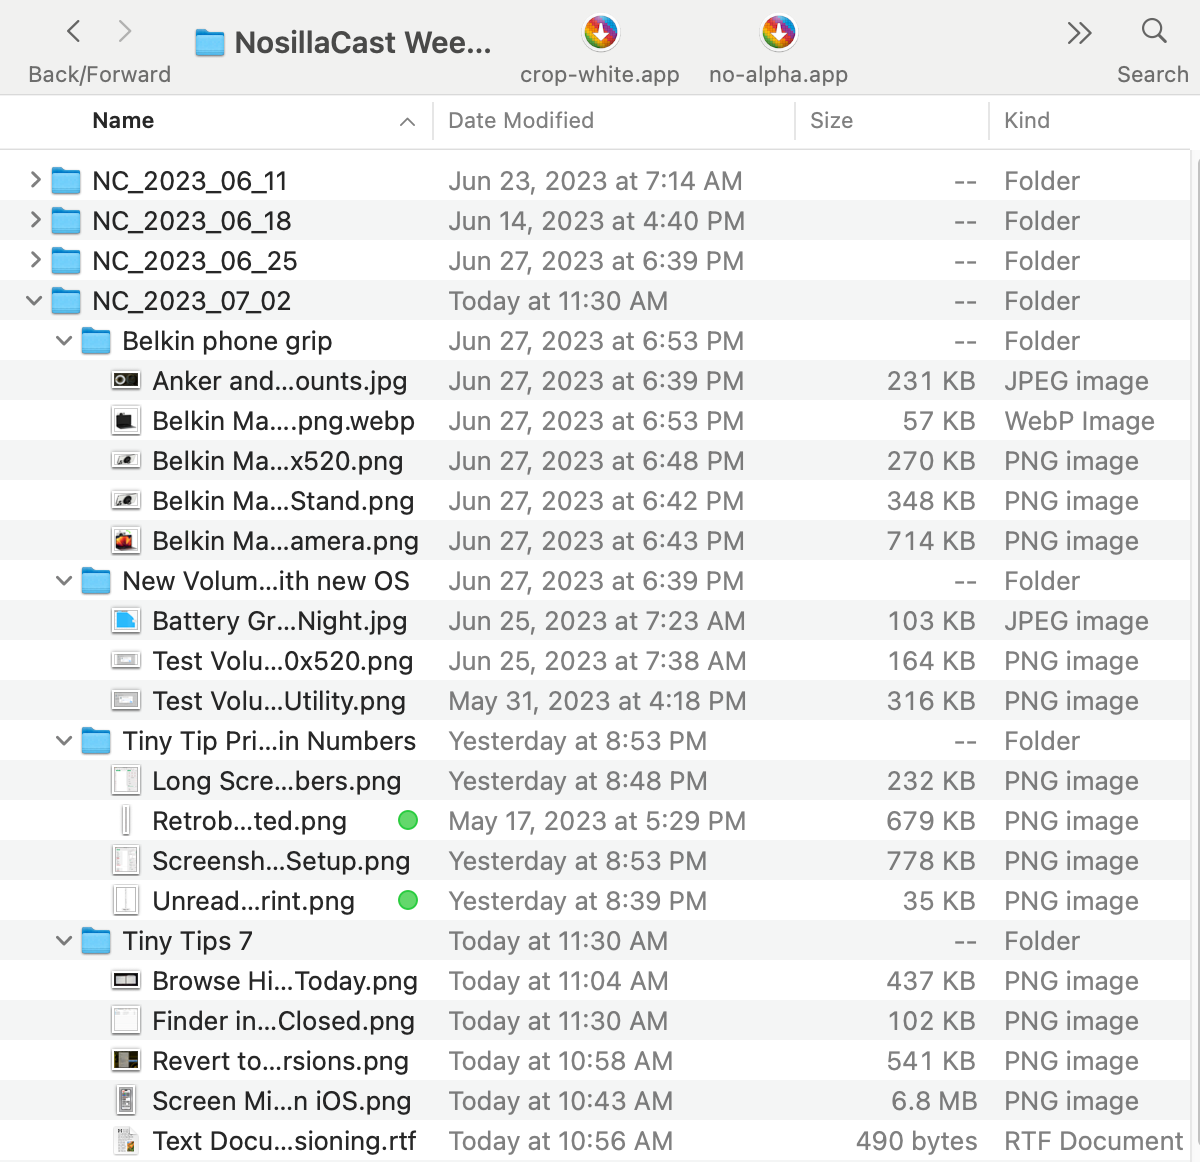
The slickest part of this is that you can Option-click again on the chevron for the top-level folder and the entire thing folds up and disappears. You don’t have to close each individual folder separately. Even if you’ve opened the subfolders manually, you can still use the Option-click on the chevron to clean the whole mess up for you.
I still really prefer Column View, but the Option key to open and close entire folder structures makes me hate List View just a little bit less.
I mentioned this works in other tools too. I haven’t tested everything I use, but I know it works with subfolders in Apple Photos. If you’re not a rabid organizer like me in Photos though, that might not be as big of a help to you as it is to me. If you’ve started using folders inside Apple Notes, it works there too.
Look around at your apps and if you see chevrons to expose subfolders, try the magic Option key to expand and contract your folders.
Open Package Contents to Extract Images from Pages/Keynote Files
The next tip is a lot nerdier. You may never need to use this tip. But someday you might and hopefully, you’ll remember you learned it.
I’ll start with a problem this tip solves. It’s not the only type of problem it solves but it’s the best example I can think of that normal people might run across. If you create or receive a Pages or Keynote document with embedded images, it’s actually really hard to get the full-resolution image back out. There is no way to export images directly from a Pages document.
If you right-click on an image in a Pages or Keynote document, you can copy the image. If you have a clipboard manager, you can insert the image into the Finder. If you don’t run a clipboard manager, you can open the Preview app, and choose from the menu bar File —> New from Clipboard. From there you can save the image.
While this works, and is probably the easiest way if you just need one or two images, it would be quite tedious to rinse and repeat this process if you needed to extract a lot of images from Pages or Keynote.
The solution is really obscure but it will give you a valuable tool in your tool belt. The trick is to convert the document to what is called a Package in macOS. This is simply a file system directory that is normally displayed to the user as a single file.
I’ll illustrate the value of this with our example of trying to extract images from a Pages or Keynote document. If you right-click on a Pages or Keynote document, at the top of the contextual menu, you’ll see Open and Open With. This is because, by default, these applications create a single file. But we’re going to convert it to a Package file which will give us direct access to all of the elements embedded within the document.
In the File menu (of Pages or Keynote), pull down to Advanced > Change File Type > and change it from Single File to Package.
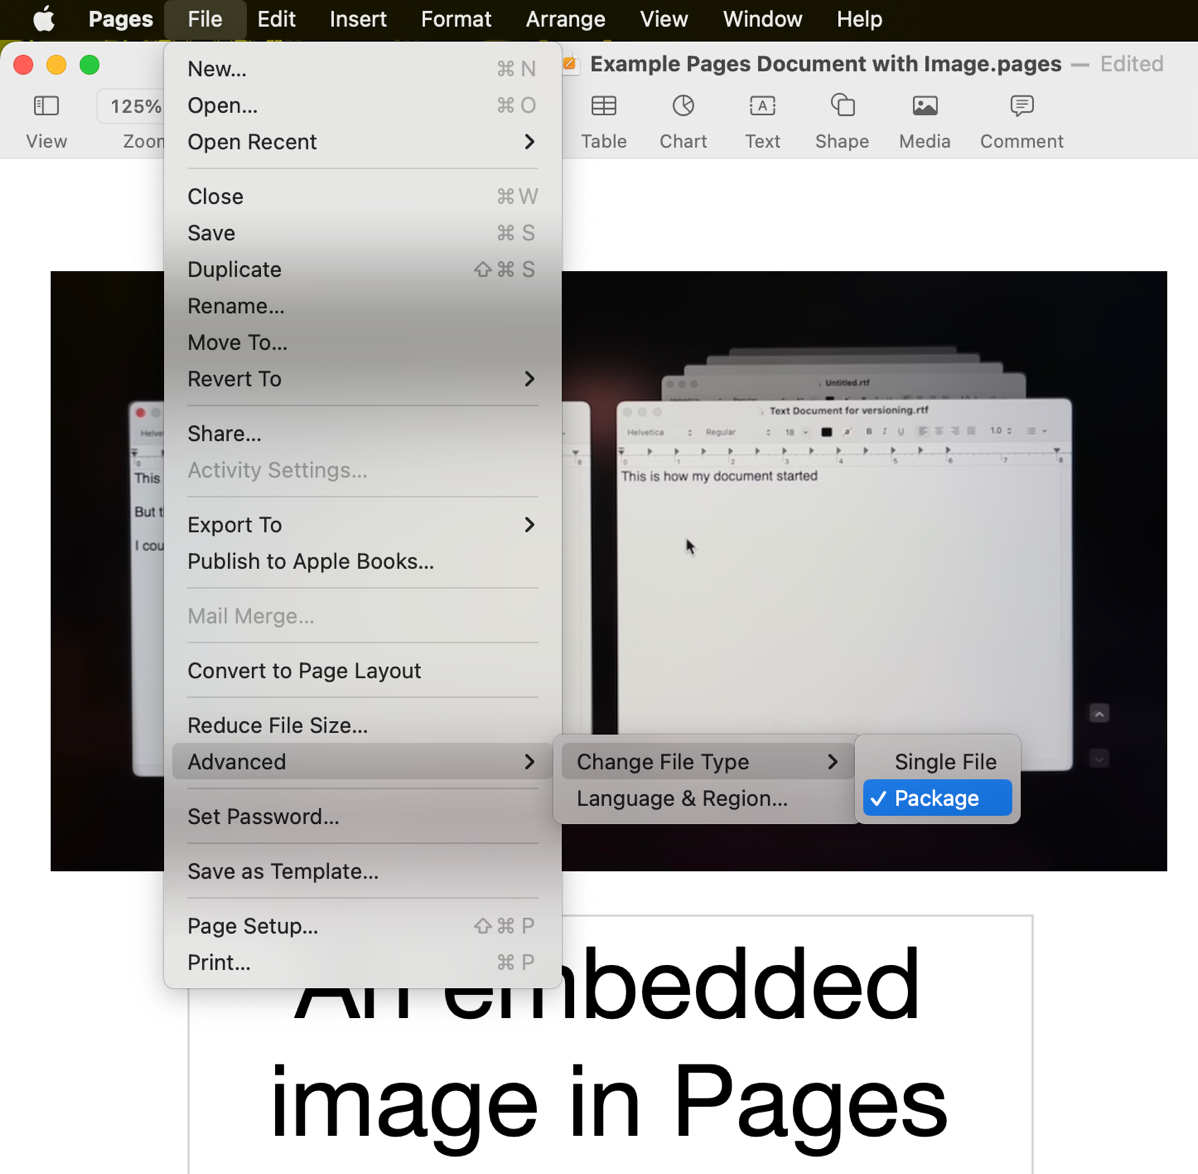
Now go back to the Finder, and right-click on your document again. In addition to Open and Open With, you’ll now see Open Package Contents.
When you open the Package, you’ll see a Data folder and inside that will be all of your embedded images! In my experiments, every full-sized image also had a small version, so you might want to sort or group by size so you can see the big ones all next to each other so you can more easily copy them to where you need them.
I know that explanation seemed complex and nerdy but let’s say it again in two bullets.
- Change the file type to Package
- Right-click on the file and Open Package Contents
The concept is nerdy but the execution is trivially easy!
Get Info to Copy an App Icon in Full Resolution
Have you ever wanted to get the icon file in full resolution for an application? Perhaps you need to paste it into a presentation or document of some sort, or even a web page. If you select the application in the Finder and then choose File > Get Info from the menu bar (or use Command-I), you’ll see the info window for the application.

In the upper left, you’ll see the icon for the application. Simply select the icon, and hit Command-C to copy it.
With the icon in your clipboard, you can simply paste it into your document of choice.
If you need to save the file for future use, open Preview and select New File from Clipboard. You’ll notice that the file is actually a series of icons, which are used for the different states such as hover or selected.
Assuming you just want the main icon, save the file as a PNG and you’ll have just that one.

If you want some extra credit for this Tiny Tip segment, try right-clicking on an application icon and selecting Show Package Contents. You’ll only see a Contents folder at the top, but drill down in and then select the Resources folder, and inside there you’ll find a file called AppIcon.icns. That’s the icon file you just copied from the Get Info window. Now don’t go changing anything in here because you could really bork up your app, but it’s cool to know you can look inside applications.
Get Info to Change What App Opens a File Type
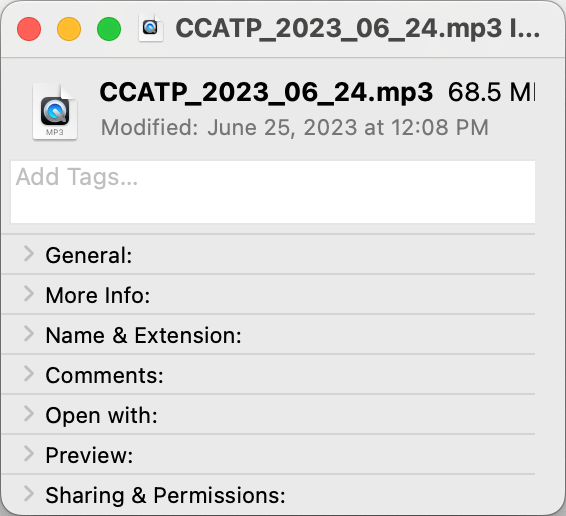
Have you noticed that when you get a new computer or you do a nuke and pave, if you open an MP3 file it opens in Apple Music? What if you’d prefer to have MP3 files open in QuickTime Player?
We can fix that with our friend Get Info. Select an MP3 file, and use Command-I to Get Info.
The window has a lot of sections and only some of them may be unfolded so it might be hard to see the one we are looking for. Let’s exercise our new trick of holding down the Option key while selecting any one of the chevrons. This folds up all of the sections so it’s easy to see the names without all of the clutter.
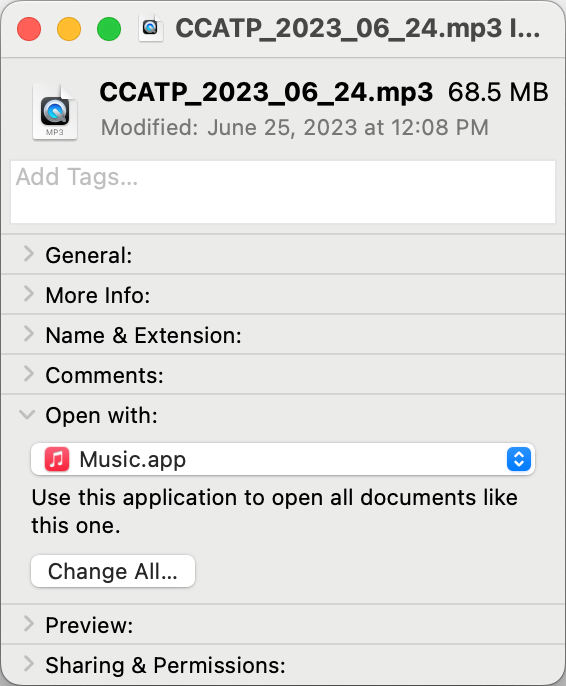
Now it’s easy to see the section entitled “Open with:” and we can open just this section with its chevron. Use the dropdown to change the default application from Music.app to QuickTime Player. This will only change the specific file you used to open the Info pane.
If you want all MP3 files to always open in QuickTime Player, click the button that says “Change All…” and when macOS asks you if you’re really sure you want to change all similar documents to open with the application “QuickTime Player.app”, hit the Continue to make the change.
I highly recommend you spend a little time looking at what else the Info pane shows you because it’s chock full of good information. Guess that’s why they named it that!
Command-Delete to Delete When Closing a File
How many times a day do you create a file and then decide you don’t need to save it? I’m not sure why this happens so often but for me it happens all the time. If you’re a keyboard junkie, you’ll like this tip.
When you use Command-W to close the window, you’ll get a popup asking you where to save the file and under what name. By default, the Save button is highlighted, which means if you hit Enter on your keyboard, the file will be saved to the location shown.
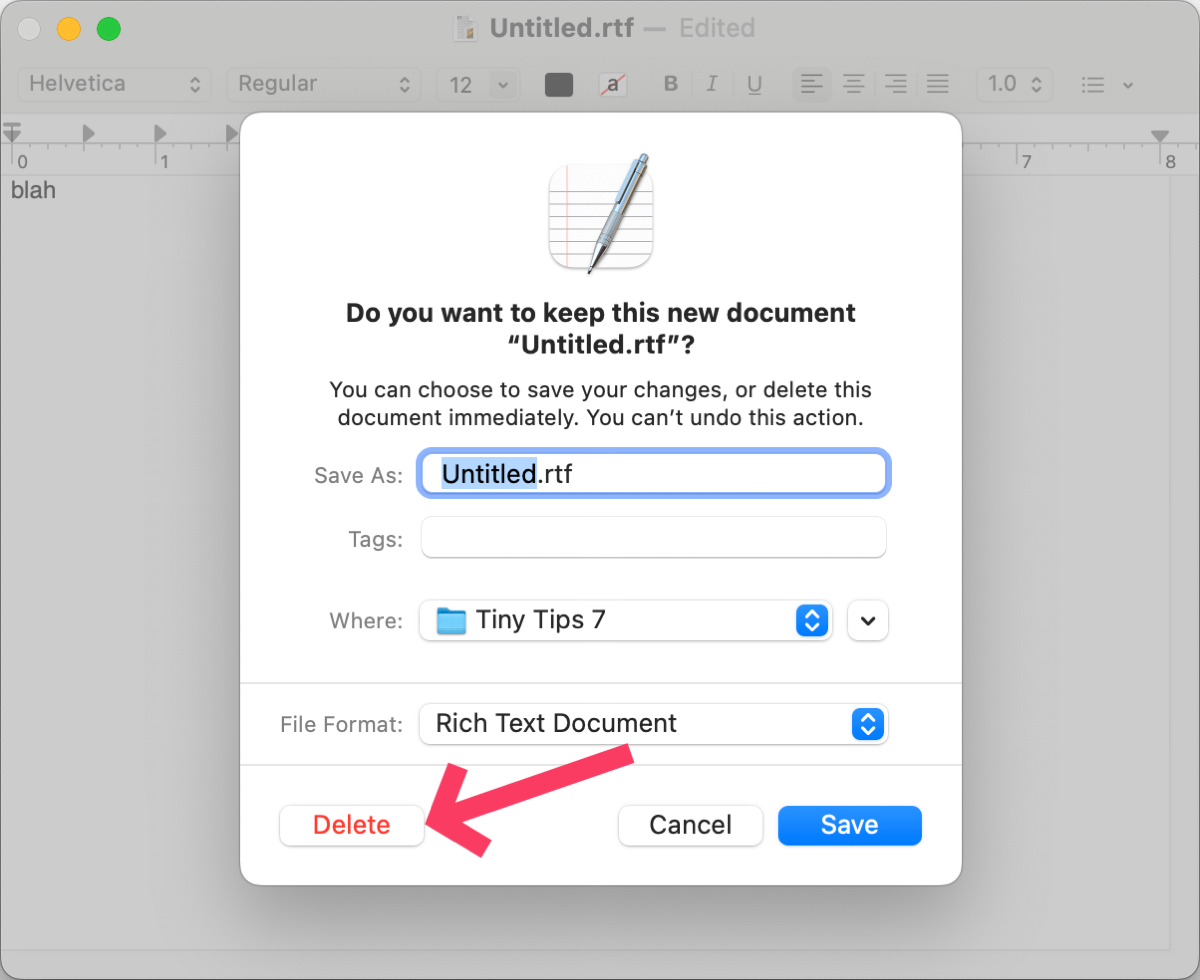
It seems very tedious to me to move my hands from the keyboard and drag all the way over to the window to hit the Delete button instead. If you hold down the Command-Delete, the file will disappear unsaved. Isn’t that delightful?
Bottom Line
I hope you enjoyed this segment of Tiny Mac Tips. I see now why Bart puts “of X” after his installment numbers – I have no idea how many more of this will be but more little tips keep jumping into my brain all the time.
If you enjoyed these tips, here’s a link to the next set of tips: Link to Tiny Mac Tips Part 8


Thank you for all of these tips. The link to part 6 is not correct in this post. I was able to get to part 6 from the part 5 post.
Dan – I think you got a cached copy – I fixed the link earlier today. But thank you for letting me know to help other people! ALWAYS tell me about mistakes!