Jump to Tips
- Quick Actions Menu
- More Resolution Options on Your Displays
- Why do Double Dashes Turn into One Long Em Dash?
- Option-Click Red Finder Window Button to Close All Windows
- Keyboard Shortcuts by Daniel Alm from the Timing App
I’m back with Part 8 of Tiny Mac Tips. This is an ongoing series I started in order to teach Jill from the Northwoods how to move from an adequate Mac user to a proficient one. In case you missed the earlier installments, I’ve included links to the first 6 installments:
- Link to Tiny Mac Tips Part 1
- Link to Tiny Mac Tips Part 2
- Link to Tiny Mac Tips Part 3
- Link to Tiny Mac Tips Part 4
- Link to Tiny Mac Tips Part 5
- Link to Tiny Mac Tips Part 6
- Link to Tiny Mac Tips Part 7
Quick Actions Menu
In the Finder, there’s a nifty little thing called the Quick Actions Menu. You access it by right-clicking/control-clicking/two-finger-tapping on any file. The Quick Actions Menu is contextual, so the options revealed to you will be different depending on the type of file you’ve selected.
Quick Actions on Image Files
If you choose Quick Actions on an image file, you can rotate left, open Markup to annotate the image, create a PDF of the image, convert the image, or remove the background.
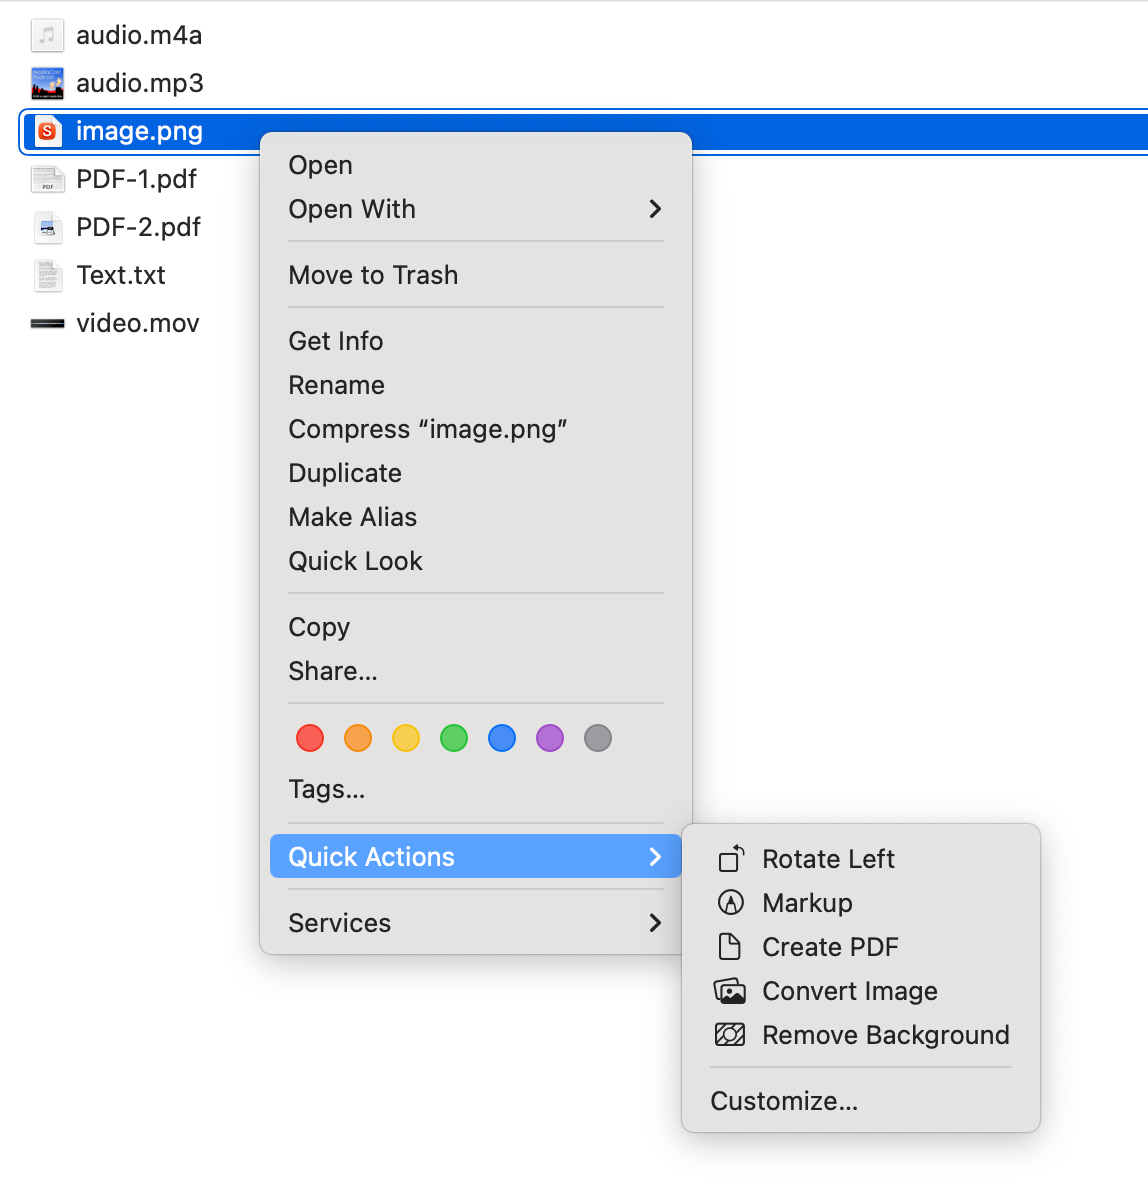
Most of those are obvious, but the last two weren’t to me. Convert Image allows you to change to a JPEG, PNG, or HEIF. You can also adjust the image size, and choose whether or not to preserve the metadata.

Remove background was even more mysterious. I read on several (reputable) websites that it should do what it says on the tin. Given a photo with a prominent subject and a somewhat continuous background, it should preserve the subject while removing the background and save it as a transparent PNG. I took a lot of different image types with varying degrees of obvious subject/background contrast, and not one single image I tested did anything at all. No transparent PNG, but also no error, and no message. I even tried a portrait mode photo and I had no joy.
And then I tried it on a different Mac with the exact same photo, and it worked on the first try.
Quick Actions on Audio Files
If you have an audio file that’s not an MP3, the Quick Actions menu will offer to let you trim the file without even opening QuickTime. It launches a little floating window with the trim bars on either side of the waveform.
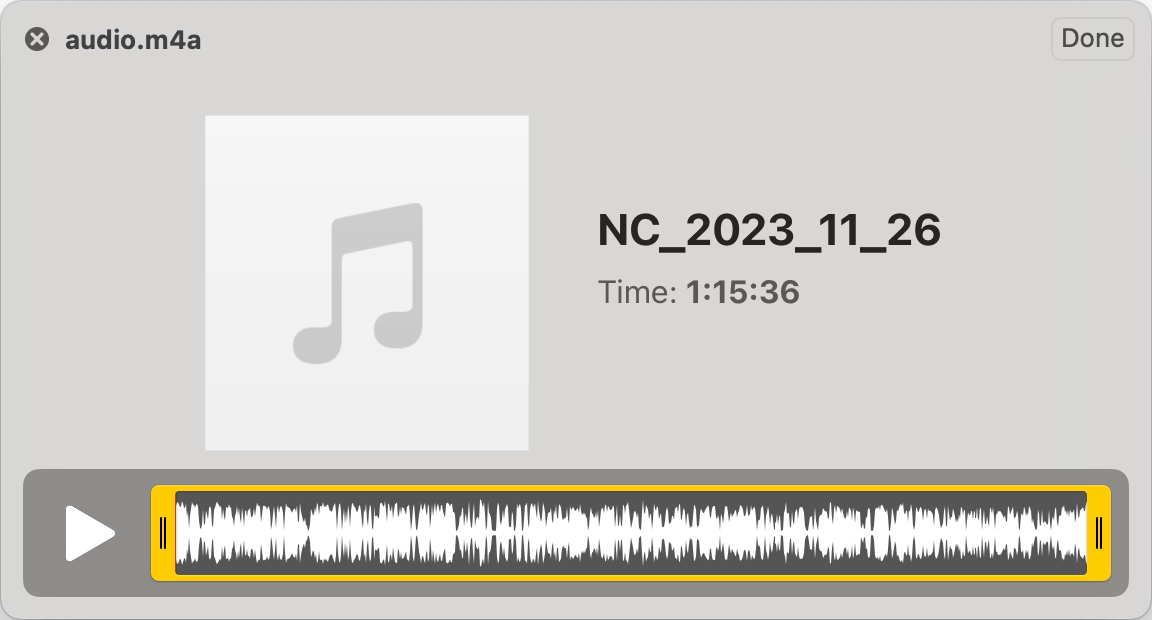
What I can’t explain is why it doesn’t work on MP3 files. I was able to trim an M4A, a WAV, and an AIFF, but the Quick Actions menu only said “Customize” when right-clicked on an MP3. Customize takes you to System Settings where you can add some types of Shortcuts to the Quick Actions menu.
Quick Actions PDFs
PDFs have two interesting options in the Quick Actions menu. If you select one PDF, you can immediately go into Markup with the PDF without opening Preview.
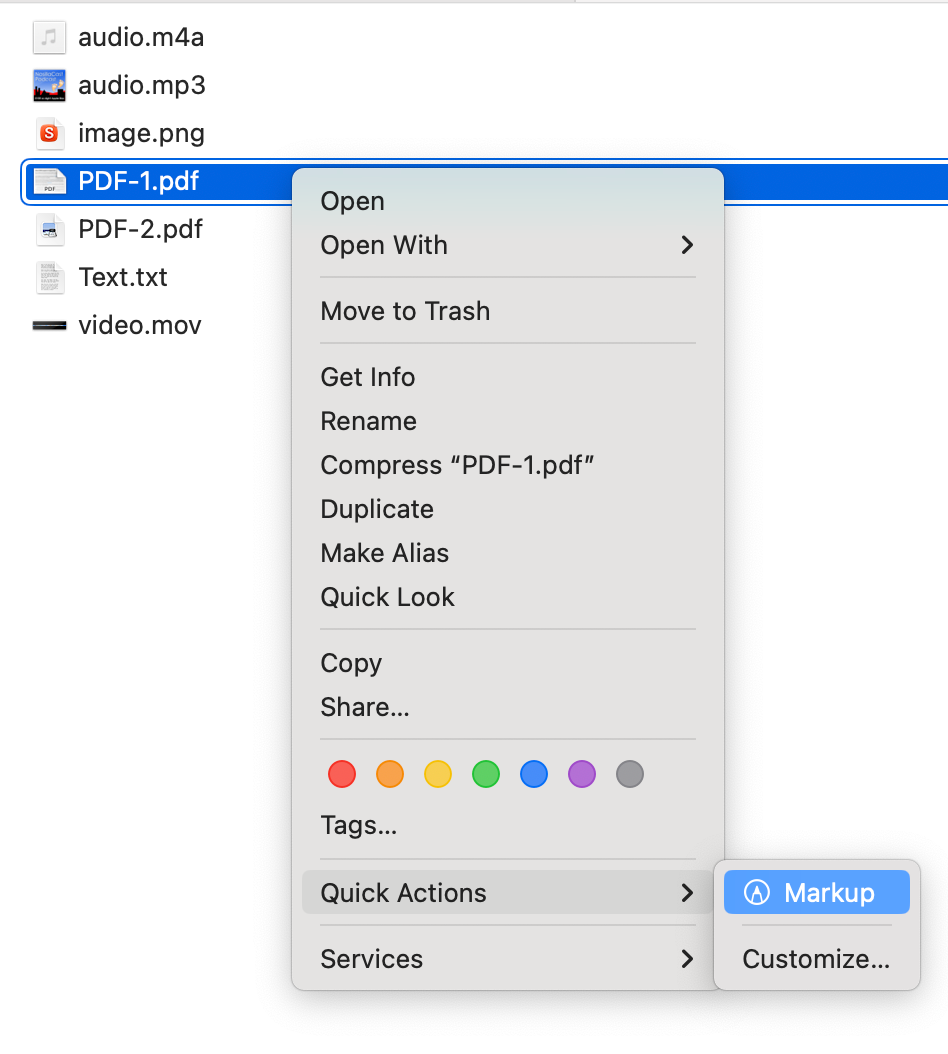
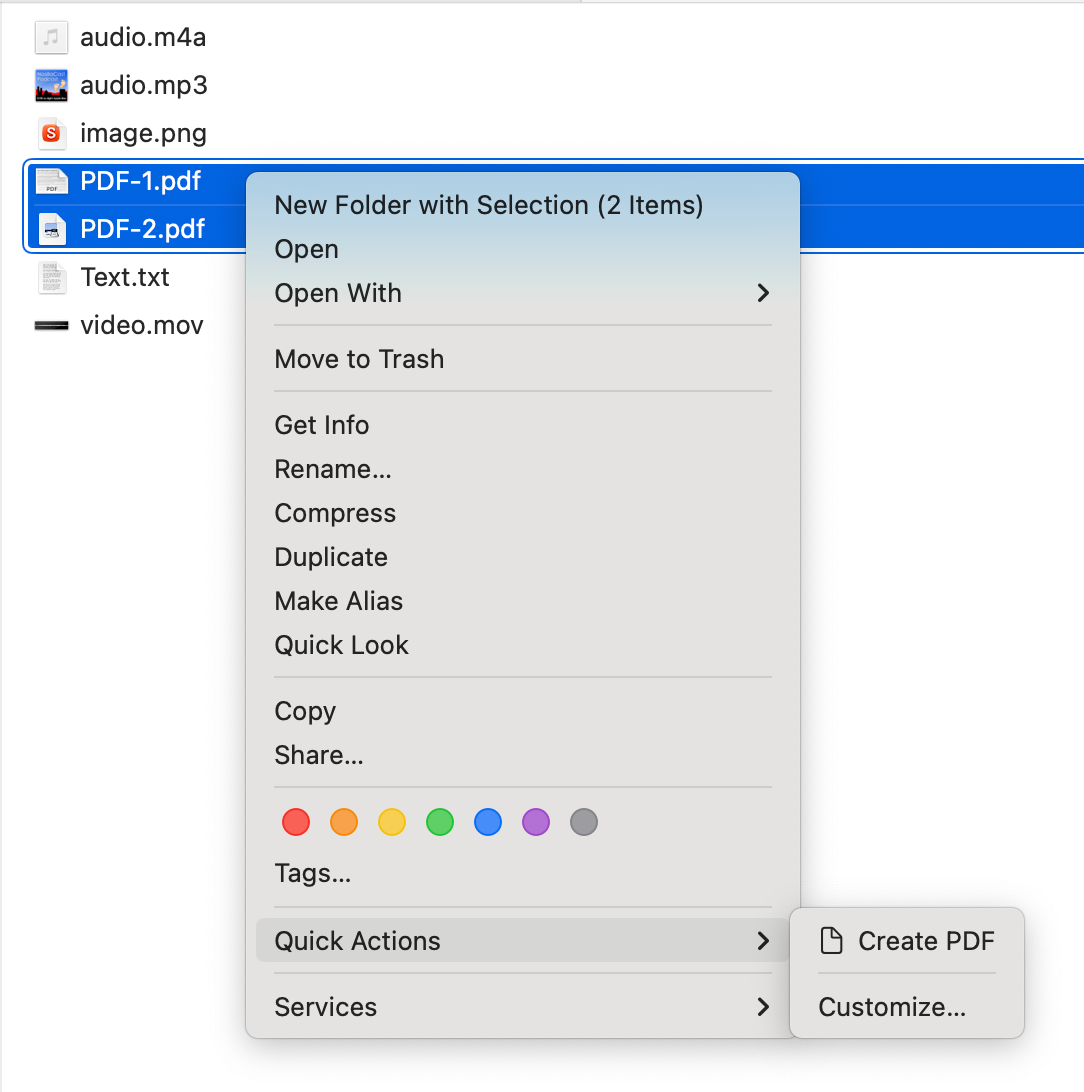
But if you select two or more PDFs and then open the Quick Actions menu, you get a completely different option. You’ll see “Create PDF”, which means in that one click you’ll be able to combine all of the PDFs you’ve selected into one. Pretty cool trick I think!
Quick Actions Movies
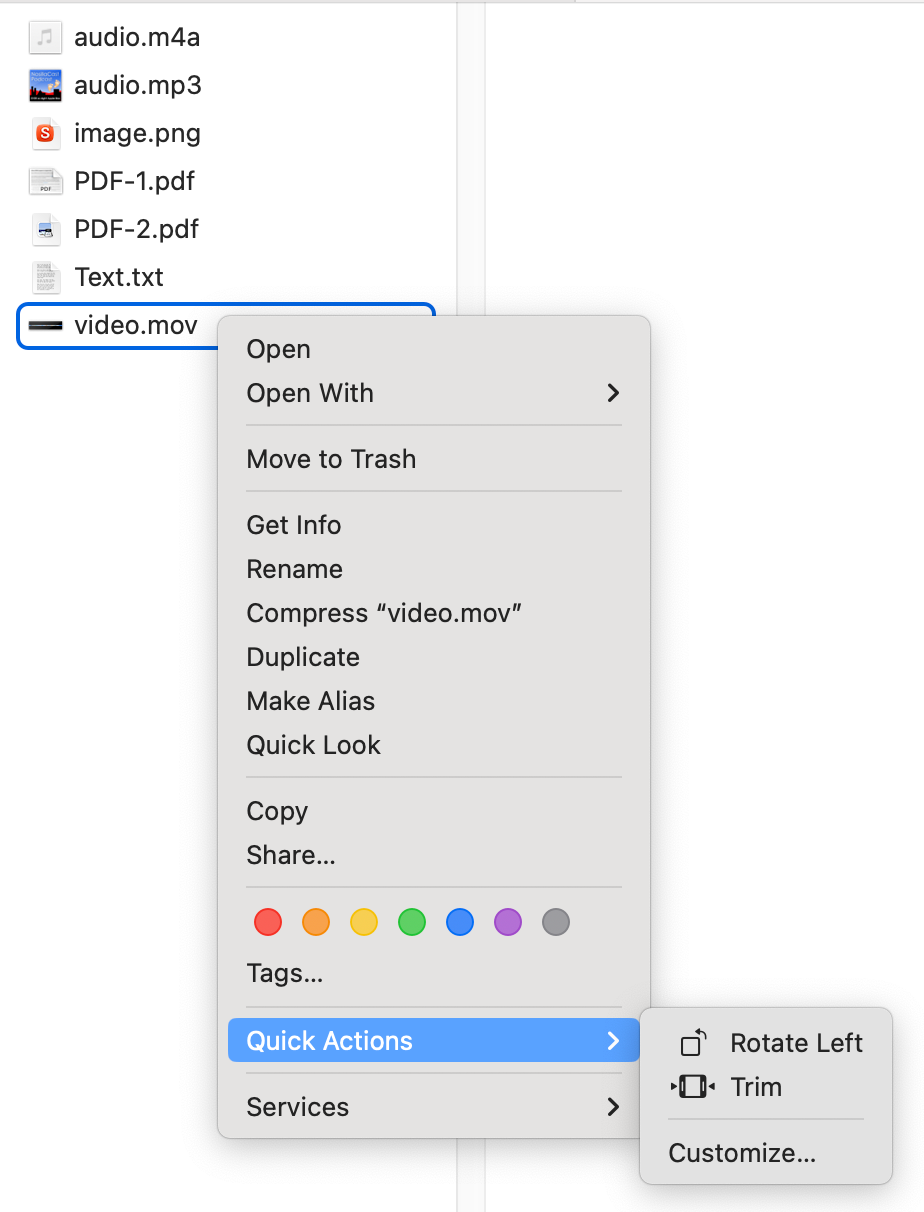
Have you ever taken a movie where you’re looking straight down on the subject and it gets saved in the wrong orientation because the internal gyroscope in the phone doesn’t know where up is? With the Quick Actions menu, you can not only trim video files just like you can with audio files, but you can also rotate them to the left just like you can with image files.
Always Show Quick Actions
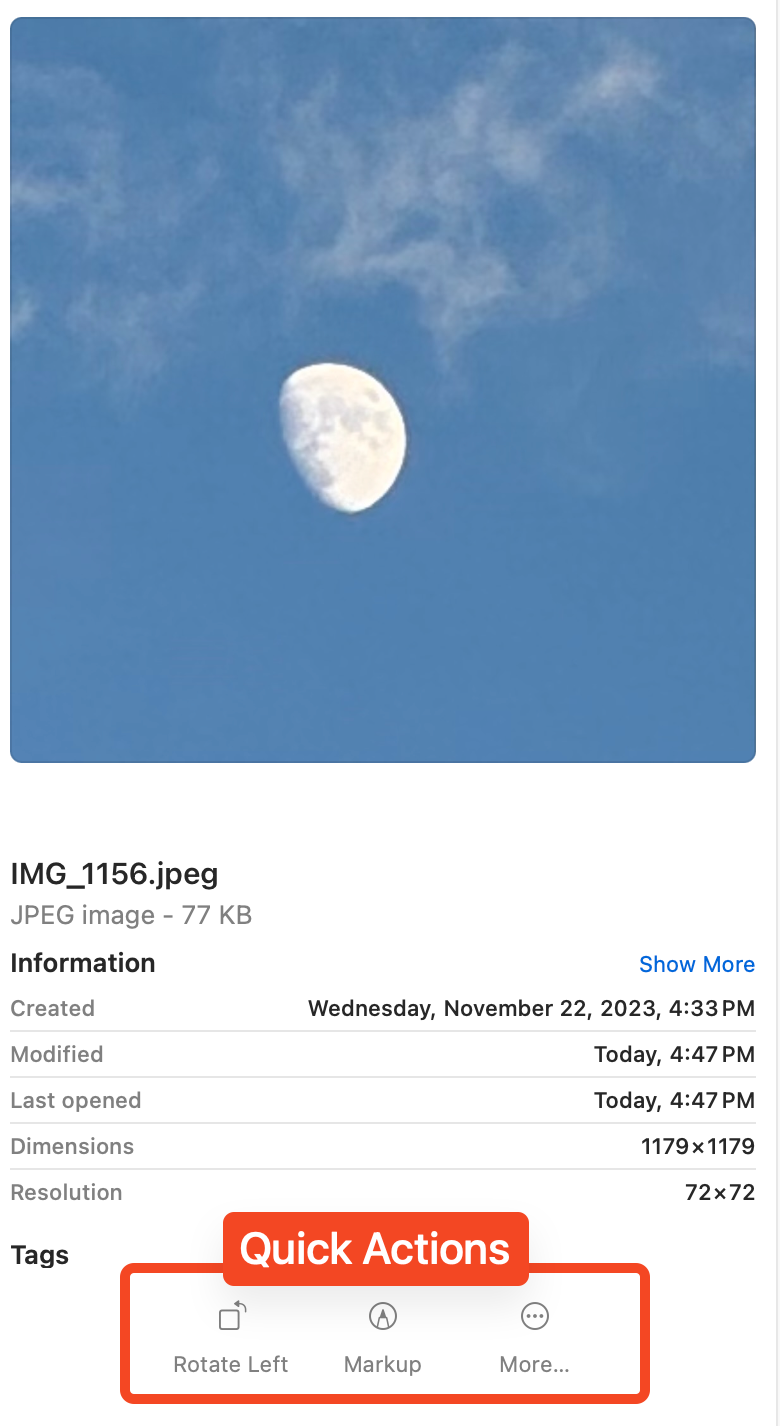
If you’d like to always have access to the Quick Actions without having to open the menu with a right-click on your file, there’s a way to see the actions available to you right in your Finder window.
With a Finder window open, go up to the View menu in the menu bar, and choose Show View Options (or use command-J). In that menu, make sure the box is checked that says “Show preview column”. In addition to showing you a large preview of your file, underneath it, you can see and select the options I’ve just described from the Quick Actions menu.

You can read more about the Quick Actions menu at support.apple.com/…
More Resolution Options on Your Displays
In macOS Settings, we have a Displays section. The normal view for Displays shows your display or displays across the top and then below that you have four icons illustrating what your display will change depending on the resolution. For a nerd, it’s almost insulting how cartoony this is. On the left, it says Larger Text, and on the right, it says More Space, and in case that’s not obvious enough the text inside the four icons goes from large to small.
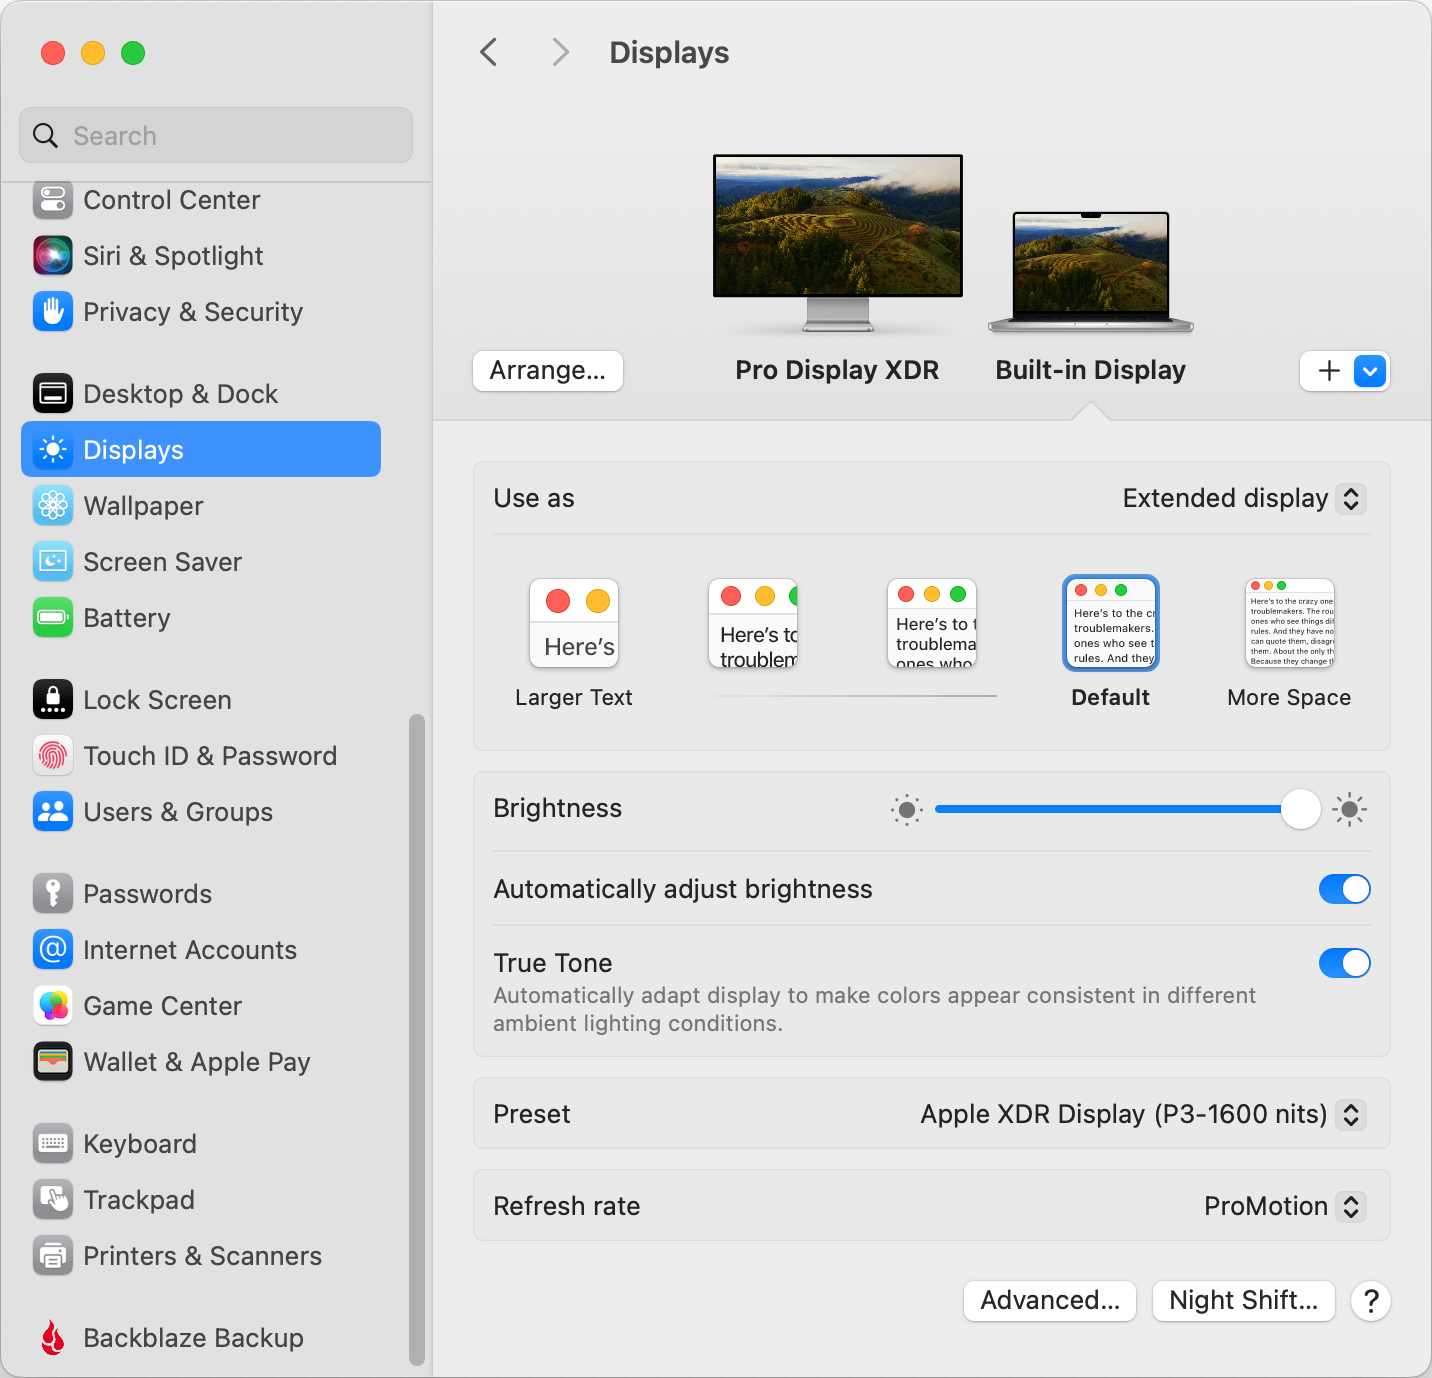
If you’d like to work with real resolutions instead of cartoons, go to the bottom of this same window and click the Advanced tab. The overlay that comes up has three fun toggles that control how your Mac reacts if there’s an iPad nearby or even another Mac, like letting your cursor just slide back and forth between the devices. Don’t be distracted by that fancy stuff in this menu — look at the top of the menu and you’ll see a toggle that says “Show resolutions as list”.
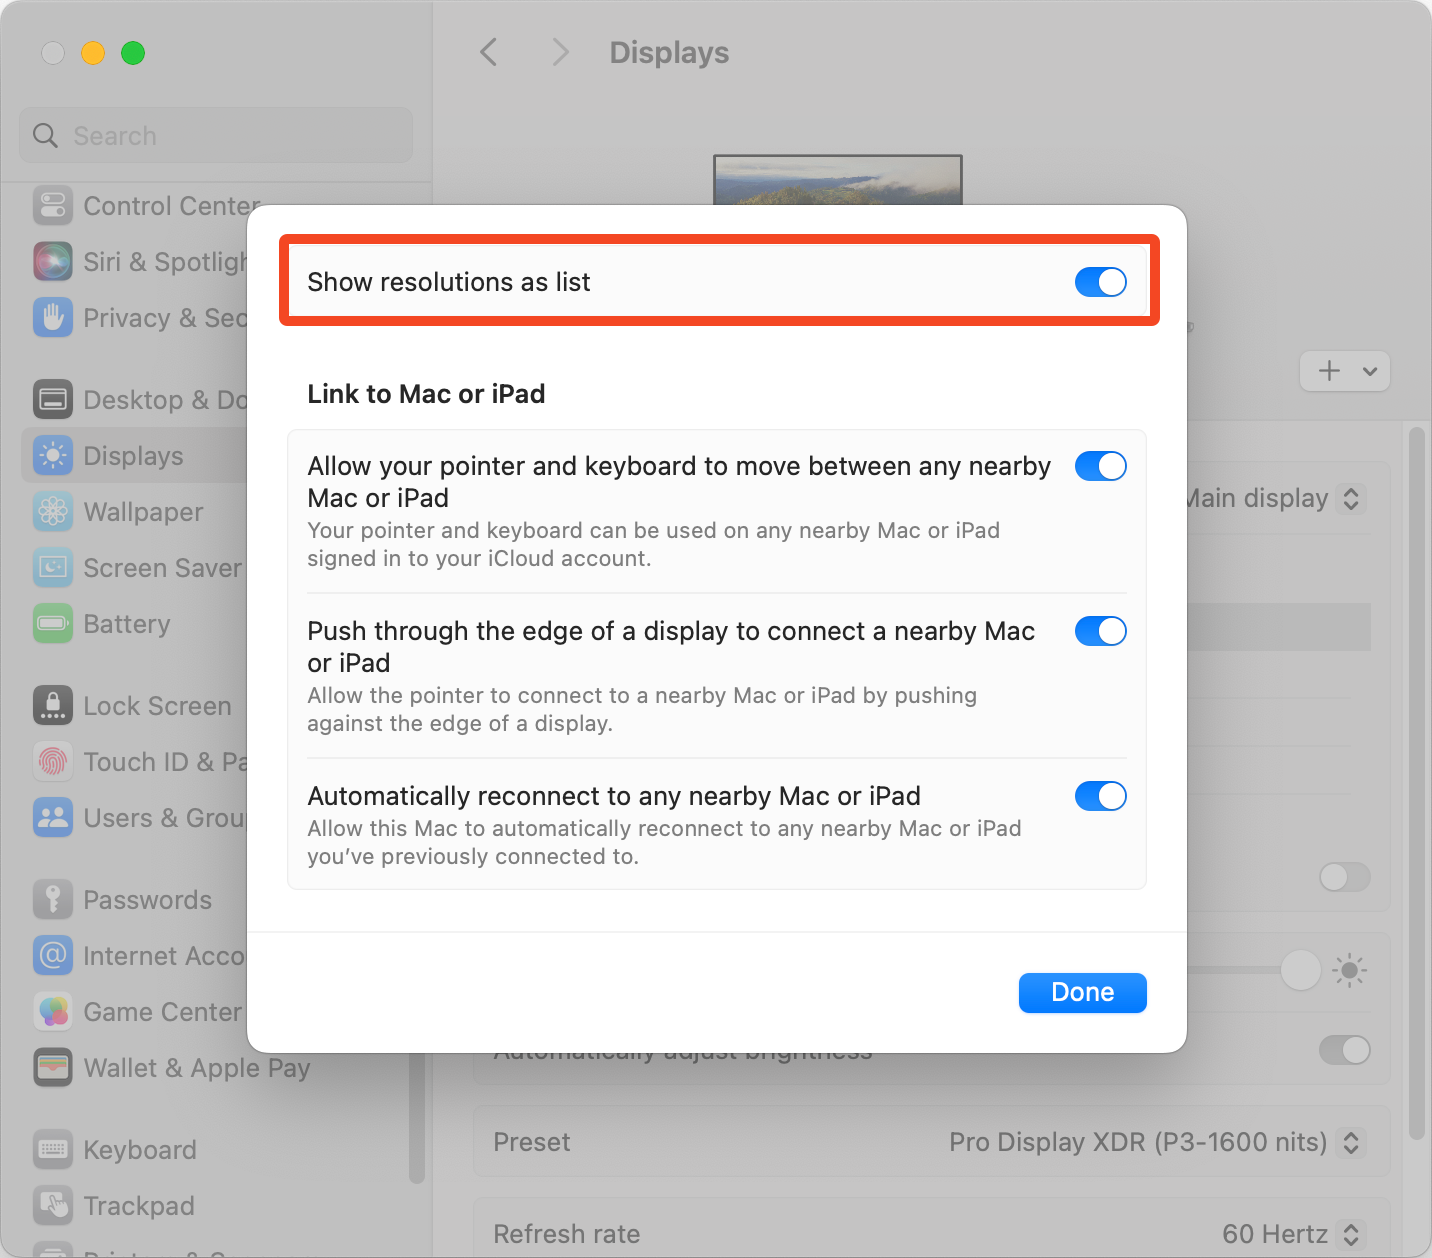
Now you’ll be taken back to the normal Displays screen and you’ll see six resolutions instead of four (or at least that’s what my MacBook Pro shows). Not only that, you’ll see a toggle to Show all resolutions. When I do that with my 14″ MacBook Pro, I get 22 resolutions from which to choose!
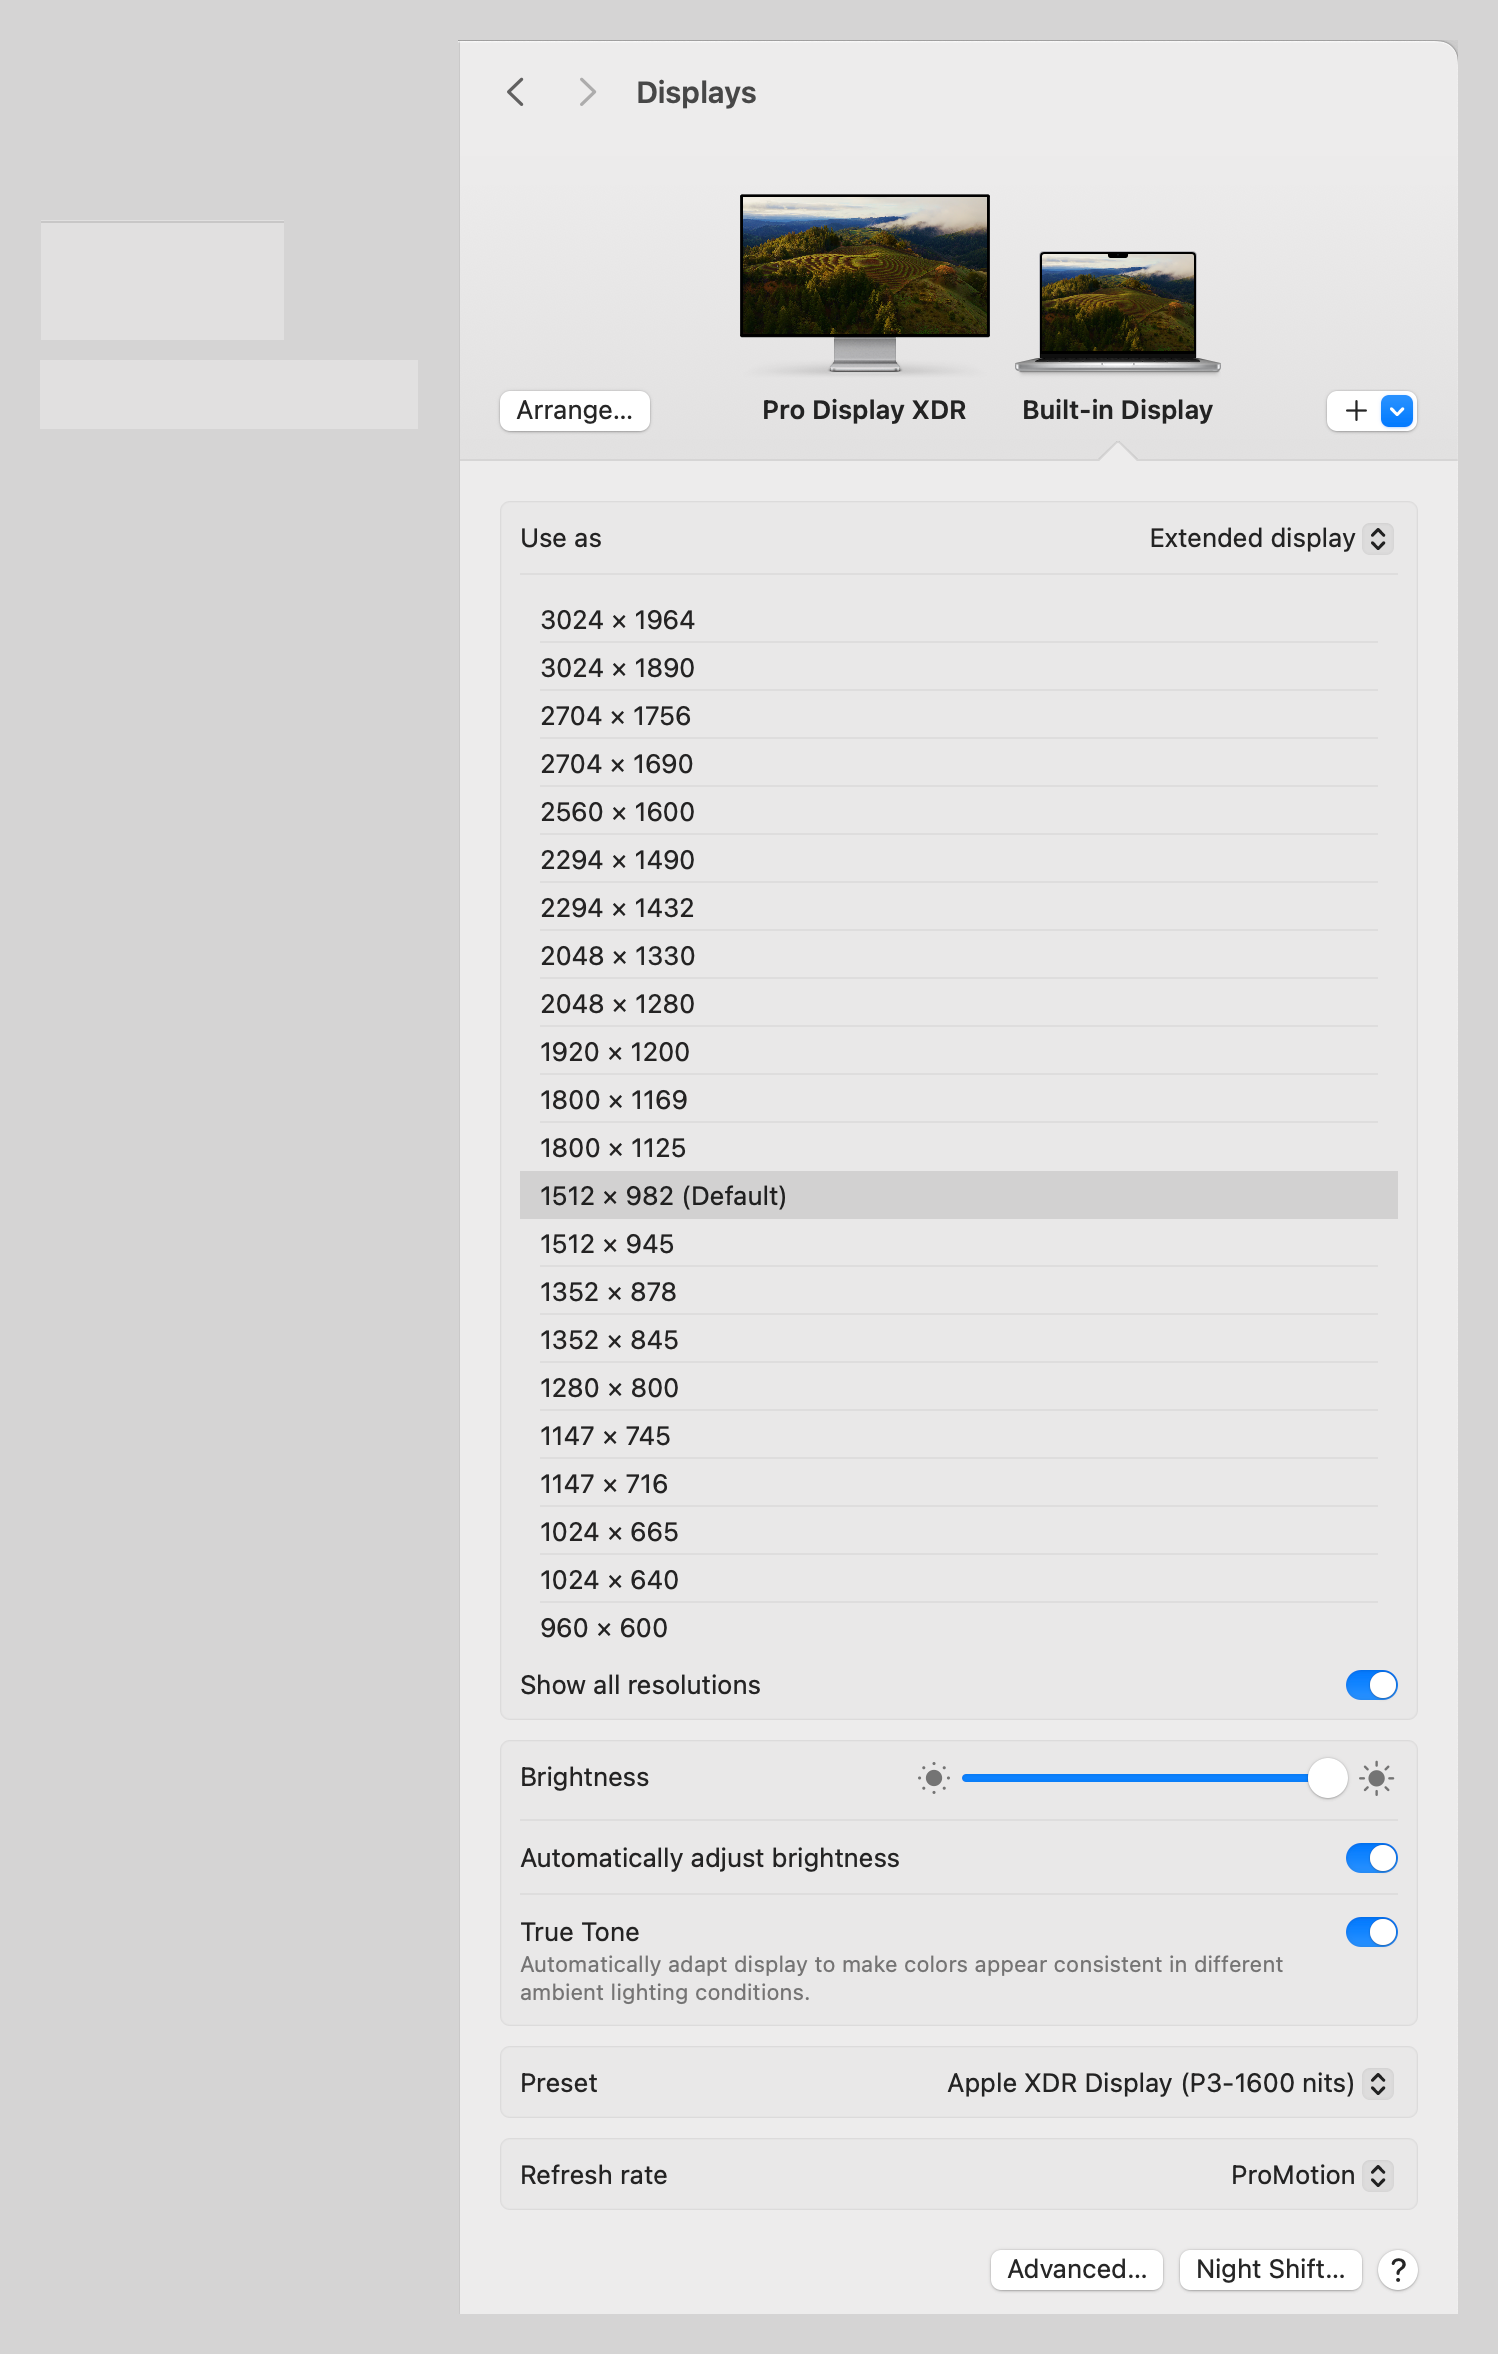
People have been paying for third-party apps to have access to more screen resolutions for years, and now in macOS, it’s built right in. I know I mocked Apple for giving us cartoons by default, but I think the cartoons are probably a lot more helpful to normal people than this giant list of options.
Why do Double Dashes Turn into One Long Em Dash?
When Bart and I record our Programming By Stealth podcast together, we are both reading along with his tutorial shownotes and we’re both able to edit them at the same time. (If you’re curious how, we use Git, which is a version control system mostly for programmers.)
Anywho, one of my jobs while Bart is teaching me is to proofread the notes. Recently he was explaining a Terminal command, and it required a flag with a double dash in front of it. He meant to write:
This is where the
--raw-outputor-rflag comes into play.
But instead of a double dash on raw-output, it was a single long dash, also known as an em dash. I usually don’t mention typos as I fix them during the recordings but I wanted to make sure I understood what this was supposed to say so I pointed it out and said I’d change it to the double-dash.
I’ve seen this problem many times before, and you probably have too, where you try to type two dashes and macOS changes them into an em dash. I explained to Bart that I know how to fix it – you just type them really slowly.
But Bart taught me a tip that I’m now going to pass along to you. It turns out that there’s a System Setting that controls this behavior, and he said he’d just not gotten around to changing the setting on his new Mac, which is why the em dash slipped through to the shownotes.
If you open System Settings → Keyboard, then under Text Input you’ll see Input Sources, then your language (in my case it says U.S. for U.S. English). Finally, you’ll see an Edit button. On the overlay, it will show All Input Sources on the left with a big list of automatic features that you may or may not like about macOS. By default, macOS:
- Corrects spelling automatically
- Capitalizes words automatically
- Shows inline predictive text
- Adds period with double-space
- And finally, uses smart quotes and dashes
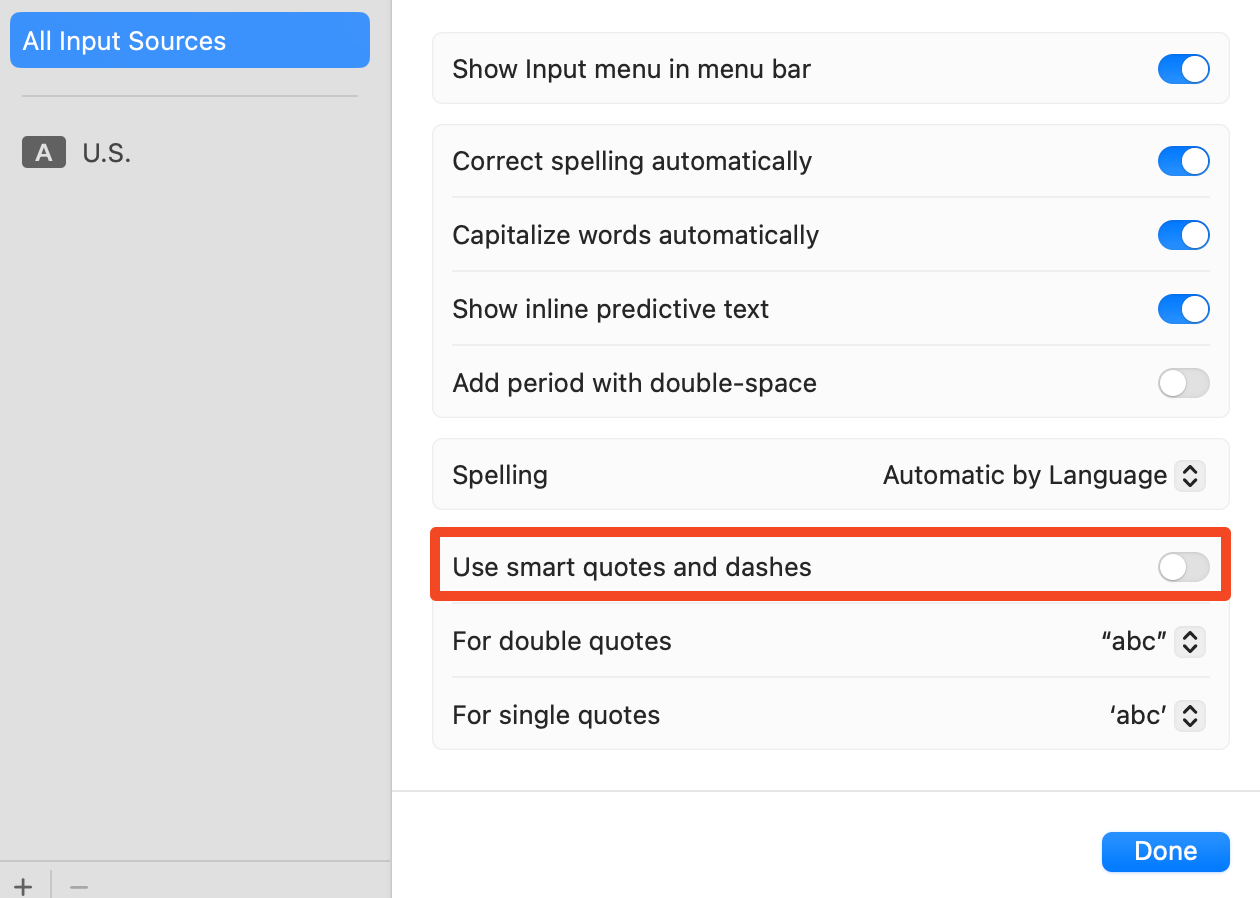
It’s interesting that they combine smart quotes and dashes into one toggle switch. Both of these bother programmers, so maybe that’s why they’re stuck together. In software development, smart, or curly quotes instead of the tiny vertical tick quotes can really wreck your code. And of course, if you’re trying to document a command for the Terminal, you often need to use flags that are called with a double dash and you simply cannot type that in a normal text editor if smart quotes and dashes are enabled.
I know this is supposed to be just Mac Tiny Tips, but if you’d also like to disable this “feature” in iPadOS, it’s in a slightly different spot with a different name. I don’t know why, it’s almost like they don’t think the same people might use the same platforms. Anyway, you’ll find the option in Settings → General → Keyboard, and the toggle is called “Smart Punctuation”.
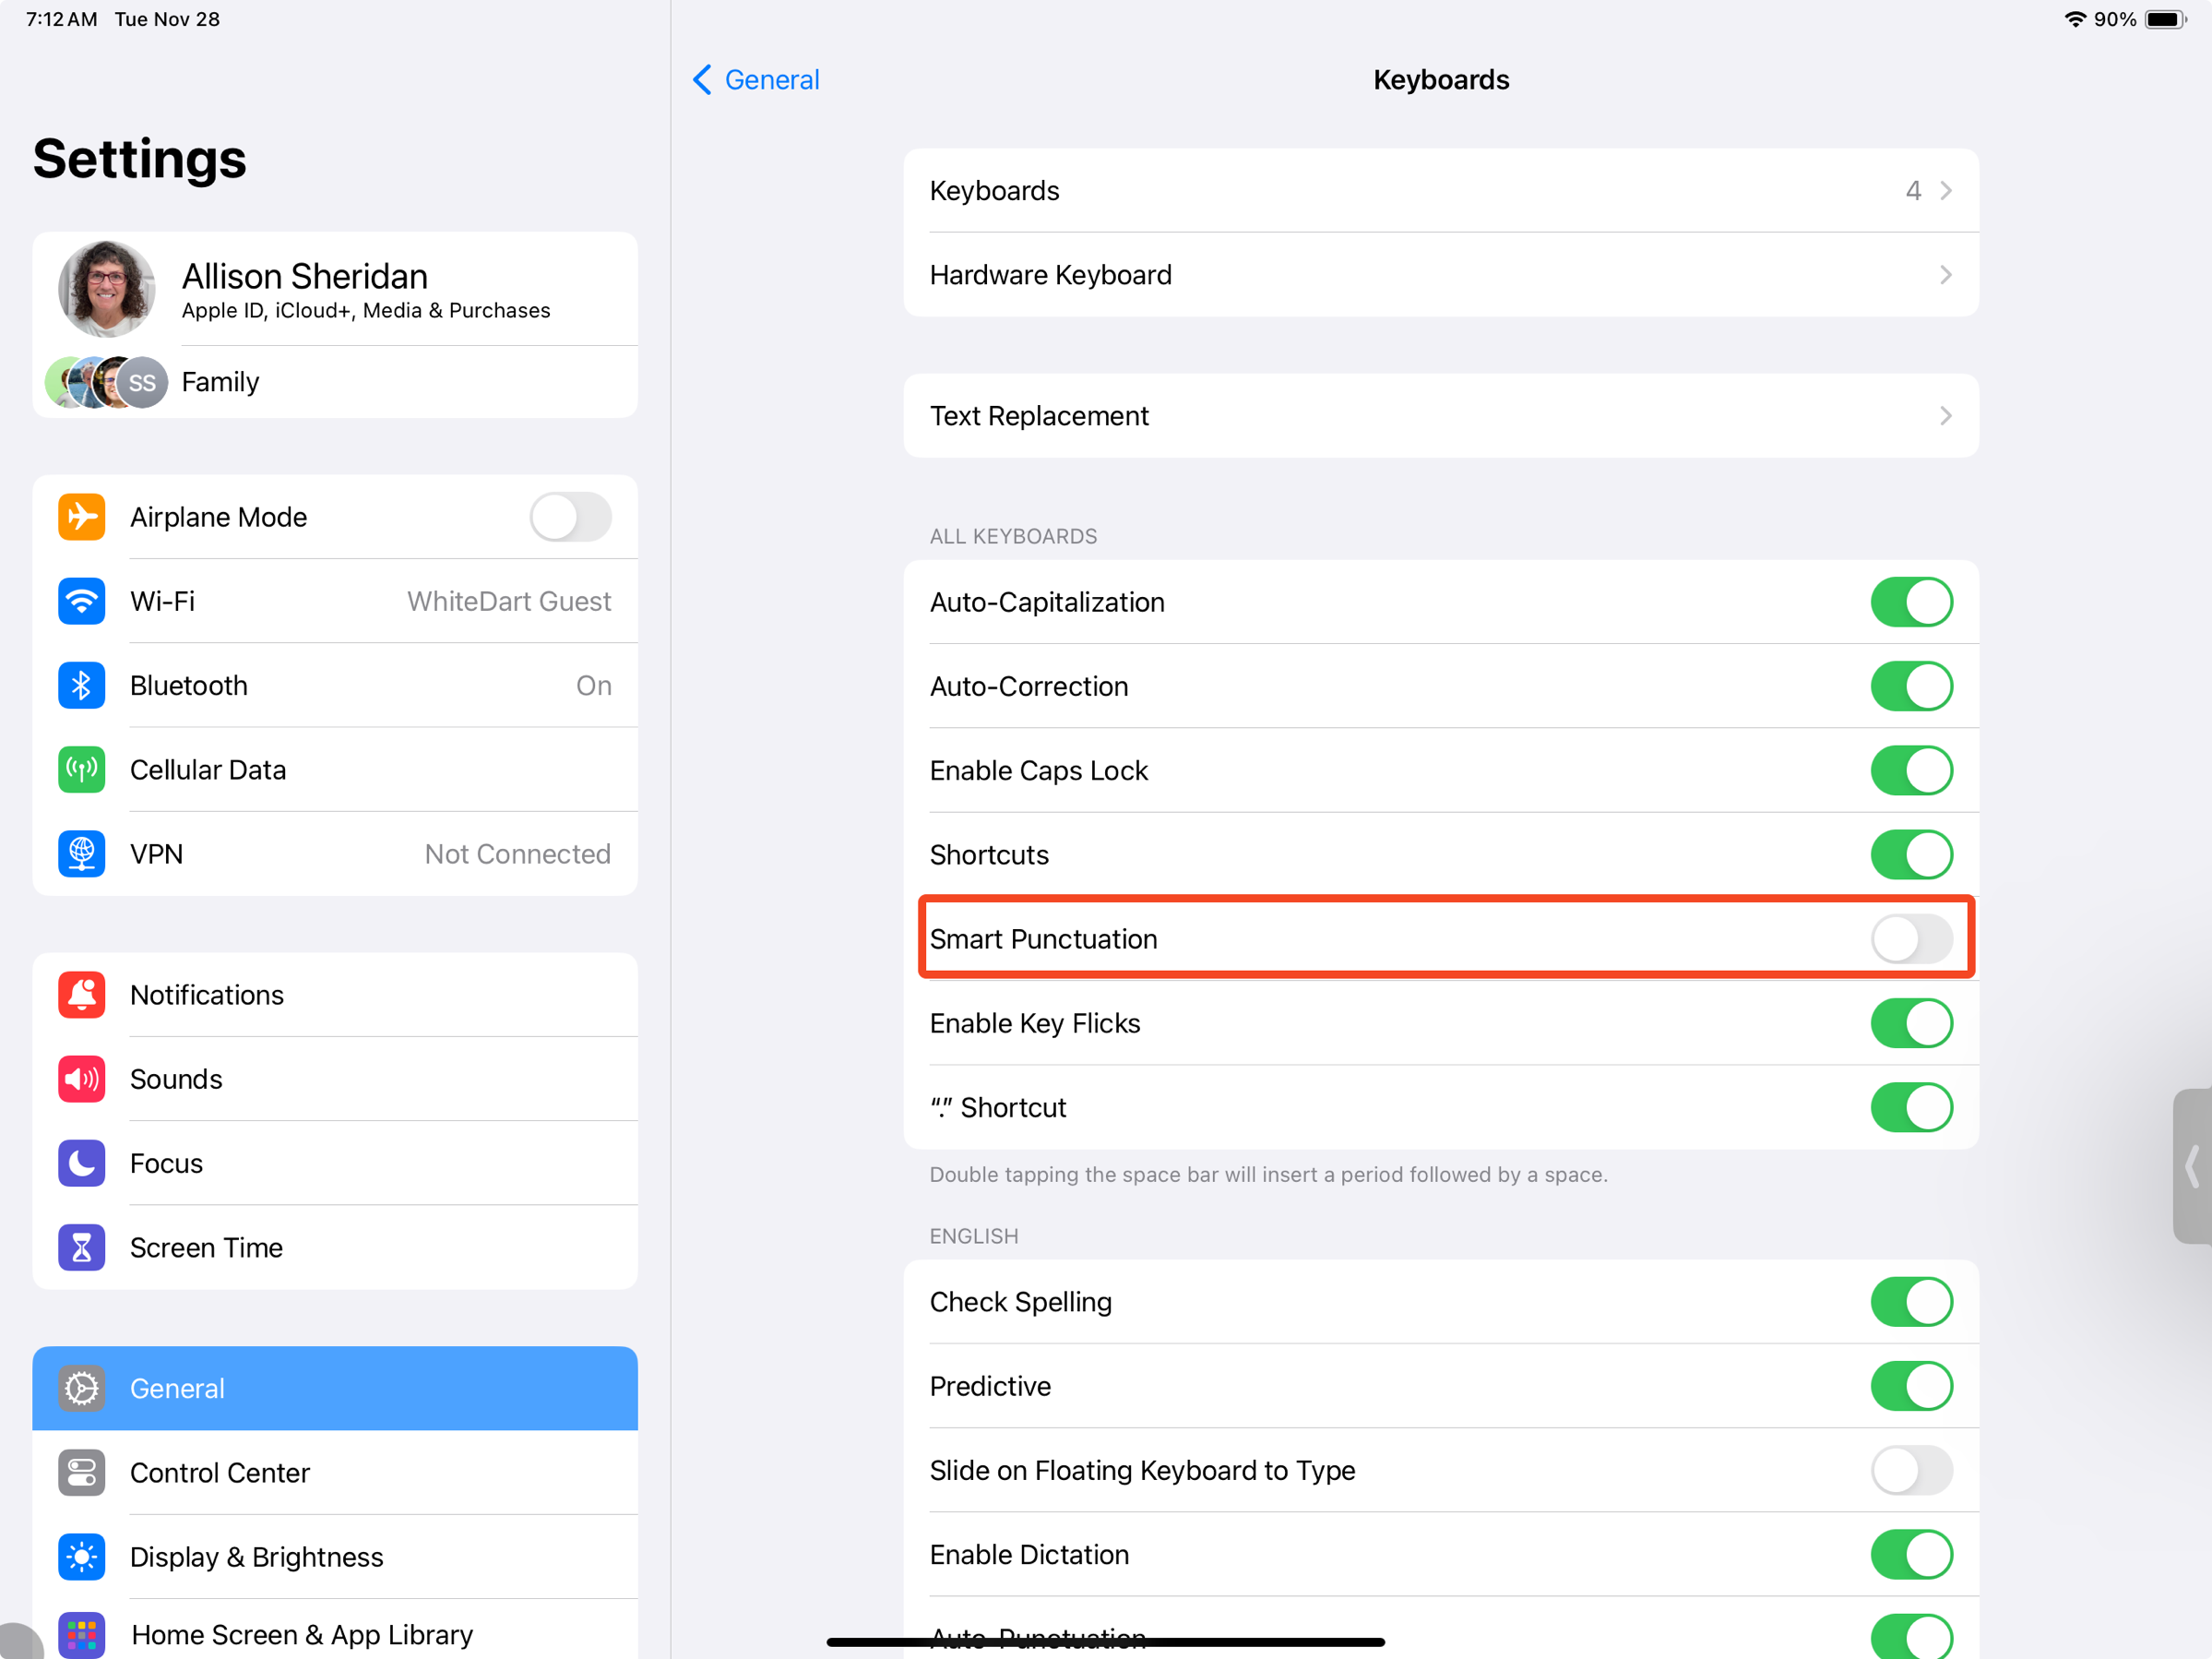
On both platforms, if you really do want to type a proper em dash, you can do it by simply holding down Shift-Option and tapping the minus/dash key on your keyboard.
Option-click Red Finder window Button to close all windows
Have you ever accidentally opened a whole slew of windows all at once? I did this the other day. I had selected all of the files in a folder, and I wanted to open the Info window on one of them. Without realizing they were all selected, I suddenly had 61 info windows open entirely filling my screen!
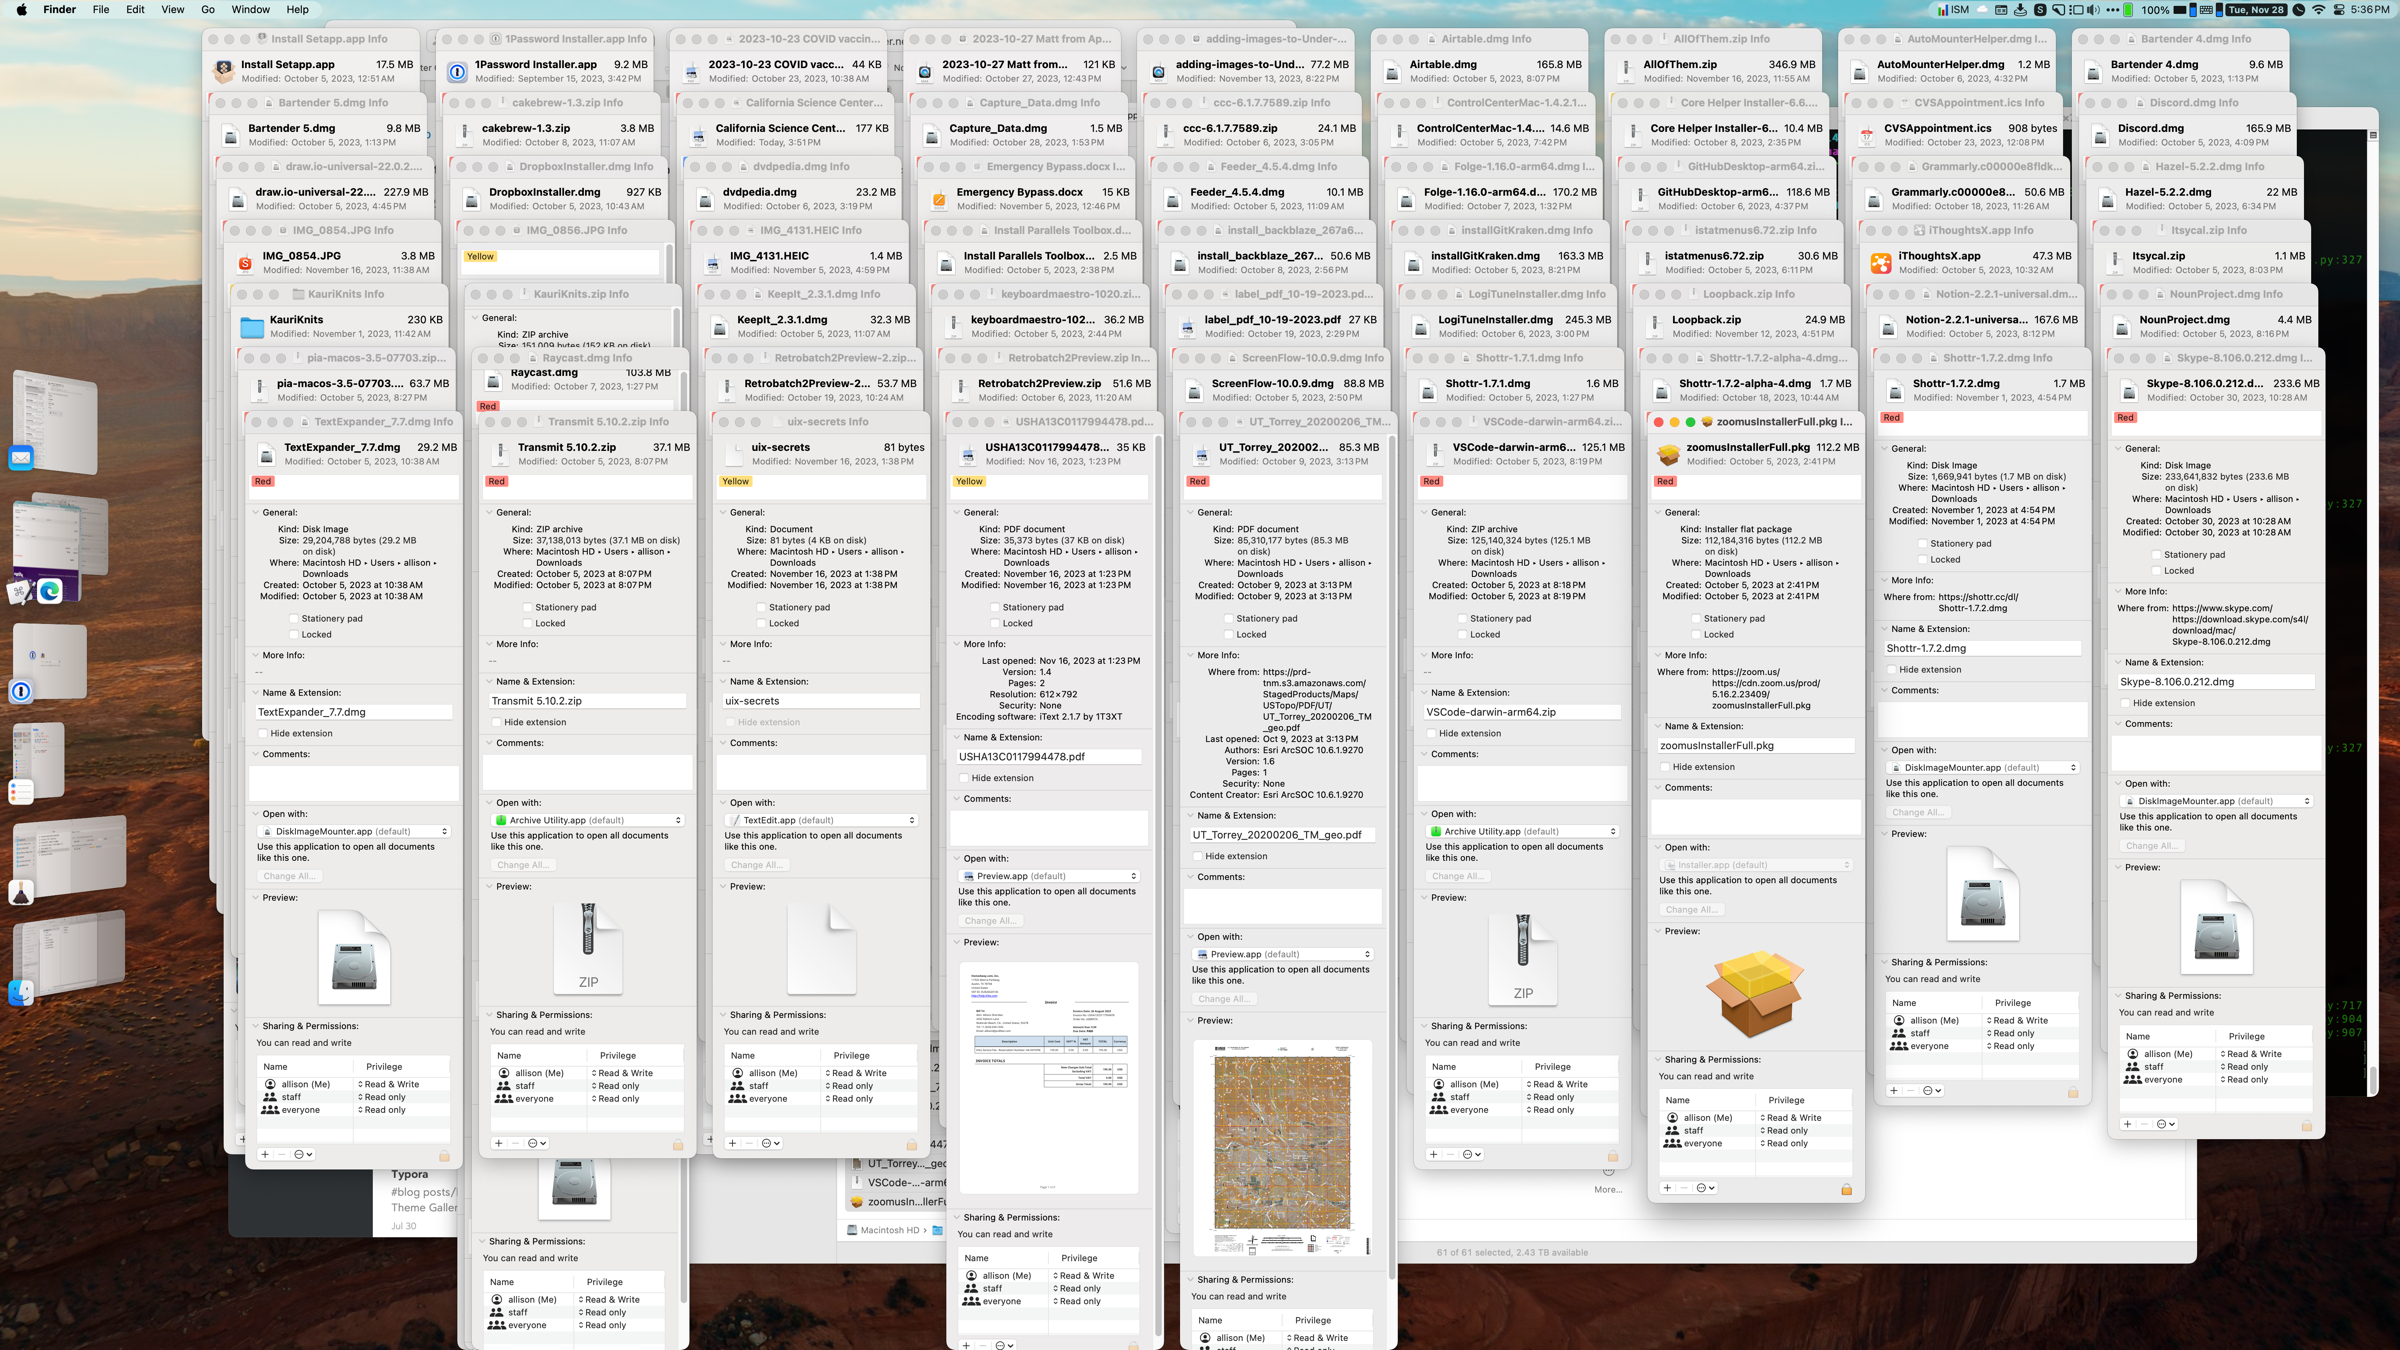
Luckily I knew how to close them all in a single click. I held down our old friend the Option key and clicked the red close button. It’s amazing how quickly they all closed.
The Tiny Tip extends beyond the Finder — it works in every app in macOS that obeys the user interface guidelines.
Keyboard Shortcuts by Daniel Alm from the Timing App
I’m going to wind up this Tiny Mac Tips article by telling you about the best keyboard shortcuts post I’ve ever seen. There are tons of these out there, but Daniel Alm, dev for the Timing App, starts slow, builds up the concepts step-by-step, and even explains the funny symbols for things like Control and Option. I had no idea the Option key symbol was taken from railroad switches!
If you’re just learning the Mac, having a good guide to understanding keyboard shortcuts will be very handy. If you’re a keyboard shortcut junkie already, keep this in your back pocket for your friends.
Mac Keyboard Shortcuts: Your Key to Faster, More Efficient Work — Timing Time Management Blog
If you enjoyed these tips, here’s a link to the next set of tips: Link to Tiny Mac Tips Part 9

