Last week I walked you through how I was able to create a bash shell script to perform OCR on PDFs using the open source library ocrmypdf that George from Tulsa taught us about. I was very proud of my little script, but I realized that running a script isn’t a very mainstream thing to do. I also thought it was a bit cumbersome for me to run for myself. If the next time I need to run a shell script is six months from now, I probably won’t even remember the name of the script, much less remember where I put it and how to run it.
I got the idea to put the script into Keyboard Maestro which I think is a smidge more mainstream. It’s still on the nerdy side to set up, but I knew you could run shell scripts inside Keyboard Maestro so it would be a lot easier to run the script.
In Keyboard Maestro, you can create macros that you can run from a keyboard shortcut, or they can be triggered by events on your Mac. It’s very flexible. I didn’t want anything fancy but instead, I wanted the option where you simply select the macro in a dropdown from Keyboard Maestro’s menu bar item. That way I wouldn’t have to remember a darn thing the next time I needed to OCR a PDF.
In case you started at this point in my story, to make this Keyboard Maestro macro work, you’ll need to install the open source library ocrmypdf using Homebrew. That process is explained in detail in the previous post on this subject.
It started out super easy. In Keyboard Maestro, you build up a workflow by dragging different actions in. One of the available actions is called Execute Shell Script. I assumed I could copy and paste my shell script in and I’d be done. I was quite wrong.
Teaching Keyboard Maestro PATH
The first thing that threw me for a loop was when Keyboard Maestro in executing my shell script saw the command ocrmypdf and said, “What you talkin’ ’bout Willis?” Basically it told me that it didn’t know the command. This seemed odd, since when I run the same script from the Terminal, my system does know the command.
Way back in Taming the Terminal Chapter 13, Bart spent a lot of time explaining something to us called PATH (in all capital letters). I’m going to admit right here in front of Bart and Country that I never understood what he was talking about until I ran into this problem with Keyboard Maestro not knowing a command that Terminal knew all about. But as Bart likes to say, the penny finally dropped for me on this whole PATH thing.
Command-line apps (or libraries as they’re often called) can be installed in different places, and the operating system has to know where they are in order to run them. Apps installed by Homebrew are stored in /opt/homebrew/bin/ocrmypdf but other commands like ls to list your files are stored in /bin. Since commands can be stored in all different places, there needs to be essentially a directory that knows all of the places apps could possibly be stored, and that directory is called PATH.
Clearly, Keyboard Maestro doesn’t have access to my PATH because it didn’t know where ocrmypdf was in order to run it. I needed to figure out how to actually teach Keyboard Maestro where to look for my installed apps and it was trickier than I’d hoped.
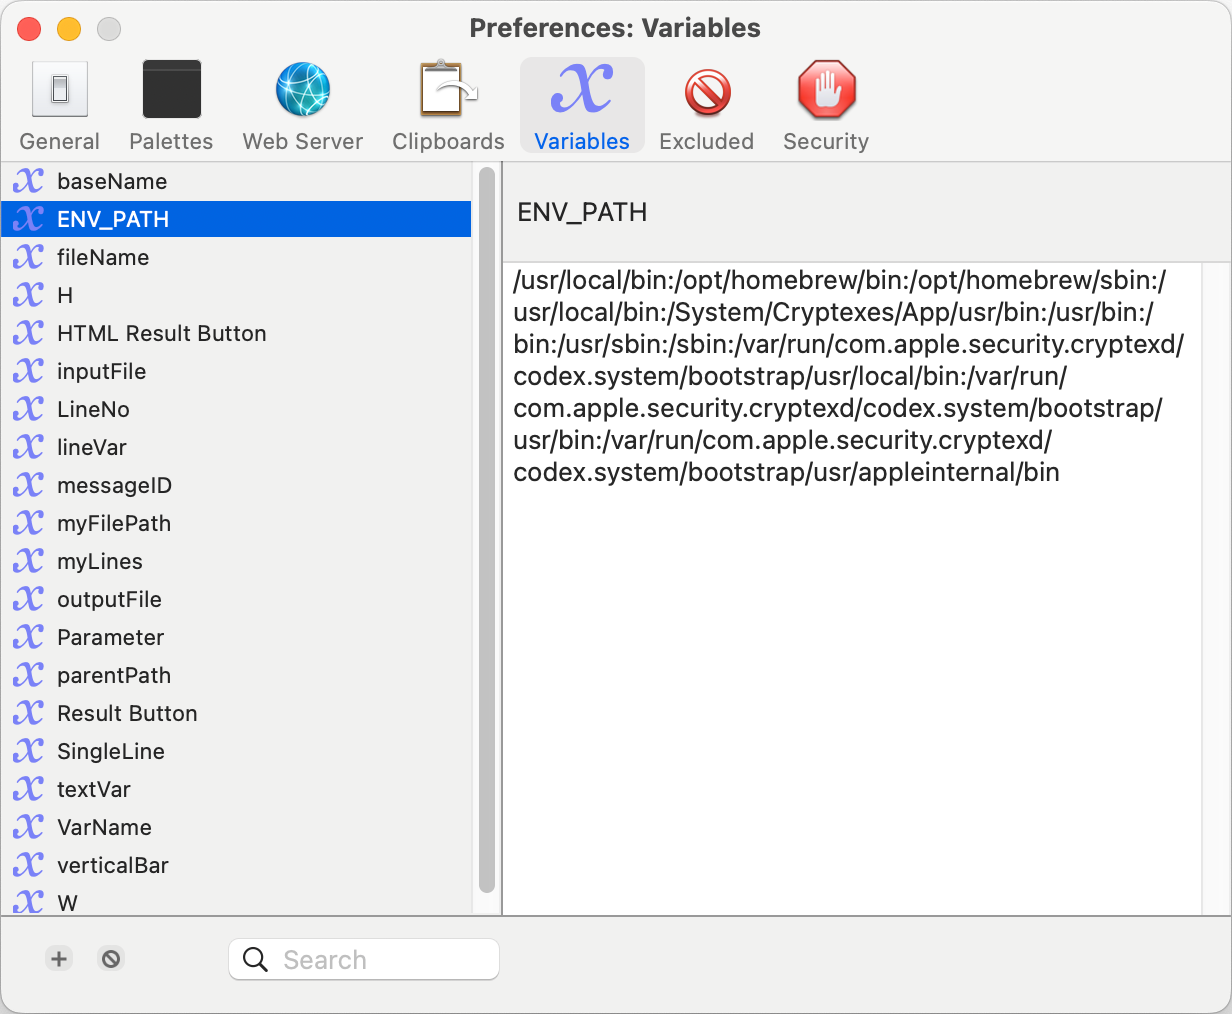
One answer was to set up an environment variable in Keyboard Maestro. (Don’t tell Bart, but I don’t actually understand what an environment variable is yet either.). In Keyboard Maestro, if you open Settings (which when open will call itself Preferences), there’s a tab to define variables. I created a variable called ENV_PATH (for Environment PATH). I needed to give that new variable the current PATH on my system, which is pretty easy to find. In Terminal, you can simply type:
echo $PATH
This spits out into the Terminal where all of the good stuff is stored. Buried in PATH were two directories I knew were important to this exercise: /opt/homebrew/bin and /opt/homebrew/sbin. These would tell Keyboard Maestro where to find ocrmypdf since I’d installed it with Homebrew.

Keyboard Maestro Doesn’t know $1
When I explained how my shell script was instructed last week, I told you that the first input to the script gets a preassigned (but ephemeral) variable name of $1. Unfortunately, Keyboard Maestro didn’t recognize $1. Instead of throwing an error such as, “Unknown variable $1”, the unhelpful error it threw was:
Macro Cancelled Execute a Shell Script failed with script error: usage: dirname string […]

Luckily, the awesome developer of Keyboard Maestro, Peter Lewis, has a good user manual, and on the page about running shell scripts, he explains that instead of $1, Keyboard Maestro uses an environment variable $KMVAR followed by an underscore, followed by the input file name.
In my shell script, I assigned my own variable using the syntax:
inputName=$1
In Keyboard Maestro it changes to:
inputName=$KMVAR_inputFile
How to Give the PDF as an Input to Keyboard Maestro
The next piece of the puzzle was how to get the macro to run on any selected file in the Finder. Using my new pal ChatGPT, I asked it how to get a Keyboard Maestro macro to work on a file selected in the Finder, and it gave me several options, all from the Keyboard Maestro wiki manual.
Of the options ChatGPT suggested, the one that sounded easiest to implement was to add an Action called “For Each” and to use the “Finder’s Selection Collection” token. This is probably the biggest value ChatGPT is bringing to me. I can jabber away at it describing the thing I’m looking for and it returns the correct terminology. I wouldn’t have thought to search for “For Each” in Keyboard Maestro’s Action list. Armed with the terminology I needed, I was able to search the Keyboard Maestro support wiki for the documentation.
Enhancements to my Macro
I’m making a big deal about this, but I really only needed to do three things to convert my shell script into a Keyboard Maestro macro. Tell it where the Homebrew app was, set up a variable to take the input file, and tell it how to find the input file.
The macro was now functioning so I decided to add two enhancements to my Keyboard Maestro macro.
Since the macro just works silently as it does the OCR, there’s no way to know if it’s working properly or maybe doing nothing at all. Keyboard Maestro has a “Display Progress” Action that will pop up a little progress bar so I thought that would be a good way to tell the user that it’s working. But the progress bars are a lie!

You give the Display Progress Action a title and then you arbitrarily assign a level of progress. You literally make up a number and it creates a progress bar with that value. I chose 50% but I really should have set it to something like 63.5% for the comedy.
Now here’s the other thing about the progress bar. It never goes away unless you put a second one at the end of your macro that’s set to 100%. A funny way to do things but I suppose these made up progress numbers are just about as useful as the supposedly real ones we look at all the time on our computers.
The final enhancement I did to my Keyboard Maestro macro was to add a notification to tell the user that it was complete. I couldn’t find Notification in the list of actions, so I asked ChatGPT what it was called in Keyboard Maestro and it told me to look for “Display Text”. I had some fun with it and added some happy clapping emoji to celebrate completion.

I lied, there was one more enhancement to my Keyboard Maestro macro to OCR PDFs. I put in a comment box, called it “REQUIREMENTS” and set the color to red. This is where I make sure the user knows that they have to install ocrmypdf from Homebrew before it will work, and how to put PATH into the environment variable in Settings. I’m sure everyone will read that first before trying to run it, right?
How to Run My Keyboard Maestro Macro
To use my little macro, I simply select a PDF in any old Finder window, then select the Keyboard Maestro menu bar item icon, and my macro is listed right there. When I select it, the macro runs, I see a little popup window telling me about the progress, and when it’s done churning away, my shiny new OCR’d file is created and I get a notification.
I’ve included a link to download my Keyboard Maestro macro and a screenshot in the shownotes so you can play with it yourself if you like. As always, make sure it’s not set to auto-run so you can study it first, and make sure I didn’t put anything nefarious in there!
Download Macro: OCR-PDF-with-Shell-Script.kmmacros
If you want to access this macro by selecting a PDF in any Finder window and then clicking on the Keyboard Maestro menu bar item and selecting the OCR macro, follow this step:
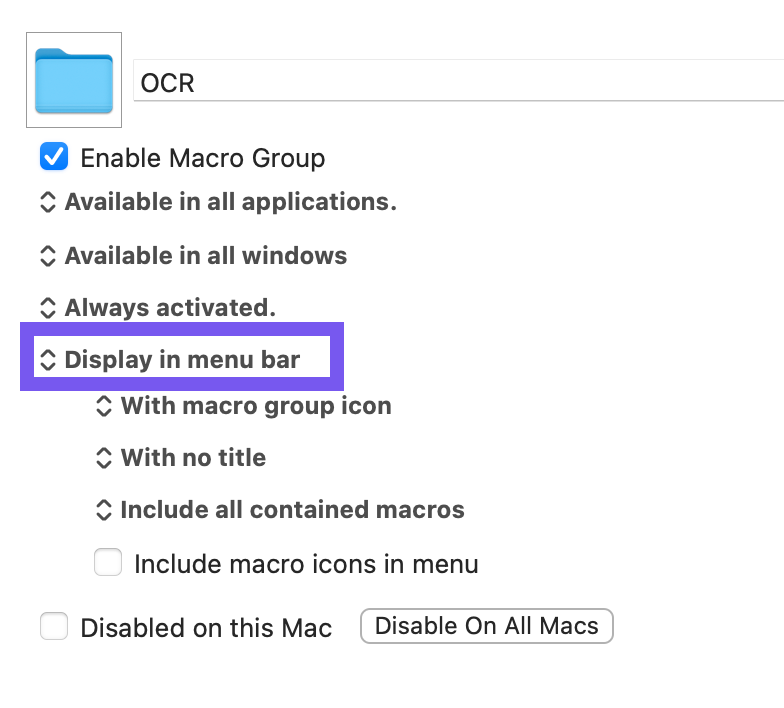
Once you import my macro into Keyboard Maestro, if you want to run it via the menu bar, you have to put it into a group and then set the whole group to “Display in menu bar”.

Another Way with Keyboard Maestro
You’d think I’d be done with this explanation of how to OCR PDFs using my shell script inside Keyboard Maestro but you’d be wrong. In the middle of figuring this all out, my variables weren’t working properly so I posted my macro and a question to the forums. A lovely person named Rob Griffiths, who goes by Griffman in the forums, explained the problem to me. Since my input file is likely a human-named file with spaces in the title, for my script to work properly I needed to put the variable names all inside quotes to preserve those spaces. I went back and fixed it in Keyboard Maestro but also in my original shell script.
But Griffman did one more thing to help me. Remember that most of the steps of my little script are designed to take my input file name with its full path break it up into pieces and then reassemble it into an output file name. If the file is at /Users/allison/Desktop/myFile.pdf, then I need to build the output file as /Users/allison/Desktop/myFile-OCR.pdf.
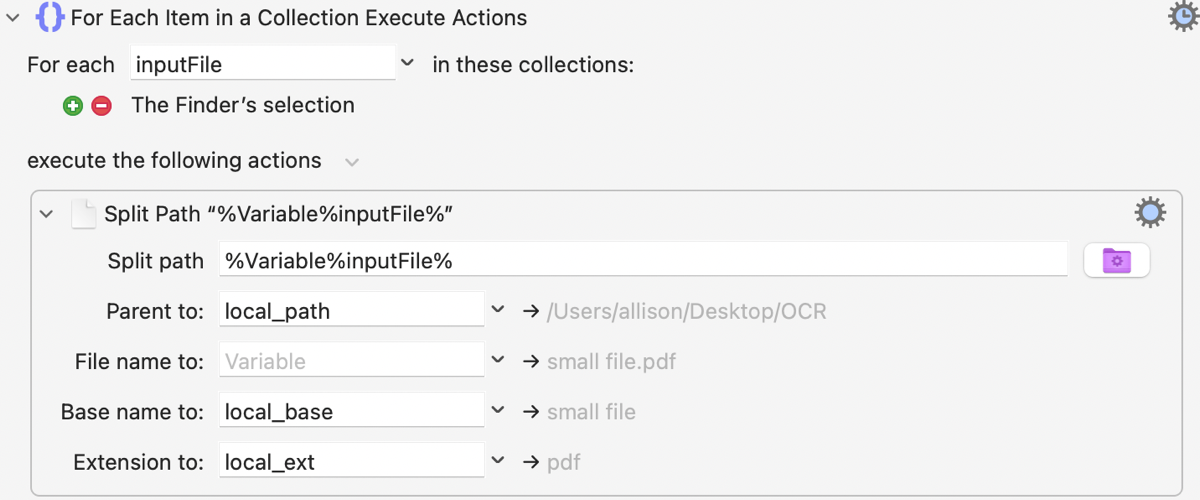
Griffman explained that you can do that same job using an Action inside Keyboard Maestro called Split Path. I’m not going to go through all of the details but I put a screenshot in the shownotes of how simple it is.

Griffman explained that my shell script could then be quite simply the running of the actual ocrmypdf command. The macro using Griffman’s solution is simple and elegant.
If this simplified version is more to your liking, I’ve included a link to download that version as well.
Download Macro: OCR-PDF-with-Keyboard-Maestro-&-Shell Script.kmmacros
Bottom Line
I’d like to thank David Roth and Jill from the Northwoods for their tireless testing of my Keyboard Maestro macro as I got it working. They found edge cases and just plain old mistakes that kept it from working and that was invaluable to me.
David Roth actually needs this macro as he runs into non-OCRd PDFs all the time that he needs to convert so he was quite grateful for my work on this. After it was working, I asked him, “Is there anything about this that you wish worked differently?”
His answer was, “I’d like to be able to trigger it without Keyboard Maestro, which I seldom use.”
Sigh. You know what this means, don’t you? There’s a part 3 to this story. I promise it won’t be nearly as dense as parts 1 and 2, because the final solution is delightfully simple and easy to use. I’ll give you a spoiler, I created a Quick Action that allows the user to simply right-click on a PDF and select the action to OCR the file. Mike Price is yelling, “I told you so!” into his phone right now because he suggested that very solution ages ago. If I’d listened to him straight away, think of all the things I wouldn’t have learned.

