Audio Hijack Recording
Physics Nerd Graeme here, continuing my mini-series on my mega project creating A-Level (high school) physics videos for my students called Physics Shorts with Dr Sheppard. This time it’s just a quickie since Allison already reviewed Audio Hijack, but I thought I’d share my setup.
I decided to just do audio recording and QuickTime Player is perfectly good for this, but since I own Audio Hijack I decided to use this tool since it brings a few benefits.

Using the App
Audio Hijack is an app that can record audio from pretty much any source, and it is absolutely rock solid so I trust it to not crash and not drop any audio.
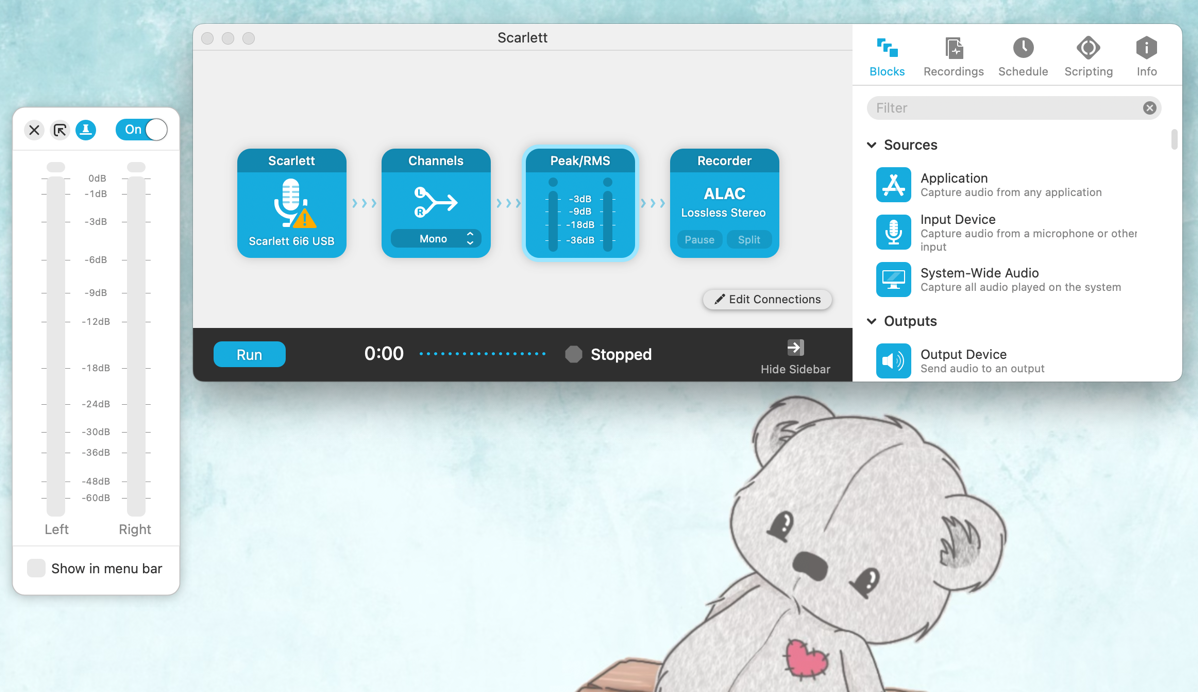
It has an interface where you build up connections, so I create what is called a new Session and drop in a Block, the first one being an input device as my source of audio. Clicking on it I get to choose my Audio Device, which for me is my Scarlett 6i6 USB interface for my good mic.
This normally will record a stereo recording with only the left channel having audio, so I next add a Block called Channels which converts the audio to mono.
Next I want to chack the levels of my audio so I don’t get too loud, so I add a Block called Peak/RMS which shows the typical bouncing lights that indicate how close I am to peak loudness. Keep out of the red and I’ll be fine. This Block has a handy feature that I can pop it out into its own window, and even pin that window to stay on top of all my other windows so I never lose sight of it whilst recording.
Lastly, I want to save the file so I add a Recorder Block. Clicking on this lets me choose the file name using variable tags such as current time, the folder to save to, the quality which I set to Compressed Apple Lossless, and some other details I don’t bother with.
Recording
With that Session set up, whenever I want to record I just need to open up the app and click Run. When I finish recording I click Stop. That’s it, and I get a great file every time, without fail.
Next in this series for the NosillaCast, I’ll go through how I make my audio broadcast-ready using Izotope RX11.

