Physics Nerd Graeme here with the final part of my mini-series on my mega-project creating A Level, or High School, Physics videos for my students. This is where I put it all together to create beautiful YouTube content using Keynote.
Keynote is a wonderful app that creates beautiful presentations, but it also has an amazing ability to make high quality videos, for whatever occasion. The obvious use-case is recording your presentation in the event you cannot do it live, but I’m using it to make YouTube and TikTok videos for my channel, Physics Shorts with Dr Sheppard. Let’s look into what it has to offer.

Initial Setup
First things first, I want to have a template so that I can make tons of videos with the same look and feel. A good template is going to have a few parts to it:
- fixed aspect ratio and resolution
- consistent title page and headings
- consistent fonts and text sizes
- colour scheme
To start then, I open a new file and go to the Document options on the far right. Near the bottom of the side panel is a section for “Slide Size”, which is currently likely to show an aspect ratio such as “Widescreen (16:9)”. Clicking on it I can select Custom, and enter my preferred resolution. Since I have chosen to do portrait videos, I type in 1080 for the width, and 1920 for the height.

Theme Colours
It’s possible to handle theme colours in Keynote, but I want my themes to be available system-wide so instead I use the wonderful macOS Colour Picker that comes with the operating system. To use it, simply go to somewhere that lets you choose the colour, and instead of picking a predefined one, look for the colour wheel icon and click on it to bring up the Colour Picker.

The great thing about this tool is that you can save your own palettes, and name them what you like, so your choice of colours is available in any app on the system. I named the palette Physics Shorts, and named the colours as well, with sensible names such as Background, Primary, Secondary, and even one called Transparent which is simply a colour set to zero opacity.
Now, when I have an object selected in Keynote and go to change its fill colour, or line colour, or text colour, I can click on the colour wheel icon and this window pops up to let me select the one I want.
Titles and Headings

For the title and headings, I have been a bit creative. I start with a pink horizontal line near the top, and my channel’s logo laying across it on the right. Superimposed on that are two transparent horizontal lines, taking up slightly different widths across the screen. Superimposed on those is another horizontal line the width of the title text, with the colour of the background, and finally on top is the title of the video. Below that is a box that contains the first sub-heading.
This complexity is to create a subtle, but neat-looking animation. I added a lens-flare animation to the two invisible lines, going in opposite directions and slightly off-set to give a dynamic glow to the title. The layered lines means the lens flare does not get hidden by anything, and it also does not seem connected to a line appearing. It’s a small effect, but brings a little bling to the video.
As soon as the lens flare ends, the subtitle’s box line draws itself as the text appears.
This is all set in my template, so by simply changing the title and sub-title, and then adjusting those two text elements to be the desired width, I have a standard format that looks cool and gives my final videos a professional feel. All from Keynote.
Templating
I talk about having a template, but I don’t actually have one, per se. What I do is create an empty Keynote presentation and name it “Keynote Template”, then duplicate that each time by selecting it in the Finder, pressing Command-D to duplicate, then pressing return to edit filename. This has the advantage of letting me make adjustments to it simply, with the disadvantage being I can make adjustments to it.
Another accommodation I make is adding a few common features for the content, such as text box set to the desired font, font size and colour, graph axes, that sort of thing.
Content
Let’s move on now to how I get content into the Keynote.
Text
The first thing is to bring in my notes from Typora. Often I could copy and paste, but I have made myself a more elaborate method to help with equations. This involves exporting the text from Typora to a Word document, which preserves the equations, opening that in Pages since that honours the Word template settings for things like font sizes and colours, and then copying and pasting it all into Keynote.

I end up with text in a standard format and a bunch of equations in MathML format.
I then edit this down, separating text into shorter chunks and positioning everything neatly around on the screen where I want them. I can also change the colour of some text as wanted, though I’d usually look at this later when everything is laid out.
For sub-headings, I duplicate the one that is already there from my template, which preserves its animations, I put the new text in, resize it, and position it on the screen.
Equations
If all the equations come across nicely, then I’m done here as they already have the font size and colour I want. Very often though, something will have gone a bit wrong. If it’s minor, I can fix it, or ask ChatGPT to fix it. Double-clicking on the equation opens up a MathML editor window and it can be adjusted in here. I tend to select-all, and copy it over to ask ChatGPT to make adjustments for me.
If it’s an alignment problem, I go a different route. The Equation Editor in Keynote will accept LaTeX as well, which is a much cleaner way to write formulas. So, I can double-click on the equation and change it to LaTeX, using its powerful typesetting. If I don’t know the way to write it in LaTeX, ChatGPT does.

Images
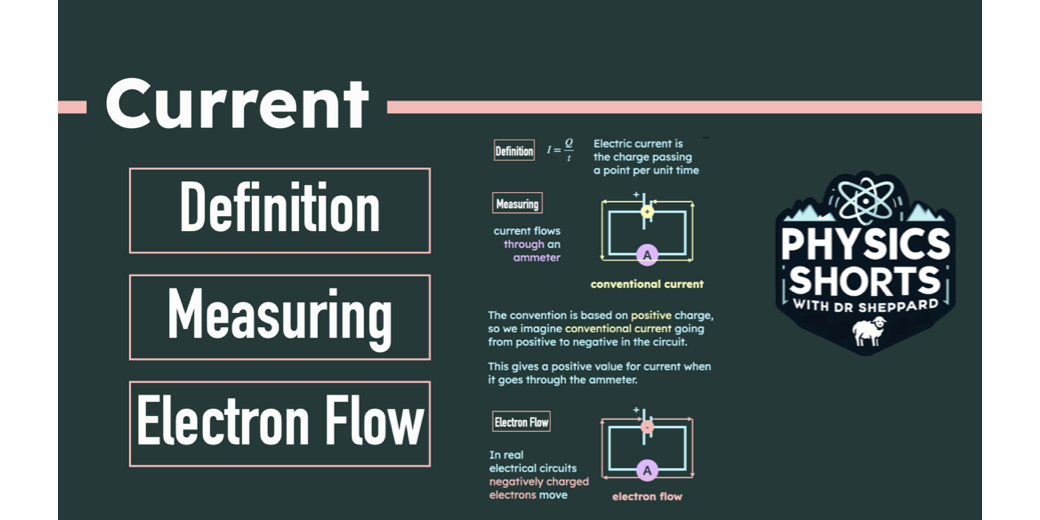
These days Keynote has a host of image shapes, but I typically only need the basics: rectangles, circles, and lines. Many more complex images can be built with these components, as long as you’re happy with a graphic art style. So, to draw an electrical circuit I need a cell, some wires, an ammeter, and a resistor. The wires are lines, and I have options of a Line, Line Arrow, Connection Line which gives a handle in the middle you can move to create a curve, and my personal favourite the Pen Tool. This last one lets you draw a free line by clicking at each position you want to change direction. Clicking on the first point completes the line to turn it into a fillable shape. Or you can press return at any time to exit the drawing mode and keep the line you have drawn so far. The best thing about this is that those points can be moved around independently, letting you refine the shape. The other best thing is that if you hover your cursor halfway between any two points, a circle appears. Clicking on it turns it into a new point you can drag around. Finally, double-clicking on a point toggles between curved and straight lines.
The possibilities with this are extensive, and if it seems tricky, be cheered by the fact that Apple provides on-screen help to remind you what you can do.

Back to my circuit. I’ll use the pen tool to draw the wires. For the cell, which is a long line parallel to a short line, I use three lines. The extra one is placed between the other two and made the colour of the background, to make a gap even if it is placed on top of the wires I drew earlier.
An ammeter is a circle with an A in it, which is simple, and a resistor is a rectangle. Both of these should be line drawings, but it looks so pretty to have them as filled-in shapes, I go the artistic route instead. So, the circuit is quite simple to draw in Keynote, and I can even animate it to appear as I describe the components.

Animations
I don’t want fancy animations with things whizzing around all over the place, but I do want movement on the screen to help draw the viewers’ eyes to where the action is. To keep it simple and unified, I use just a few of the animations available, but not the same thing over and over to try and keep a little bit of visual variety.
For text, I use the Keyboard animation, which shows an insertion point and then types each letter. The default time is always 3 seconds, so I adjust this down usually to get the words typed out a bit more quickly.
For equations, I use a simple 1-second wipe from left to right.
For large images, I tend to group things and use a dissolve to bring them in early. If it’s circular I might choose to use Iris, which reveals it from the centre.
For lines and arrows, I like the Line Draw animation that draws the image out, giving a lovely dynamic feel.
And if I want to highlight something, I might choose the Pop animation, which is not too in-your-face and has more movement to it.
To set them up I go through the objects in order adding the animation, which will default to being activated On-Click. I then go and combine some of them together, setting them to run with the previous animation or after the previous animation. If I don’t want this automatic, immediate behaviour, I leave it at On-Click.
When I first started I chained animations together using delays to get the timing perfectly synced to the audio, but I have since learned that for my 2-minute videos, it is far, far less time-consuming overall to do it manually when I record.
Anyway you want to do it, there are two parts to controlling animations. First is to select the object and open the Animate side window. At the top are three tabs for “Build In”, “Action”, and “Build Out”.
Each object can have one Build In animation, many Actions, and one Build Out animation. Beyond that, you can change the chosen animation, preview it, set the duration, set some animation-specific options, and choose its order in relation to all the other objects. But, there’s a better way to do the last bit. At the bottom of the sidebar, and easily overlooked, there’s a “Build Order” button. This brings up a new window that lets you select individual or groups of animations, drag them to change the order, and change whether or not they have a delay before starting and animate automatically or on-click. It’s really quite intuitive, and easy.

Audio
I recorded an audio file already and processed it just how I want, so I just drag that into the Keynote and it shows up as a circle with a sound icon in it (this also shown in the Animation Build Order image above). It already has a Build In animation set for it to start playing, so I use the Build Order window to drag that to the top, just after the Title’s Sun Flare animations and set it to start playing after those.
Note that video can also be added, but Keynote only has rudimentary tools for clipping the start and end, there’s no crop or other advanced things.
Recording
The recording process is also quite simple, at least for shortish videos. Under the Play menu item, there’s “Record Slideshow…”, which brings up a full-screen view with rudimentary controls. You can rewind back to the start, pause, and hit record. There’s also a scrubber to select a point in the current recording, and a mute button. The scrubber means you can rerecord sections, but I haven’t played with that.
Since I have audio inserted as a file, I mute the microphone and press record. The screen counts down from 3 in big glowing figures, and the recording starts. I wait a couple of seconds then press the spacebar to start the animations running. I get a view of the current slide and the result of the next animation, so by listening to the audio I know when to press the spacebar for the next animation to play. By doing this I can record the whole slideshow with nicely timed animations. If I get something wrong … I start again. I don’t tend to make too many blunders, so the time it takes to redo the recording is way less than the time it would have taken to set all the timings individually using the Delay option in the animation. For one of my complex ones with an animated spring oscillating, it must have taken me over an hour to get all the timings right. Doing it with my new method I just described, it would have been 10 minutes max.

Export
Now that I have a recording of the slideshow, I can go to Export To…Movie and instead of exporting the default “Self-playing” option in the Playback option, I can use the drop-down to select “Slideshow Recording”. Making sure I have my preferred settings, most notably my output resolution and 60 frames per second to get smooth animations, I click “Save…” and in under a minute, I get a high-quality video that can be used wherever I want.

Ending
So, Keynote can be an amazing tool for creating high-quality video content for YouTube, TikTok, or wherever. Even though I own Final Cut Pro and ScreenFlow, I choose Keynote for this because it is the best tool for the job. Text is crisp, objects are uniform and aligned nicely, animations are smooth, are well thought out, and the tools are easy to use. It can be more of a challenge for more complex animation needs, especially if timing is critical, but for most needs, it may just be the perfect tool.
And that concludes my series for the Nosillacast. If you want to know more about what I’m doing, you can always find me with the other lovely NosillaCastaways on Slack, so head over to https://podfeet.com/slack and say hi.
Thanks for the insight into keynote and it’s capabilities!