My Simple Elgato Video World
Last autumn, I decided to start working on a YouTube channel. I already have four podcasts that air five times a week. I don’t have a lot of time. My goal was to find a way to start in a very easy and quick way to get content completed. As Allison reminds me, podcasting is a different beast and, in many cases, a different audience. But YouTube has an amazing algorithm for discovery which podcasting does not have, and this is an opportunity to send more listeners back to the podcasts. It’s free advertising with content I already created. But can I make this as simple as possible? The first step is really to choose the right equipment from the start.
A better camera is the first step
I have some Logitech cameras, which were fine for Zoom, but when I tested creating videos, they were not as clear as they needed to be. I also had to use third-party software to adjust the panning and video size to frame the right part of the picture in the video.
Many YouTubers use DSLR or mirrorless cameras, which tend to look amazing in videos. I have a nice camera that would work, but it is complex to take on and off the mounts. To get the video on your computer, you can transfer it via an SD card or a capture card. It felt very complex, with a lot of set-up time. This was not the simple process that I was seeking.
As I started watching other YouTubers and their reviews of their cameras, I saw that Elgato cameras were a bit hit with people. Their videos looked great, and they were easy to use. I am already a big fan of Elgato products. Christmas sales were around the corner, and they had some good price drops during this time of year.
The winner: Elgato Facecam Pro, True 4K60 Ultra HD Webcam for Live Streaming – $299
Winning Features:
- 4K60 UHD with Autofocus Lens.
- f/2.0 21 mm studio-quality sensor optics, which is better for low-light situations.
- Easy software pan, tilt, or crop and zoom with excellent image quality.
- Variable Focus, up to 90-degree field of view: You can set focus manually or select autofocus. This captures a face up or an entire area or room.
- Onboard memory to save your settings.
- USB C – which is a must. With USB C 3.0 the video is uncompressed.
- Easy to use and set up, and it can just stay there.
- The software is also very easy to use.
- The quality of the picture is fantastic. It will last into the future proofing with 4K. The color is great, and the picture is clear. There is no fisheye like I saw with other cameras. I looked at other videos on YouTube that tested cameras, and this camera looked good.
- It is part of the Elgato system. The Elgato Camera Hub is a free, separate app for these cameras.
- Everything I bought from Elgato I have loved.
Runner Up: Elgato Facecam MK.2 $149 – would have been fine, but it was the same resolution I had with Logitech. I worried that someday, the world would all go to 4k, and I would have to buy yet another camera. The extra money was a lot, but the features were worth it for me in this case.
- Records in 1080p60 resolution and lower.
- 4 is good but not quite as good in lower light as the Facecam Pro
- Built-in privacy shutter which is nice!
Lights are important to look good
I needed a light to show my face in the right way. My room has Hue but area lights can give you weird and unwanted shadows.
Elgato Key Light Mini – $57
I had this vision of going camping, being in nature, and making how-to videos, so I thought this would be perfect. But in a big studio, it only provided accent lighting when I tried it, but it is still very nice for close ups.
- Portable LED Panel and easy to bring everywhere at 67 x 5.79 x 3.9 inches.
- Adjust light settings via onboard controls or the Elgato Control Center app on Mac/Windows/iPhone/Android.
- 800 Lumens and is dimmable, 2900 – 7000 K cold to warm light. It is changes color and brightness with the LED and not with external filters.
- It has a rechargeable battery. It lasts about 4 hours of light at 50% brightness. It has bypass mode and will fast charge.
The light was too small for this purpose. I need more lights. So I bought another light.
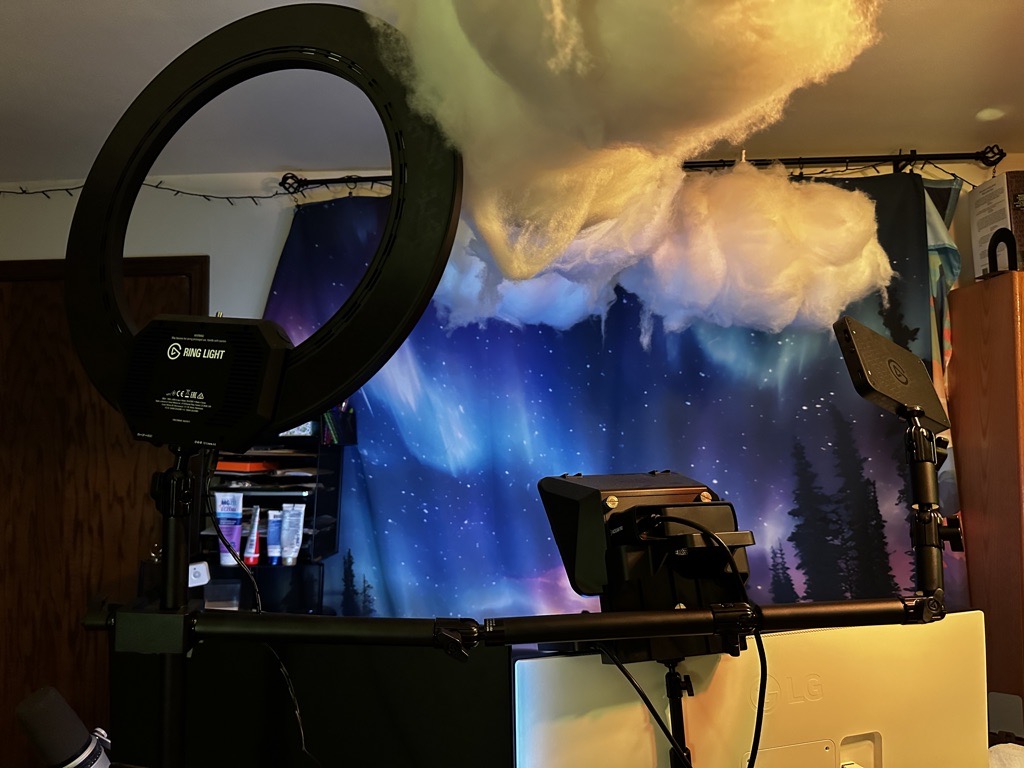
Elgato Ring Light – $99
- Adjust light settings via onboard controls or the Elgato Control Center app on Mac/Windows/iPhone/Android. Both lights work as Wi-Fi devices.
- The Ring is 17 in diameter and weighs 2.3 lbs.
- 2500 Lumens, which means it can be very bright and fully dimmable.
- 2900 – 7000 K, which means it adjusts color from sunset amber to arctic blue. The colors and light are from the LED and not external light filtering.
- No light flickering. This can be very annoying on videos.
- It has what they call “Edge-Lit with Multi-Layer Diffusion” which means it is good lighting and is easier on the eyes. I am very sensitive to bright light.
It has a stand that can reach 29 inches tall. The camera is meant to fit in the center of the ring. I didn’t realize that mounting the camera there would put rings all over my glasses. I should have thought of that, but I watched some YouTube videos and found that you can put it up very high, and it gets rid of the ring. That is what I did, and it works.
This has ample light at all temperature ranges, and I can lower it or make it blazing bright. I can pack up the other light for remote locations. The light problem is solved.
Do I need a teleprompter?
I tried some test videos, and I kept looking away at my notes and not at the camera. It was not compelling for the videos. I also started being a backup on Dave Ginsburg’s podcast panel, which is live on YouTube. I kept looking at my notes instead of the rest of the people on the podcast. Also, I noticed that I forgot to smile on video, so I wanted to see my own video to remind me. Videos, so far, were taking a lot of time. They were not very good, and it was frustrating.
I tried some iPad apps, and they worked well, but mounting and unmounting my iPad was time-consuming. I didn’t want to buy a teleprompter that was useless most of my life. Wouldn’t it be nice to get something useful when I wasn’t recording?
Solution: Elgato Prompter – $279
Features
- 9-inch display, W 8.88 x H 8.62 x D 11.10
- 1024 x 600 pixels and 1.5 lbs without the camera.
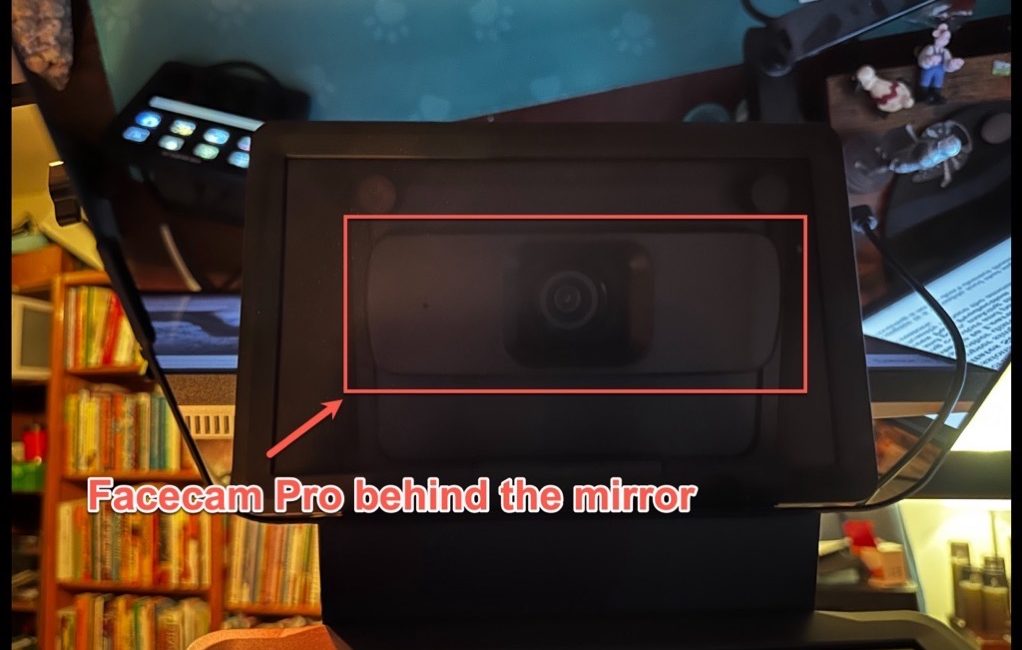
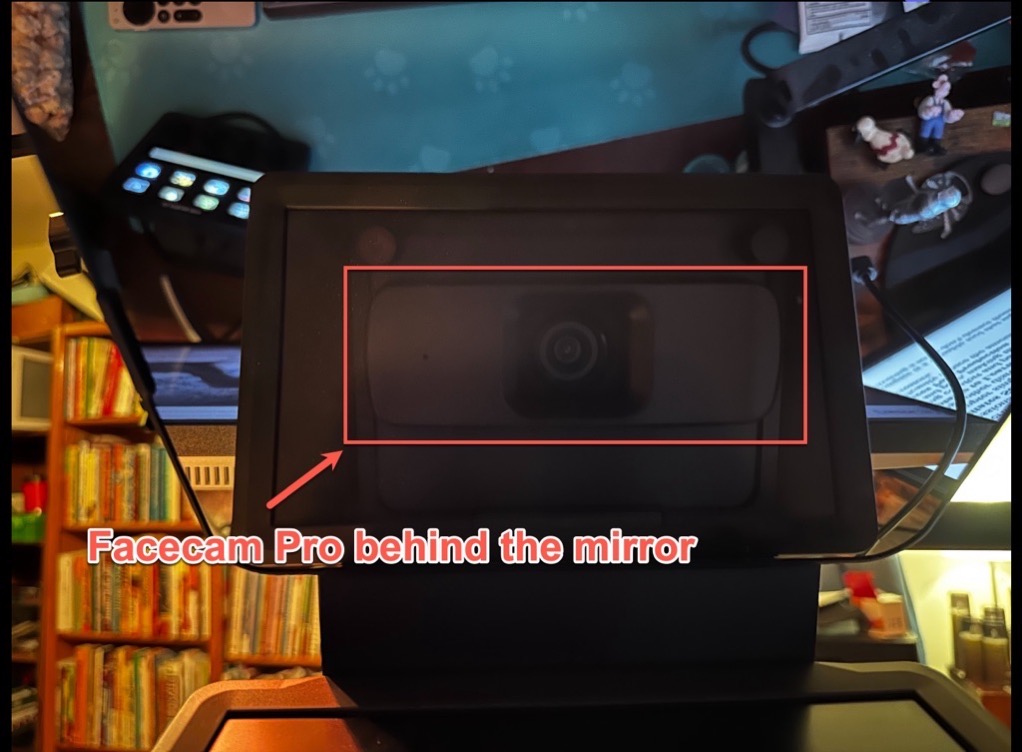
- The Prompter’s glass acts as a two-way mirror and the camera goes behind the mirror. The horizontal monitor is what reflects up on the mirror to show you whatever you intend to put on the Prompter. This ensures that the camera behind it remains unseen while reflecting the script text clearly to the speaker. When you look at the front face glass, you are looking right at the camera.
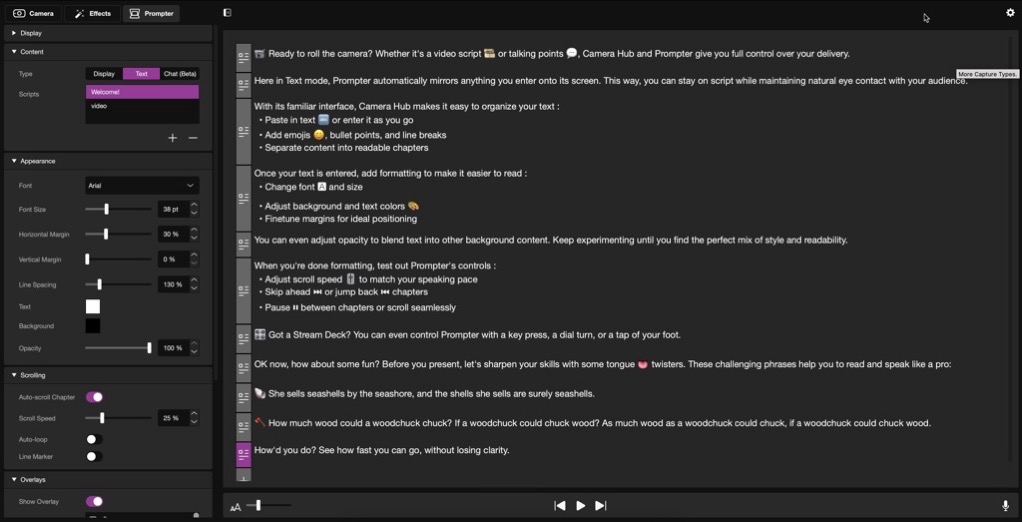
It works with DSLRs, mirrorless cameras, webcams, and smartphones. It comes with brackets that easily attach to the Prompter. It is supposed to be quick, even for DSLR cameras. - It can be used as a teleprompter with text scrolling up automatically or manually with a Stream Deck. Text is entered in the Elgato Camera Hub software,
- It can also be used as a tiny monitor and uses DisplayLink if you have too many monitors for your MacBook.
- It can be a place for Twitch chat as a feature of the software.
- It uses USB C
- You can customize text size, color of text, and background.
- No remotes other than what you set up on Stream Deck. There is no iOS apps, which can be flakey and hard to use.
The big complaint is that it does not have an auto-detect AI feature that listens to you and controls the speed. People hope this will come someday.
What it solved for me:
- I don’t have to remember what to say next because my outline is right there.
- I keep my eyes where they should be on the camera, and it is more engaging particularly when chatting with others.
- My outlines and content are more useful to me now that I just don’t go off on my own brain.
- Everything can be controlled with the Elgato Camera Hub app or Stream Deck buttons.
- I can control the speed of the scroll.
- I have a red target right where I should look at the camera.
- By getting it right the first time, I save time and improve the video quality.
- With DisplayLink it acts as another monitor. When I am not recording, this acts as a third monitor for me. I keep Telegram and Message chats on this screen so I can see when someone says something. So the device is not useless during the 99% of the time when I am not recording.
Arms
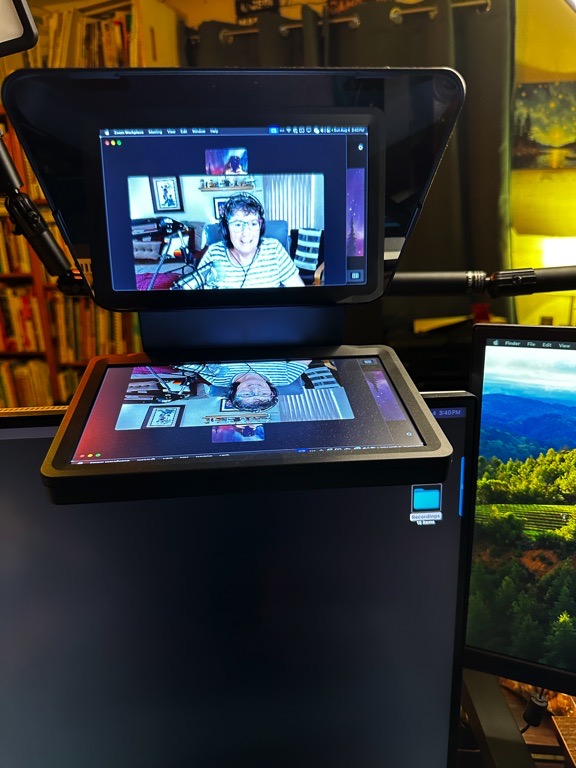
- Elgato Mini Mount – $49 – 6 inches high to 25.2. Adjust the ball head. The Prompter is heavy with the camera in the back, so I put it on this mount and rest it on top of my main monitor.
- Ring Light comes with its own stand which you can steal for other purposes. It can go 29 inches high which is great for the Ring Light.
- Elgato Flex Arm L—$39 This connects to the Tall Ring Light stand and is just a bending arm on which I can put the Key Light Mini as an access light. It tilts and bends, and it has many other uses that I use it for.
- All of these mounts can be useful for many things.
Stream Deck+ Brings it all together
I have many other Stream Decks, but the process was a bit clunky. The scrolling Prompter didn’t quite fit with the buttons on most Stream Deck models. I can also adjust lights with the rotating buttons to make them brighter, dimmer, warmer, or colder. Also, videos and audio streams are on a horizontal timeline. Wouldn’t a Stream Deck with rotating buttons be the final step to make this easier? Yes, it would!
Elgato Stream Deck+ – $199) – This was the final purchase in my aspiring video empire. It makes sense for the Prompter text scrolling so I can control it with an unobservable movement with the rotating buttons. It also allows me to zoom, go forward or backwards on the timelines while I am editing. It even has a touch screen, which I am dying to learn fun things to make this do.**
Summary
My next goal is to learn how to become a button creator with Keyboard Maestro and Better Touch tools and create amazing buttons, touchscreen navigations, and rotating features.
In the end, I threw dollars at this problem and what I got in return is a nice recording studio that is easy to use. I can set up videos in under a minute and start recording. The video looks great. The lighting looks appropriate, and I don’t get headaches from the lights. I look at the camera whether I am recording on a live show or a recorded video. The items I bought should be good for a long time or as long as any tech can live. Most of the items will be useful in many scenarios that I might try in the future, like nature or camping videos. I feel like this is a highly functional and simple solution. I am satisfied with the results, even if the price tag was high.

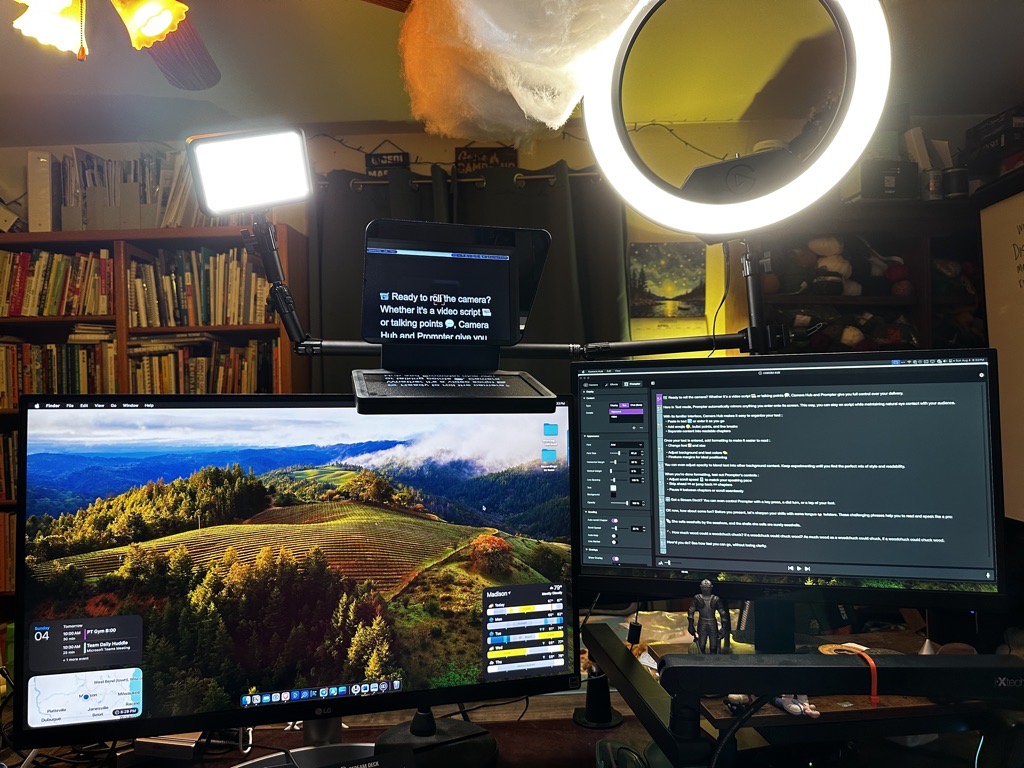
As a problem to be solved, I have two CalDigit Thunderbolt 4 Element 60W, which, plus my two Stream Decks, HDMI to USB C converter, my Shure microphones, the Facecam Pro, the Prompter. If I go live on video, either recording or with Zoom, something crashes, which might be the power overwhelming the plugged-in power source. I am not sure. I mindfully unplug my unwanted devices and put some of the devices directly into the MacBook, and it all works. But do keep in mind that perhaps there are limits to the hubs, or maybe the new devices are very beefy with their power/bandwidth demands. powered. I will someday solve this or get a third hub. There must be something I can buy!
I now have eight videos posted. I have some personal issues of being shy of the camera to get over but there is no technology in the world that can fix that! With small steps, I hope to get good at this soon! You can find out more about me at abetterlifeinsmallsteps.com or see my fledgling YouTube channel here youtube.com/@startwithsmallstepspodcast.

