You’ve probably noticed by now that I have created quite a few Tiny Mac Tips posts over the last couple of years with a goal of helping people move from adequate users of the Mac to power users. I just ran a count, and there are 53 tips posted so far and I have even more in the queue.
The Problem to be Solved
As I finished Tiny Mac Tips 9 a few weeks ago and gave a second presentation to a Mac User Group on some of the tips, I realized that improvements could be made to help people more easily navigate this body of work. Even when I wanted to find a tip, I had to refer back to my own Notion database of the tips to figure out which tip number had that particular Tiny Mac Tip. How on earth could consumers of this content ever find the one they remember hearing about? What if you wanted to send someone to my site for all of the Tiny Mac Tips – how would you do that? Before I explain the improvements, let’s look at the evolution of the posts.
History
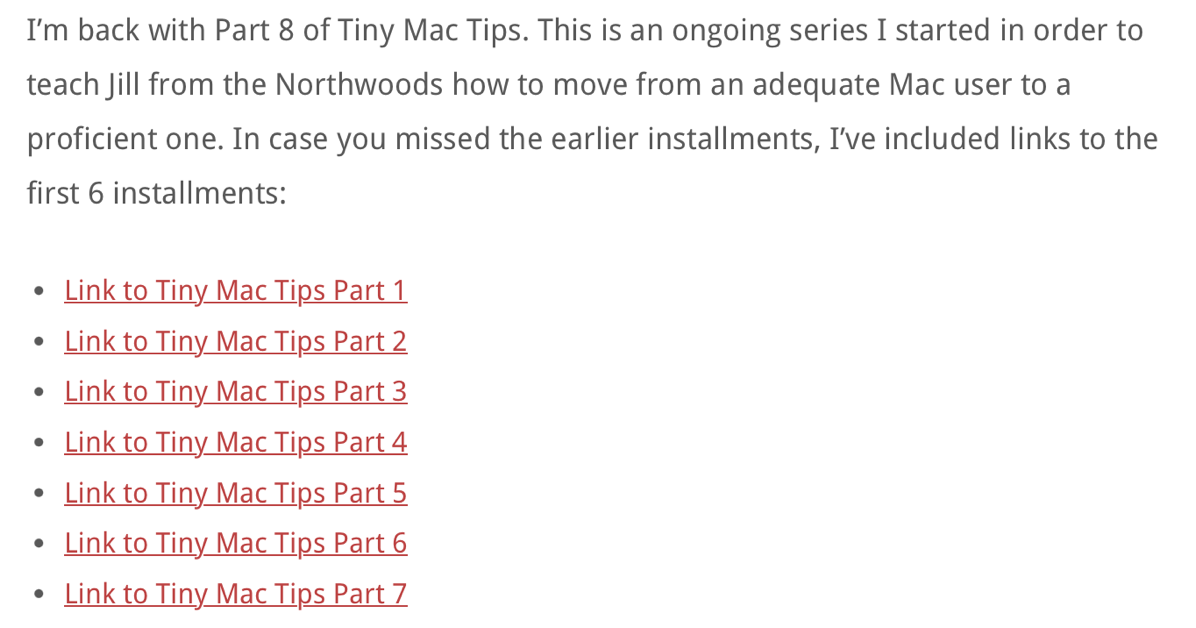
I created the first Tiny Mac Tips post not realizing these would take on a life of their own. It was pretty simple to navigate with each heading being a new tip. But after I had a few more posts published, I thought maybe it would be handy to be able to jump between the posts. They’re often separated in time of publishing by months so without some assistance it would be hard to find them all.
I decided to create links in the posts to help you navigate. At the end of Tiny Mac Tips 1, I added a link to Tiny Mac Tips 2. In Tiny Mac Tips 2 up at the top, I put a link back to Tiny Mac Tips 1. That sounds silly when you’re only talking about two posts, but now no matter what Tiny Mac Tips post you’re on, there are links to all of the previous posts at the top and a link at the bottom to the next one.

Solution 1 – Category Page for Tiny Mac Tips
That certainly helped, but then I got to thinking, what if you wanted to see all of the tips posts at once without opening every single one in a separate tab? To solve this I created a category in WordPress called tiny-mac-tips and assigned all of the Tiny Mac Tips posts to that category.
Once a category exists, it’s possible to navigate to a page that contains all posts in that category. This is how the Blog Posts and Security Bits and even the podcast pages exist. Every item on those pages has that category name. It also explains why you can see Security Bits on the Security Bits page and on the Blog Posts page – they exist in both categories. It also explains why sometimes you can’t find the most recent Security Bits post. It’s because I sometimes forget to check the box to add it to the Security Bits category.
I created the red buttons on the podfeet.com home page so that you have an easy way to see these category-created pages. If I didn’t, you’d have to remember a URL like:
https://podfeet.com/blog/category/security-bits
That’s a lot of unnecessary glop for you to memorize. The buttons mean you don’t have to worry your pretty little heads about it. I added a red button to the Tiny Mac Tips category on the home page of podfeet.com.
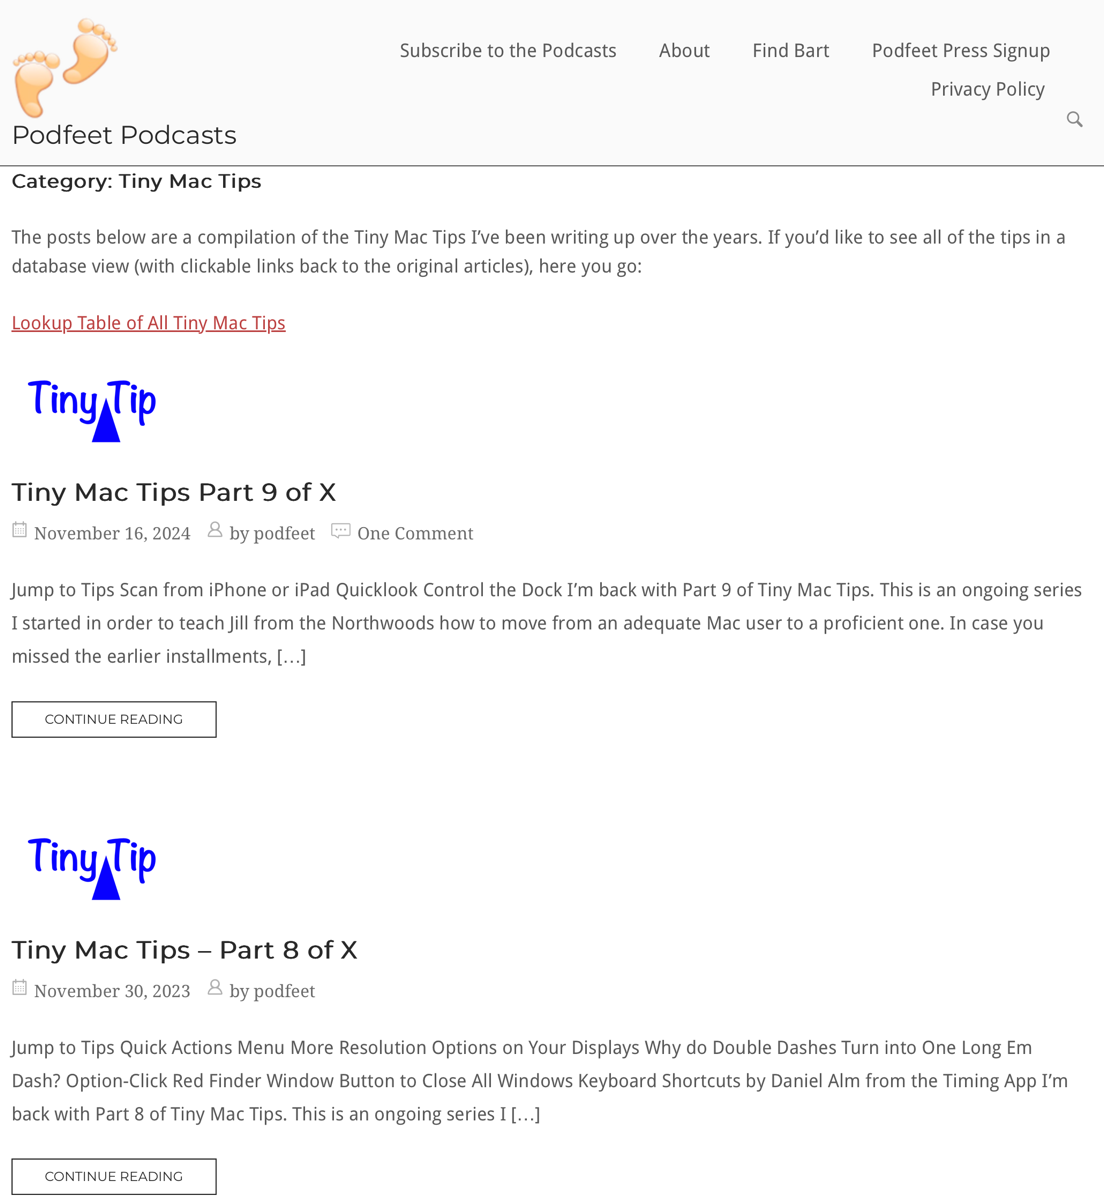
And in keeping with my “everything good starts with podfeet.com”, I went into my web server again and created a redirect to that long, gloppy, and unmemorable URL so now you can get to all the tips by going to:
Now you can get to all of the Tiny Mac Tips by that simple URL, or you can use the red button to Tiny Mac Tips, and once you’re inside any of the Tiny Mac Tips posts, you can navigate forward and back to all of the posts. But there were still opportunities for improvement.
Solution 2 – What Tips are In Each Post?
The next problem to be solved was improving how you would know which tips are in each post. Maybe you remember that I talked about how to use your iPhone as a scanner to the Mac, but you didn’t remember which post had that tip. As it stood, you’d have to navigate to every single tip post and read the entire post or at least scroll through all the headings to find the tip about scanning with the iPhone.
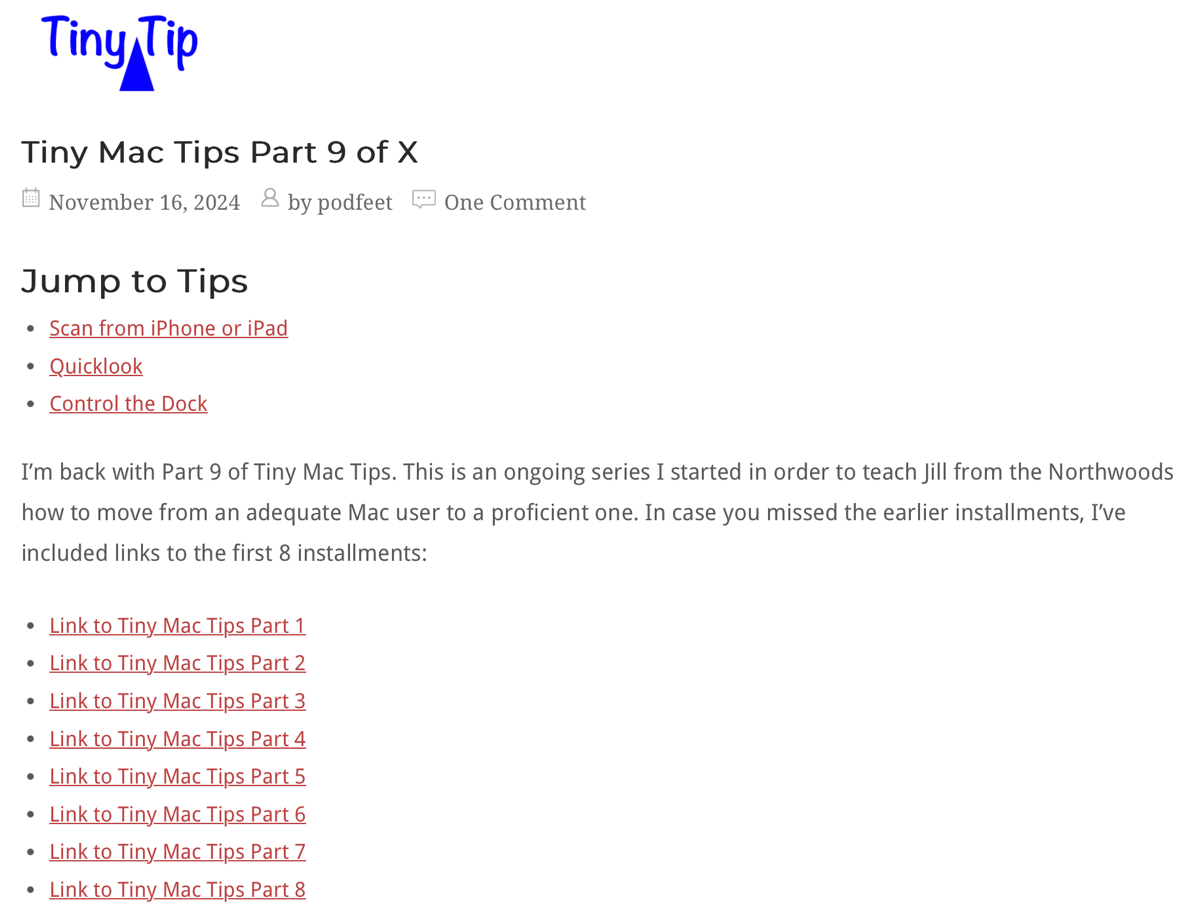
I toyed with the idea of putting shortened versions of the tip headings into the name of each post, but that got really ungainly with some of the ones with lots of little tips. I decided that it would be a big improvement if you had a little index at the top of each post where you could not only see which tips were within the post, but you could also click on the tips to jump right to the heading for that tip.
In HTML (and sort of with Markdown), you can create a special kind of link that takes you to a different position within a document (rather than linking to some other page source). I learned how to make these links ages ago, but I hate doing it because it’s tedious! But because I love you all so much, I decided to take on the challenge.
Regular HTML links start with <a href="someURL"> where someURL is where you want the person to go. These are called anchor links, hence starting with a and the href means hyperlink reference. Next, you put in a link title, which is the text the viewer will see on the page. Links need to be closed, which for anchor tags means following the link title with </a>. Putting it all together, you get:
<a href="someURL">Click here!</a>
That’s great, but someURL takes you to another web page, not a new location on the same page. To stay on the same page, we need to use a jump link. It’s pretty similar in formatting to a regular anchor link, but since you don’t have a URL to send them to, you need another method to identify the location to which you want the link to jump.
Since we want to “identify” that location, we give the location an id and then we link to that id as the hyperlink reference.
Let’s do this by example. In Tiny Mac Tips 9, one of the tips was about Quick Look. Right at the heading for the Quick Look tip, I created a jump link that said:
<a id="Quick Look"></a>.
Again I have to open and close the anchor link, but I don’t have to put anything between the opening and closing. I’m just marking a location with an id so it can be in an empty space if you want.
Now that I have a place to go with an id, I can put a link at the top of Tiny Mac Tips 9 that is a link to that ID. Instead of using a URL for the hyperlink, I put the ID I want to jump to with a # in front of it to designate that it’s an id. As the link text, I chose to put the heading title so you’d know which one I was pointing you to.
<a href="#Quick Look">Quick Look</a>
I created a heading at the very top of every Tiny Mac Tips post called “Jump to Tips” and placed all of the jump links right under it.

Now at a glance you can see what tips are in a particular post and jump directly to a specific tip. The only possible downside I see to this is that now the top of every tip page is getting pretty long with links because you have the Jump to Tips section followed by the links to the previous tip pages. I think it will be ok because you can always jump past the list of previous tip pages by using the jump links to get to specific tips.
Solution 3 – Link to Database of All Tips
I’m sure at least some of you are thinking, “This is all well and good Allison, but how do I figure out which post has a specific tip I’m looking for? Do I have to go to each Tiny Mac Tips post and look at the fancy new index?” I’m glad you asked.
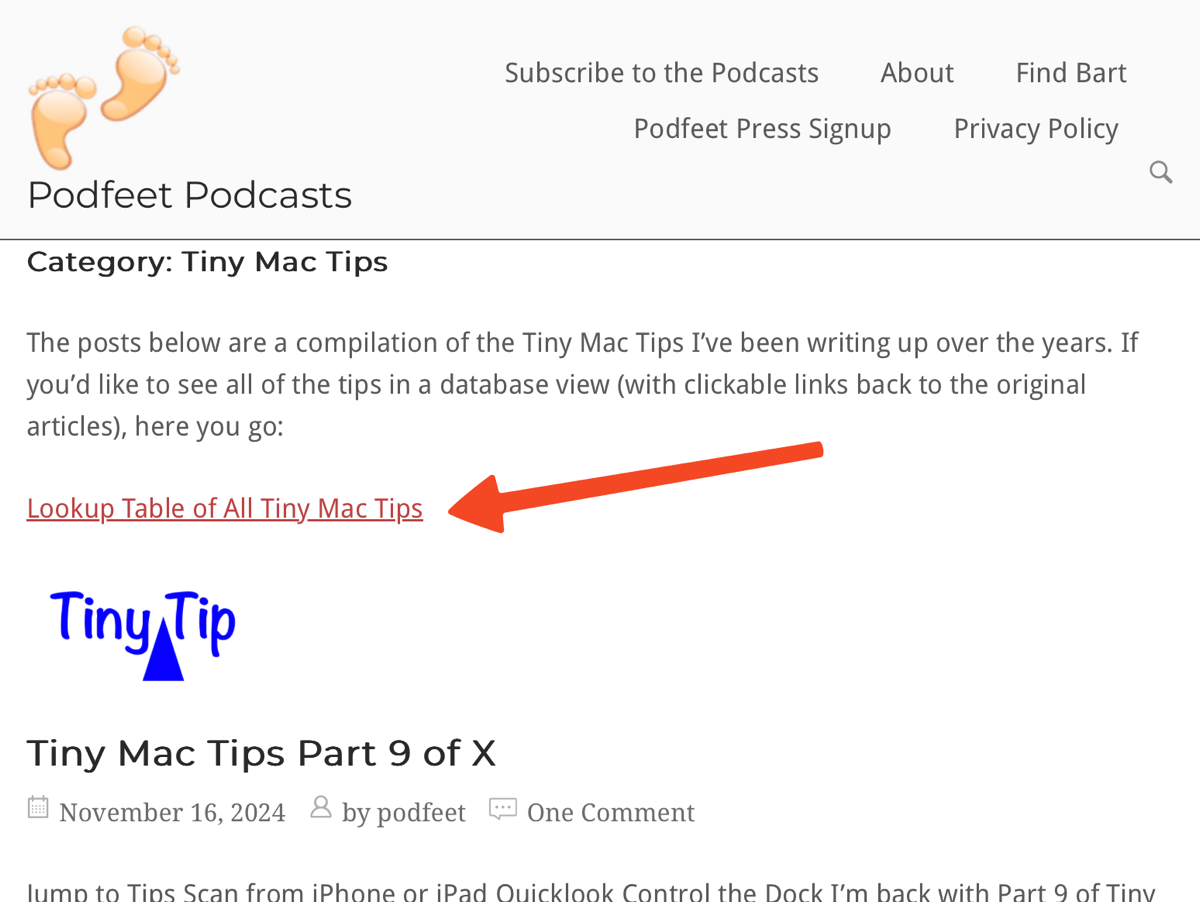
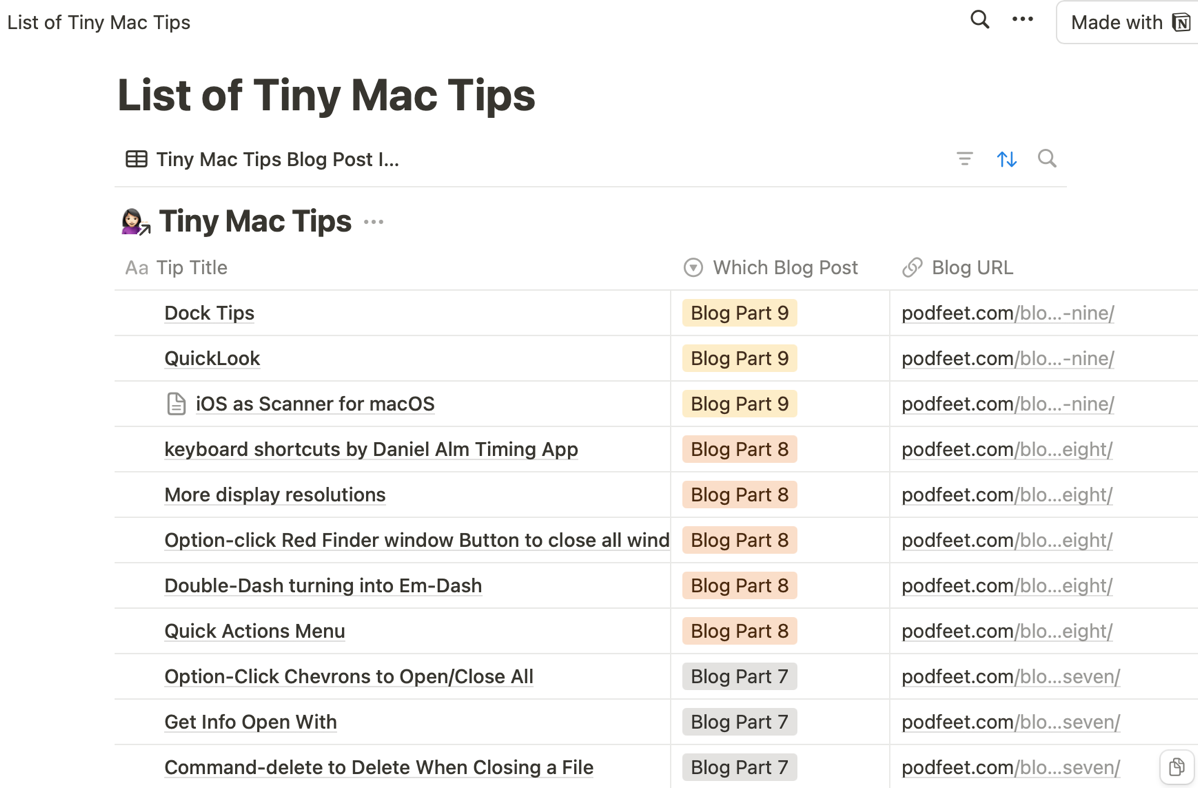
I’ve been tracking my Tiny Mac Tips using a Notion database (thanks to Jill from the Northwoods teaching me how), and it lets me publish a webpage of the data for you for easy reference. On the category page where you can see all of the Tiny Mac Tips posts, you’ll see a link to the table of tips with the post number and URL links to take you right to them.
Bottom Line
The bottom line is that the Tiny Mac Tips have been really well received and I’m pretty happy with the improvements I’ve made for you to be able to find them. You’ve got the button on the home page, an easy-to-remember URL with podfeet.com/tinymactips, every page has links to the tips within and previous/next tip pages, and you’ve even got a table to find the tip you’re seeking.

