Steve’s Camcorder Setup for Interviews
If you’ve enjoyed watching Steve’s videos of our interviews at CES and CSUN’s Assistive Technology Conference over the years, the quality of the video you’ve been watching is due to his Panasonic HC-WXF991 4K camcorder. Its large 1/2.3″ CMOS gathers a fair amount of light but struggles under really low light conditions, which is common in some of the CES venues. It also has challenges in changing light conditions, such as a bright monitor coming into view.
The biggest advantage of his camcorder is the 20X optical zoom. It was the key feature behind his spectacular videos from our Africa safaris. But that 20X zoom doesn’t provide any advantages in doing interviews in hotel ballrooms.
For a powerful camcorder, it’s relatively light at 351g (.75 lbs), and compared to camcorders of old, it’s pretty small at 9″x9″x4″. However, he has to add a lot to the setup when we go to the conferences.
To get high-quality audio for the videos, we use the Audio-Technica System 10 digital transmitter mic and receiver. The receiver is bit bigger than a box of cards, and slides onto the cold shoe on top of the camcorder. To hold it there, there’s a threaded piece that needs to be tightened down four or five turns. The receiver has two antennas that fold out to enhance the signal reception.
The transmitter microphone looks pretty standard but is powered by two standard AA batteries. Steve can confirm the connection to the mic on the receiver’s display and the remaining battery level. We could put in new batteries every event, but that’s a lot of e-waste, so we go as long as we can with each pair. It’s a tradeoff, so every day and a half or so, we have the hassle of replacing the batteries in the middle of a press event. We moved to this fancy “new” digital audio system in 2015, a decade ago.
Once you add the receiver to the camcorder, now it becomes reasonably heavy to hold by hand during interviews, so Steve uses a monopod to support it. While recording interviews, Steve has to stand back a bit because the angle of view isn’t very wide. This creates a challenge in the press events because people often walk between me and Steve without realizing we’re recording. If you’ve kept a watchful eye on our videos over the year, you may have noticed me making some weird hand motions as I’m physically pushing someone out of the frame!
A few years ago, I bought Steve a wide-angle lens to screw onto his camcorder to help solve this problem. It worked well, but it added even more weight to the system and even more time to screw it on during setup.
While the monopod helps support the camera and gives you stable video, its length makes it very difficult for Steve to push in with the camera to get a quick closeup of what the interviewee is trying to show us.
Let’s review what Steve has been carrying in his backpack to CES. He has to carry:
- Camcorder
- Transmitter
- Receiver
- Spare camcorder batteries
- Spare AA batteries
- Monopod
Setup involves getting the camcorder out of the case, sliding on the battery, screwing the receiver on top with the threaded mount, attaching the audio cable from the receiver to the camcorder with several service loops to take up the slack, plugging in a mono headphone cable to the camcorder so he can monitor my voice, screwing on the wide-angle lens, extending the monopod, screwing it onto the camcorder, powering up the camcorder, powering up the mic receiver, checking channels to make sure we’re communicating, and we’re ready to go.
The whole process takes about 5 minutes, and of course, breaking down is the reverse of the whole rigamarole. For the press events at CES and CSUN, we just set up at the beginning and then break down at the end of the event. One of the reasons we don’t do a lot of interviews on the big show floor is it’s just not worth the overhead of setting up and breaking down.
The pros of this setup are that you get high-quality video and audio for the interviews which is the most important thing. The cons are it’s very heavy and bulky for Steve to carry, and the setup and breakdown process denies you any spontaneous interviews.
My Wandering Eye
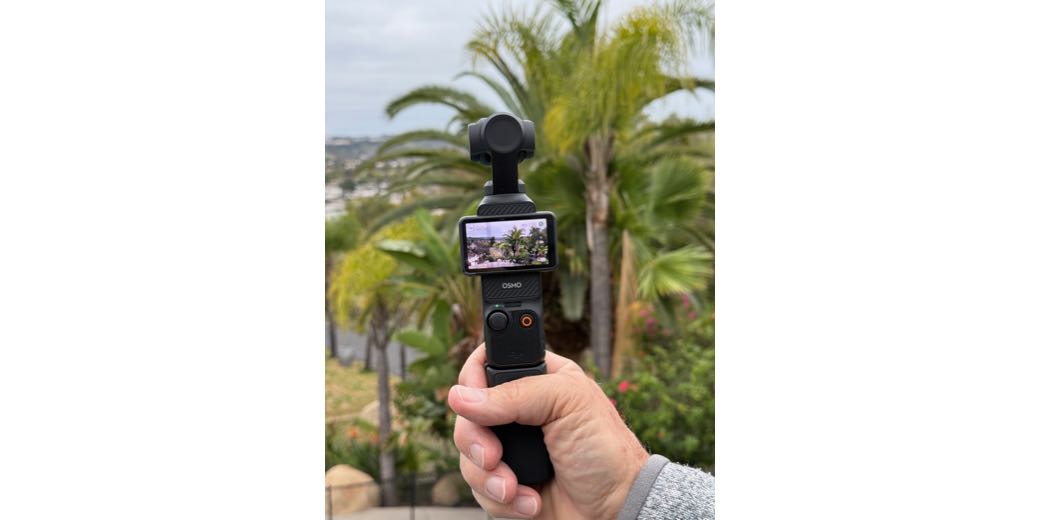
Over the few months leading up to CES earlier this year, my friends started talking about an intriguing little camera, the DJI Osmo Pocket 3. Pat Dengler has the Osmo Pocket 3, and Robb Dunewood bought one just for CES. As we lugged around (well, as Steve lugged around) his giant backpack of gear for recording, here’s 6’5” former defensive tackle Robb Dunewood carrying this tiny little camera about the size of three fingers.
Four things prompted me to start looking at the Pocket 3:
* Saving Steve’s aching back
* Steve’s birthday was coming up in April
* CSUN was coming up even sooner which would be a perfect test case for whether this tiny camera could replace Steve’s rig for CES
* We have a trip to Japan in April where a small video camera might be fun
The DJI Osmo Pocket 3
Before I go much further, I really should describe the DJI Osmo Pocket 3 (to be called Pocket 3 from here on out.) Picture a 5.5″ long rectangular device that’s 1.7″ x 1.3″ in cross-section. The top is a tiny gimbal holding the small camera. Along the length of the handle is a 2” touchscreen. If you rotate the touchscreen 90° so it’s perpendicular to the handle, the gimbal and camera spring into life. The entire thing weighs 179 g or 6 ounces.

The Osmo Pocket 3 is $519 and comes with a few accessories. The base package includes a protective cover that easily snaps onto the camera and a short handle you attach via USB-C to the bottom of the handle. This short handle makes it a little easier to hold and adds a standard 1/4-20 thread mount for mounting on a tripod.
Both Robb and Pat suggested I consider buying the Osmo Pocket 3 Creator Combo for $669. In addition to the protective cover and the short handle, it also comes with a longer handle that is also a battery. Pat said that the Pocket 3 is so small that it’s a little hard to hold in the hand and reach the record button and the little joystick, so adding the battery handle helps even more than the short handle with ergonomics.
The Creator combo also includes a mini tripod, a carrying case, and probably the most important accessory, a DJI Mic2 wireless transmitter. This itty bitty mic is no bigger than a box of Tic Tacs. The Mic2 transmitter has a built-in clip to attach it to your collar and a tiny but powerful magnet if you want it lower on your shirt. It automatically transmits the audio wirelessly to the Pocket 3. When all of these accessories are packed up, the included case literally fits in the palm of your hand.
Deciding to Buy
Normally, I would do research on a big purchase like this with Steve, but I wanted it to be a surprise. As I read about the Pocket 3, watched videos about how awesome it was, and saw videos Pat had taken at Disneyland with it, I started to think it might be a viable solution for Steve. The one thing holding me back was whether this tiny camera would be able to do well in the challenging lighting in hotel ballrooms for CES press events. It’s not just low light; it’s overhead lighting that has a nice ghastly yellow tint.
Could this tiny camera possibly have a sensor big enough to gather the amount of light gathered by the big boy camcorder’s sensor? I looked up the specs on both cameras and found the answer, but the way sensors are described is kind of weird.
Steve’s Panasonic HC-WXF991 camcorder has an image sensor specced as 1/2.3″. Using simple fractions, you’d think that’s a little smaller than a half-inch. But you’d be wrong. The Pocket 3 specs say its sensor is 1″. You probably think that means it’s 1″. But again you’d be wrong. I’m not going to go through the background to explain this, or even the math to get to the correct answer.
- The camcorder’s 1/2.3″ sensor measures .3 inches diagonally.
- The Pocket 3’s 1″ sensor measures .7 inches diagonally.
To put it more simply, the sensor on the diminutive DJI Osmo Pocket 3 is significantly larger than the Panasonic camcorder, which means surprisingly it should be able to outperform the camcorder in our challenging recording environments.
I still wasn’t convinced, so I asked Robb if he could send me a link to some of the video interviews he recorded at CES with his Pocket 3. I was blown away at how great they looked! I was pretty darn sure Steve would be really happy with this very early birthday present, and I was right.
Learning the Pocket 3
I gave Steve the camera before CSUN as planned and he dug into learning it straight away. I downloaded the manual and even printed it out, but to be perfectly honest it was easier to learn by watching online videos.
Turning on the Pocket 3 is super simple — you just rotate the touch screen 90°, and you’re in business. The controls for the camera are accessed by swiping down, left, right, and up on that screen. Steve took to it quite quickly because of his experience with GoPro cameras. The controls aren’t the same but the gestures are very familiar to him.
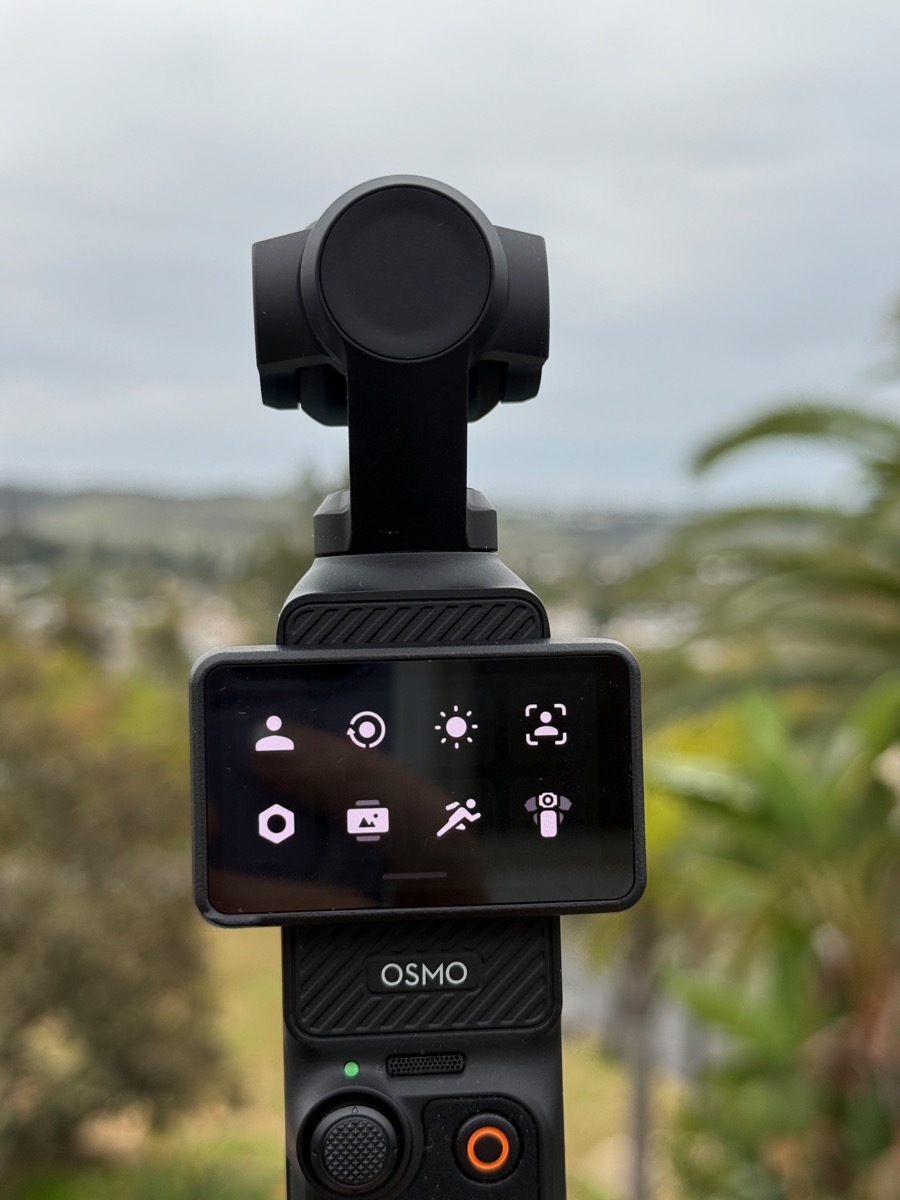
The gimbal is one of the best parts of the camera because it helps stabilize the image so there’s no camera shake or tilt. The gimbal has several different modes, and I’m not going to go through all of the ones we experimented with. There’s a mode that does face tracking which is great if you’re doing a selfie video, but we settled on the one that keeps the horizon stable but doesn’t track the subject. Steve needs to be able to point the camera at me and the person I’m interviewing, but then also to nimbly pan the camera to the product we’re talking about.
Speaking of “nimbly,” you can change the speed at which the gimbal reacts as you swing the camera around. If Steve were to violently swing the camera down to look at the ports on a battery system and then whip it back up to look at me, ideally, the gimbal would slow down his movement to smooth it out. With the speed controls on the gimbal, Steve can choose to have the camera slowly follow his movement, go at medium speed, or go quickly to his new position. We did some experiments, and the fast setting best met our needs, but he’ll have to be careful not to move too quickly, or the video could get a bit jerky. He’s got a lot of practice doing smooth pans without a gimbal, so I think we’ll be ok.
It also helped to watch Robb’s first video attempt at CES to cement the fact that we didn’t want face detection. As I mentioned, Robb is 6′ 5″ tall. He doesn’t have a videographer as I do, so he put the Pocket 3 in selfie mode and held it at arm’s length with the camera in face-tracking mode. It would have been perfect except the gentleman he was interviewing was a full head shorter than he was. The camera locked onto Robb’s face so he was perfectly centered, but that left the other gentleman basically with his chin resting on the bottom of the frame. As I said, this was Robb’s first attempt so it was a learning experience for him and we were glad we saw it before we did our tests.
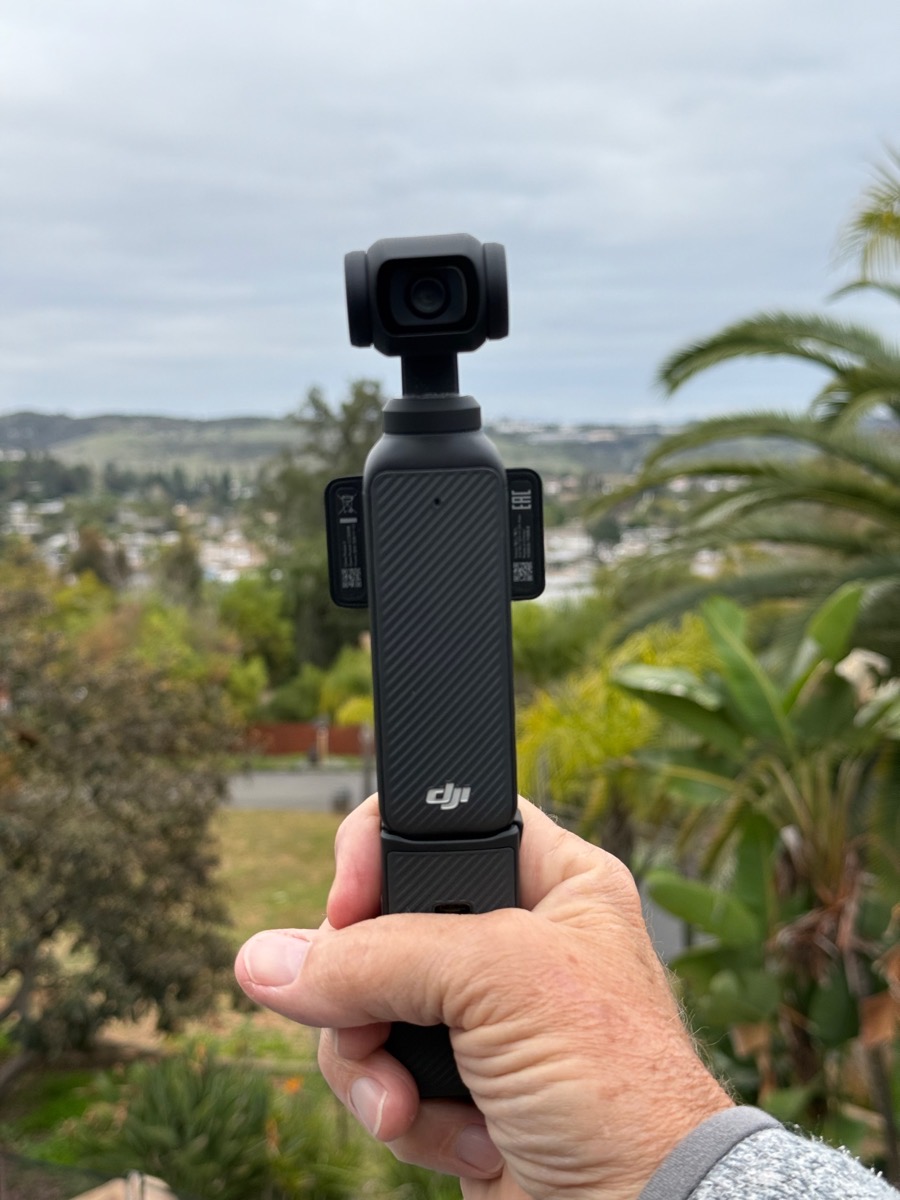
When explaining Steve’s camcorder setup, I explained that he monitors my audio from the wireless mic using a mono headphone plugged into the camcorder. This is easy with the Pocket 3. The camera has a USB-C connector on the bottom where Steve can plug in a headphone adapter to monitor the audio from the Mic2. If the battery handle is connected via that USB-C connector, the handle has another USB-C connector that supplies the audio signal. It looks a little dopey, though, as the USB-C port is on the side, so the adapter and headphone cable are sticking out towards the subject.
The Tic Tac-sized Mic2 transmitter would be pretty weird to hold in my fingertips to do interviews, so Robb recommended a cheap mic handle stick thing that has a slot into which you can slide the Mic2. We were able to add my fancy NosillaCast mic flag to the stick. It makes this Mic2 look like a big-girl mic.

We spent a lot of time reading up on out how to make the Mic2 connect to the camera. All that research time was wasted, because you turn on the Mic2 and the camera recognizes it. Seriously, that’s it.
With the mic connected, Steve can see the bouncy level lines for the audio-in to verify the levels are good.
When Steve used to record with his big-boy camcorder, he would have to give me a hand signal to tell me when he started recording. But with the new Pocket 3, my Mic2 vibrates as soon as he hits record, so I already know he’s ready. We’ll probably stick with the hand signal just because we’ve been doing it so long, but it’s cool that I have that vibration to let me know it’s time to start the interview.
With the Pocket 3 paired with a DJI Mic2, the Pocket 3 records the audio and video to a microSD card. Additionally, the Mic2 transmitter automatically stores a backup recording locally to its internal storage. It was a nice surprise to have this backup.
The audio quality of the Mic2 transmitters is really quite good for video interviews. I wondered if maybe it would even be good enough to use as my road mic when down at Lindsay’s, but it wasn’t quite up to my standards for that use. Pretty good but not good enough.
Charging
The USB-C connector on the bottom of the camera can be used for data transfer and for charging. The battery handle’s USB-C connector can also be used to charge it. If the camera is less than fully charged, connecting the handle will charge the camera back up, depleting the battery. The Mic2 transmitters have USB-C ports for data transfer and charging.
Mini Tripod
The Mini Tripod that comes with the Creator Combo is adorable. It isn’t much bigger than your thumb and weighs practically nothing, but it gives the Pocket 3 a nice stable base. You can’t connect the tripod directly to the Pocket 3 because the camera only has a USB-C connector on the bottom. Both the standalone camera and the Creator Combo come with a mini handle that plugs in via USB-C, and sports a 1/4-20″ thread for attaching to tripods. If you buy the Creator Combo and get the battery handle, it also has the threads to attach to a tripod.

Wide-angle Lens
The Pocket 3 supports adding additional lens adapters to the camera. They’re wee tiny (since the camera is wee tiny), and they magnetically snap on in front of the camera lens. The Creator Combo comes with a wide-angle lens you can pop on to expand the field of view from 92° to 108°. As it turns out, the 92° field of view of the Pocket 3 is well wide enough for Steve to easily capture the interview subjects without having to stand back very far, so he didn’t use the snap-on lens.
Steve also bought a magnetic variable neutral density filter on Robb’s recommendation. He explained that in outdoor filming, that big sensor gathers a little too much light. If you want a shallow depth of field, you need to stop the sensor down a bit so the aperture can open up more. We haven’t tested out the $18 third-party filter from K&F yet but it looks pretty nifty.
The base model and Creator Combo both come with a protective plastic case, and there’s even a little magnet inside to hold any of the available magnetic lenses DJI and third parties sell.
Real-World Use at CSUN
Ok, enough description of the camera, let’s talk about real-world performance at the CSUN Assistive Technology Conference. We’re happy to confirm that the video quality is fantastic. It did a surprisingly good job of automatically adjusting video settings under terrible lighting conditions. One of the problems Steve has had in trying to take videos at trade shows is that he often has to shoot the interview with giant video screens in the background. Inevitably the exposure changes to make the display look good causing the faces to be super dark, or it exposes the faces and then the video screen is blown out.
While at CSUN, I was chatting with someone in front of a bright screen and he was delighted to view the recorded footage because the Pocket 3 did a fantastic job of exposing both at the same time. One reason for this is probably the advancements that have been made in digital signal processing in the years since his camcorder was first developed, but it was still a delight to see how well the Pocket 3 performed.
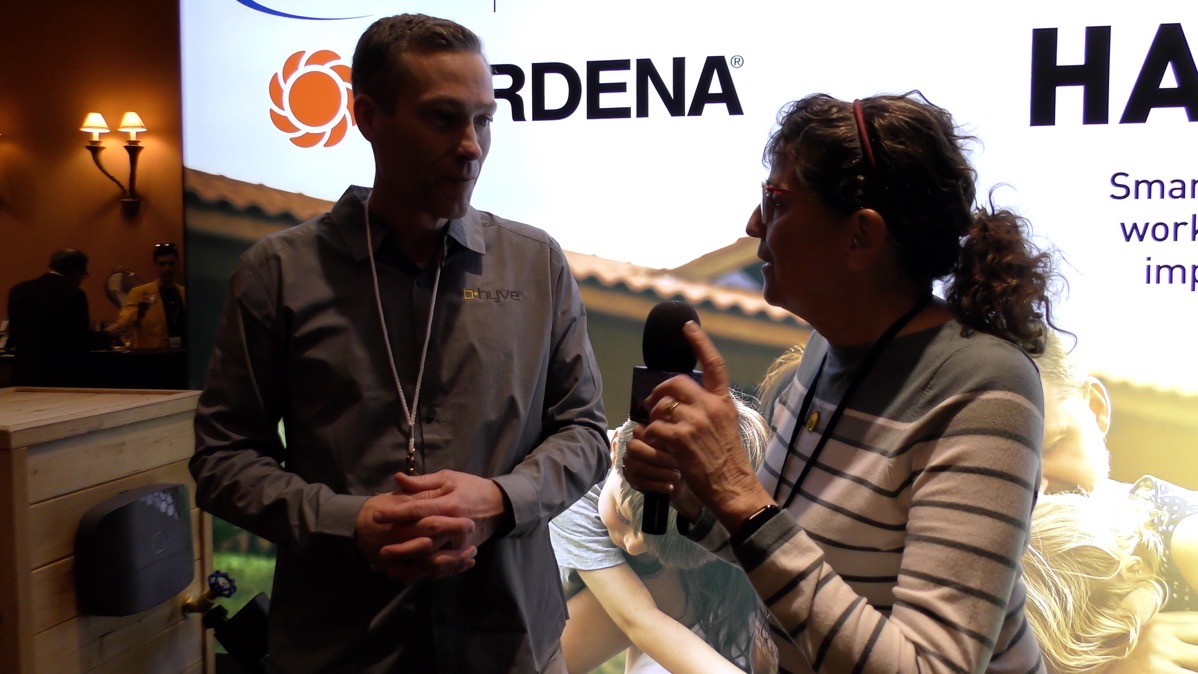
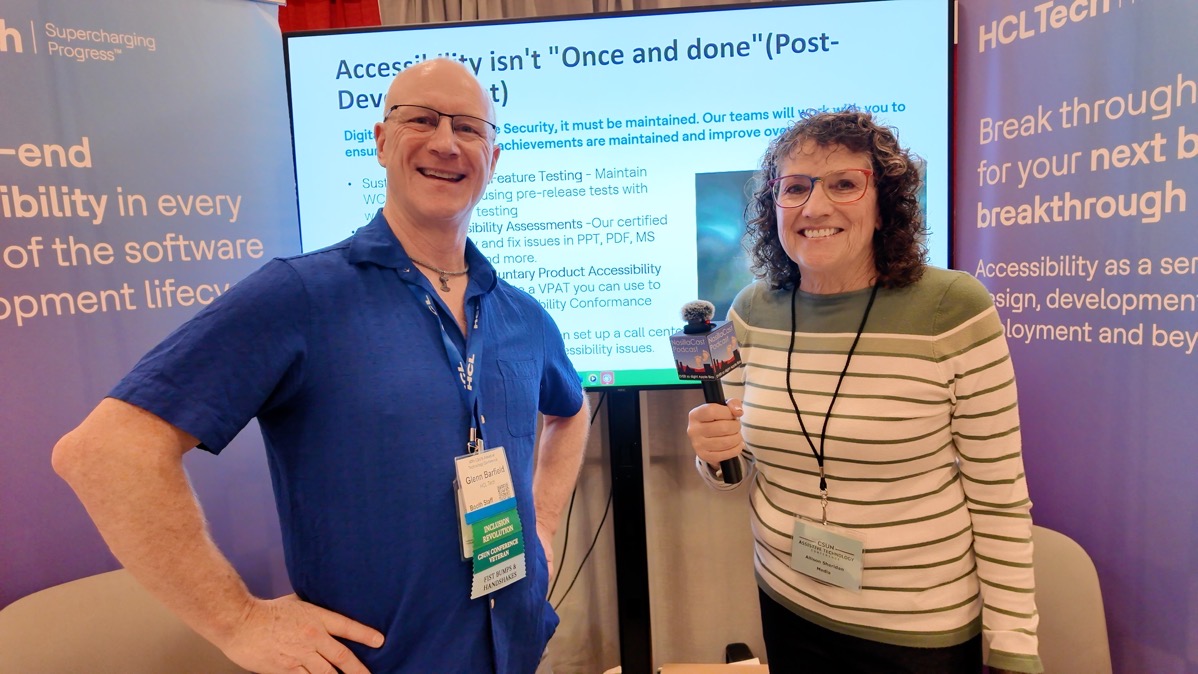
The audio sounds great too, and we confirmed that we have a full backup of the audio on the Mic2 transmitter.
After one of our first few interviews, we were walking away and Steve was swiping on the screen to perform some function when a trash can appeared. He tried to swipe it away and inadvertently hit it instead. To our dismay, the file was deleted, and there is no trash can to go back to if this happens. Luckily, I had told the guy we’d just interviewed that we had a new camera and were still learning it, so when we went back he was quite gracious letting us record again. Steve learned to be very cautious if that trash can pops up again!
When we were doing practice recordings at home, Steve found at one point that he couldn’t hear me through the his mono headphone. We swapped out the USB-C to audio jack adapter and that didn’t fix it, and we swapped out the headphone itself but he still couldn’t hear me. At some point, the problem went away but we didn’t remember what fixed it.
I bring this up because while we were at CSUN, it happened again. Luckily, Pat Dengler was with us at CSUN, so we started troubleshooting with her. She suggested Steve unplug the battery handle and plug the headphone adapter directly into the bottom of the camera. He could hear again. We figured out that the reason he lost audio was that the battery handle was completely depleted. Without power on the handle, it couldn’t transmit the audio signal to the headphone. We don’t know whether this was the same cause of the failure when we were at home, but it might have been. At least we know what the problem is now.
We were surprised that the battery handle depleted in just a couple of hours. We looked up the specs, and it’s only 950mAh. I happened to have my 10,000mAh battery with me, so I was able to recharge it for use again after lunch, but that seemed a silly solution. When we got home, Steve just bought another DJI battery handle for $69 on Amazon. There are less expensive battery handles from third parties but we stuck with DJI for this.
That also made us go look up the battery specs for the camera itself, and it’s only 1300mAh. I know the camera’s big benefit is how small and light it is, but I expected we’d be able to record the 4 or 5 hours we were at the show with the battery handle attached. The spare battery handle doesn’t weight that much but it does diminish the simplicity of what Steve has to carry.
I mentioned early on that the giant camcorder on the monopod made it hard for Steve to push in really close on a piece of electronics to get a tight shot. With the Pocket 3 it was so much easier for him to move in and out and the gimbal kept the horizon steady and the video panning nice and smooth.
Bottom Line
It’s time for the bottom line. While the 20X optical zoom of Steve’s camcorder was priceless for capturing a cheetah in a tree a quarter-mile away in Africa, for doing interviews at tech conferences, there’s no question that the DJI Osmo Pocket 3 with Mic2 Transmitter is a much better solution. It’s lighter, it’s smaller, it’s less complex to set up, it has vastly improved low-light performance, the transmitter captures a backup recording of the audio, the camera’s gimbal mount provides smoother motion, it doesn’t require a monopod to hold for long periods, and the entire kit has rechargeable batteries.
At $669, the Pocket 3 Creator Combo isn’t cheap, but to replace Steve’s camcorder with the current model from Panasonic would be $800, and that doesn’t include the microphone transmitter, receiver, and monopod.
We’ll have to keep an eye on the battery levels, but overall Steve and I are delighted with the DJI Osmo Pocket 3 and Mic2.

