One of the great things about being a tech blogger and podcaster is that just about anything I think is interesting has been fully documented. If I can’t remember how to do some complex technical task and I’ve ever accomplished it before, I’ve got a blog post about it. Half the time I forget that I’ve done it before and when I do a search I find my own posts which is awesome and embarrassing at the same time!
In October of 2016 I did a nuke and pave (also known as a clean install) and I documented the major steps in a blog post. That nuke and pave was forced because after a hardware repair my 2013 MacBook Pro had an empty hard disk.
This time I’m doing it on purpose. My 2016 MacBook Pro which received that clean install 2 years ago is starting to struggle and I know it’s because of all the cruft that builds up over time. I preach a nuke and pave every year, but like everyone else, the task is daunting so I do put it off, even though I know the payoff is huge. Let me explain what pushed me over the edge.
Who Would Jump to a New OS This Soon?
You may think I’m bonkers jumping to a new operating system within days of its release for my production machine, but I’m not as nutty as I may sound. When I bought the new MacBook Pro in 2016, I kept my 2013 MacBook Pro around for just this kind of situation. I knew I could run the new OS on the other Mac, and test out my mission-critical software before jumping to Mojave on my production machine.
I started by creating a Numbers spreadsheet with priority 1, 2 and 3 apps listed and found definitive answers on Mojave compatibility from each vendor where I could. For the less critical apps, I trusted my own testing.
But here’s why I thought it was really time to do the nuke and pave. As I did this testing on my 5-year-old MacBook Pro, I discovered that Apple Photos was way way way faster than it is on my 2016 MacBook Pro. That just ain’t right. I wasn’t sure what the root cause was, but I looked at that darn beachball constantly when I’m doing the most trivial operations. Deleting an image can be a minute or longer some days.
Testing
On Tuesday Steve and I tested the live show, which strains my Mac the most, and Mojave caused me no problems at all on the older Mac. On Tuesday night I decided to rip the band-aid off and do that clean install on my production Mac I’ve been promising myself I would do, “when I had time.”
The good news is that in October of 2016 I documented the critical and tricky pieces of my clean install process. There are so many odd little things to remember, like installing homebrew from the command line so I can install the command-line apps that make my home-made ID3 editor function. Or where I got the Century Gothic font of which I’m so fond (spoiler, it comes with Microsoft Office.)
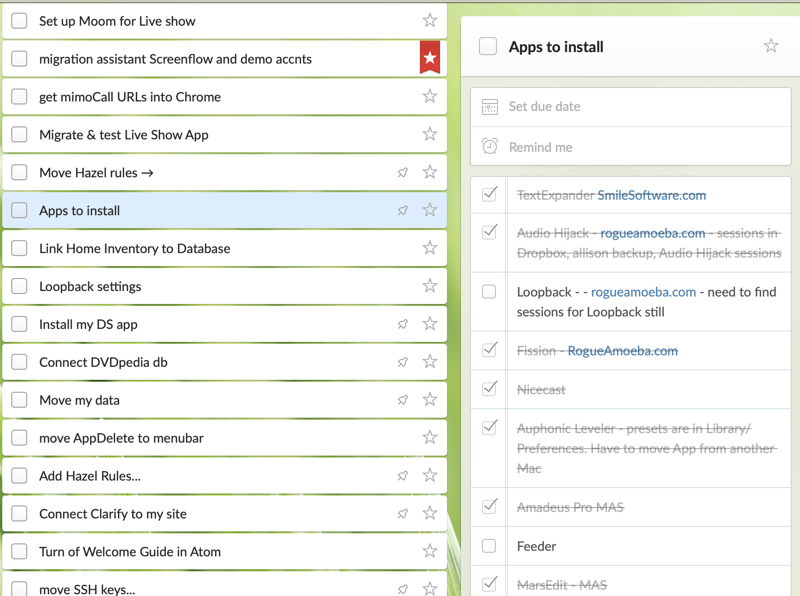
The other great thing I discovered in rereading my blog post and which had completely slipped my mind, was that I had put ALL of the steps into a Wunderlist! Not only that, I had one entry that said “install apps” and within that were subtasks with each and every application I needed to install.
It took a bit of time to cross reference my current list of mission-critical apps against those I’d recorded in 2016, but it was a darn site easier than starting from scratch!
I thought it might be fun to document the metrics I covered in 2016 too. In 2016 I said that I started with 242 apps before the clean install and only had 80 right afterward. Today I’m starting with 224 apps. Interesting that I’m starting with 18 fewer apps.
The last time I did this, my Library folder went from 136GB to 12GB after the clean install. Since then, I’ve been running an app called Clean Drive from within the $20/year Parallels Toolbox and it regularly tells me when things like cache files are stacking up, so my Library folder was only 12GB before the clean install. I’m starting to feel like I’m running a clean machine!
My disk is twice as big on the 2016 MacBook Pro at 2TB, and I’m using 1.11TB of that. I didn’t record how much I was using in 2016. I simply said that after the nuke and pave I was using 200GB less space. That’s a shame, I would have liked to compare those numbers too.
Backups First
I have been making a bootable backup to my machine using SuperDuper! for ages. I use a 1TB SSD to run the backup. You’ll notice it’s smaller than my internal drive, so I have to eliminate some things in the copy script. I tested my bootable backup, only to find that I had eliminated all applications! Not only that, somehow I managed to make a bootable backup that didn’t even have System Preferences.
I do have a Time Machine backup now on my Drobo (but it whines pretty regularly that it wants to start over, so that’s sort of a last resort backup. I have a Backblaze backup too, but that’s not a great solution for rebuilding my machine.
When we did the great Drobo migration of 2017, we bought new drives for the Drobo 5N2 (which by the way has been performing flawlessly), so I actually ended up with a couple of leftover 2TB 7200RPM spinning drives. I grabbed one of those and the WAVLINK USB dual-bay disk caddy I bought for Steve to use to erase the drives after they came out of the Drobo. I hooked it up to my 2016 MacBook Pro. Yes, I had to use a USB-A to USB-C dongle, but I still say that’s not a bad thing because I got to choose the convenient side of my Mac to plug it in.
I ran a full bootable backup via SuperDuper! but I forgot how slooooow spinning hard drives are! I started it before I left to go exercise, and it ran for two hours while I was gone, and I still had to wait another hour before it was finished. THAT’S why I use an SSD for my backups, even one that’s too small to do the job properly.
I tested the backup by booting up my older Mac with it and it worked like a champ. After about a 15 minute boot up process. Have I mentioned how slow spinning hard drives are? How did we get anything done with these things?
Armed with my Time Machine, Backblaze, full bootable backup, and my data backup on the SSD, it was time to nuke.
Nuking Process
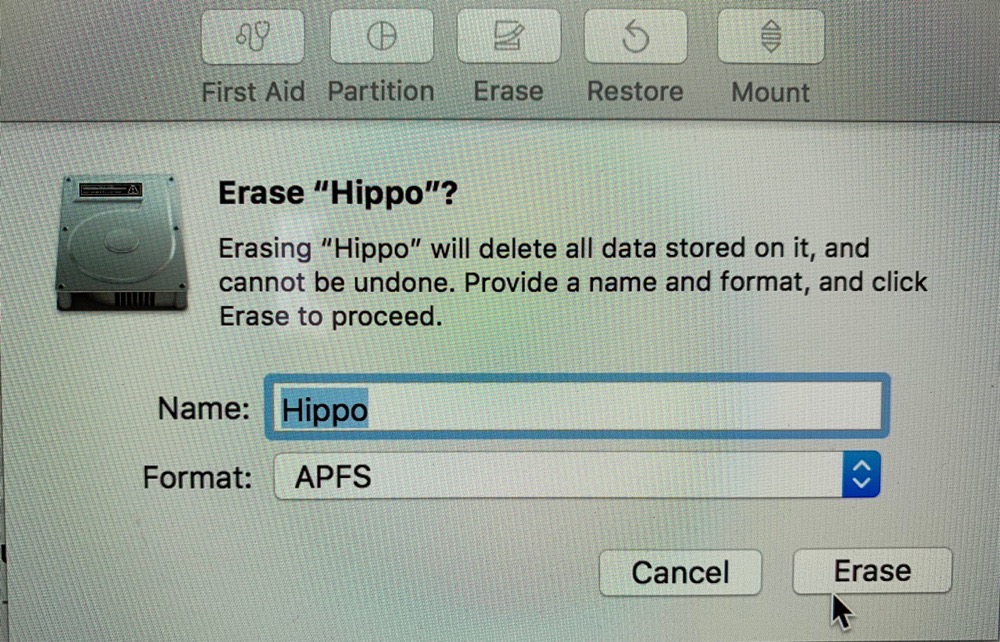 Nuking a machine isn’t too hard. I followed online instructions to download a bootable installer of Mojave to a thumb drive first. On booting from the thumb drive I went into Disk Utility and told it to erase the main drive. It was a scary moment to hit Erase. I posted a picture of the screen to our Facebook group and said, “hold me.”
Once the disk was blank, the terror part was over and it was time to get to work. I used my thumb drive to install Mojave and of course it was a breeze and took very little time. That was the easy part.
Paving Process
The main tenant of a nuke and pave is to not use Migration Assistant to migrate your user accounts. Sure, it’s easy and painless, but it also means you’re dragging over every bit of cruft you’ve collected from apps and services you may not be even using any longer. It sort of defeats the whole purpose of a nuke and pave. I do drag over my documents and desktop, and this time I also decided to let iCloud control them. Everything else is done by hand. Think of it as artisanal, hand-crafted configurations.
As I mentioned earlier, I had a Wunderlist to guide me but after a while, I realized that this wasn’t really an ideal tool for the job. The big problems came in when I starting adding items as I thought of them. With such a giant list of apps to install and tasks to accomplish, I found myself adding things without being able to easily see whether I had already put that item on the list. Wunderlist won’t alphabetize and I had maybe 75 items in a single list.
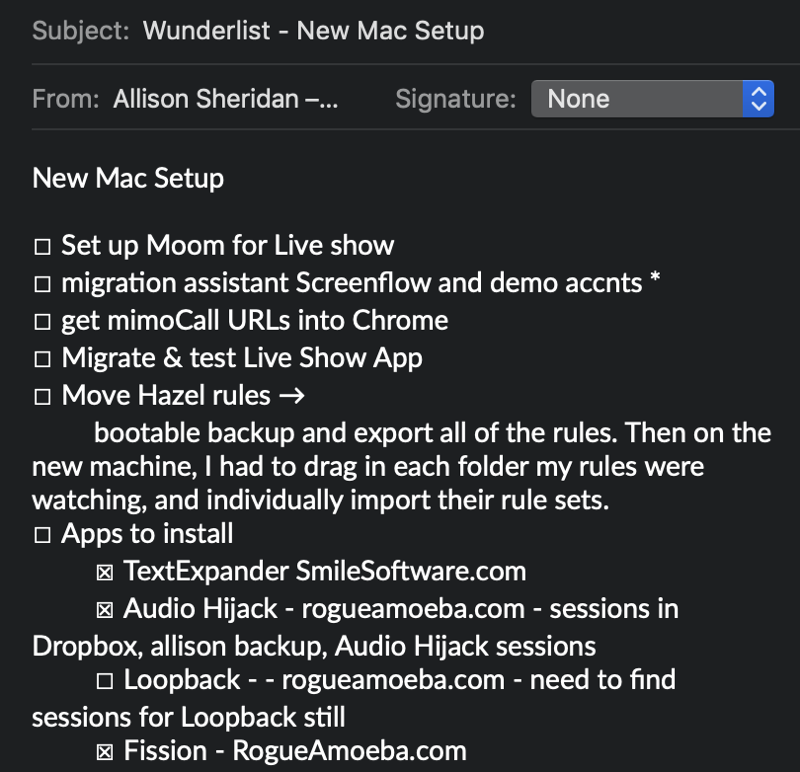
I chatted with Dorothy on the elliptical about the problem and she asked if I could export the list and put it in another tool. Brilliant! Ideally, I would export from Wunderlist to a standard OPML (Outline Processor Markup Language) file. That would let me pull it into an outlining program like Cloud Outliner or a mind mapping app like iThoughts.
Unfortunately, Wunderlist could only export to JSON, which I’m sure someone more knowledgeable than me could convert, but I found another way. I figured out that I could email the list, which just plopped the whole thing (indented for the sublists) into an email as a flat file.
I copied that and pasted it into Cloud Outliner. Unfortunately, it pasted the entire list and all of the sublists into one line of the outline. I fiddled around, tried a bunch of different keystrokes and when I wasn’t paying attention, the entire list reformatted into separate lines. I wish I could replicate it but I honestly don’t know how I got it to work.
Once I had it in Cloud Outliner, from there I was able to export to OPML and open it in iThoughts. Immediately I could get a better picture of what I had to do. I was able to start sorting things visually to really get a grasp on my priorities.
Priorities
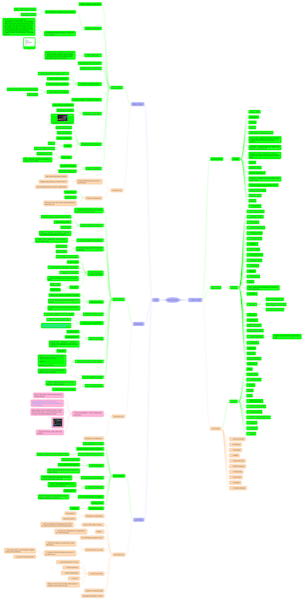
I sorted the topics into two basic sections. Apps to install and tasks to complete. For example, I’d have Feeder as an app to be installed, but under tasks I put “download podcast feeds” and “connect to my blog”.
Under the tasks and apps to install, I created three categories: mission critical, high priority, and low priority. I hope you appreciate that anything for the podcast production that couldn’t be replicated with another tool was considered mission critical. Things like backup only made it to high priority!
One level deeper I created a bubble called “Installed” for apps and “Task Completed” for the tasks. I color coded them and as I dragged completed items into them, the bubbles changed colors to match. With all of this structure created, now I could see visually how much I had to do and how much I had accomplished.
With the entire mind map expanded it was pretty daunting. But each time I finished an item and got to drag it into the completed pile, I could see the mountain of work shrinking.
How Long Did it Take?
I know I have more time than most people since I’m retired, but the process hasn’t really taken that long. I started on Tuesday morning with the full backup. Working on it probably 3-4 hours a day, by Friday morning at 10:30 I was able to record an episode of Chit Chat Across the Pond. That meant all of my audio applications were installed and configured. By Friday afternoon, Steve and I had tested the full live show setup which is even more complicated.
There were lots of bits and pieces left to go including 17 low-priority applications left to install, but I can take my time on those
But What About Those Pesky Photos?
If you’ve been listening for any length of time, you know that my 70,528 photos are the most challenging piece of the puzzle. In the past, I’ve dragged over my entire Photos Library, but it takes approximately 3 weeks for every single photo to be checked by iCloud Photo Library to see if everything is synced. During this 3 week process, not only do you have to listen to me whine about it, but I also cannot use my Photos during that time. No new photos from my phone will be uploaded so there’s a 3-week no-joy period.
A while back an Apple Senior Support Specialist came up with a new way to do it. If you’ve got a large library too, this tip will really make you happy. In the long run, of course, this is the one place I want to have all of the originals, but he suggested that I set my Photos Library to only use optimized images at first. My originals were of course safely in the cloud.
iCloud Photo Library starts by downloading the most recent photos first and will continue to import new photos as you take them with your phone. Once all of the optimized images were downloaded (which only took about 2 days instead of 3 weeks), then I was able to flip the switch to download originals. The Photos Library remains useable during this part of the process as well.
I am still optimistic that my Photos library will eventually be snappy, but so far with all the work it’s doing it’s still a little bit slow. It better be faster after all this work!
Bottom Line
The bottom line is that a nuke and pave is a fair amount of work, requires good record keeping and a good plan, and must include several backups (including a bootable backup in case everything goes horribly wrong.). I have to say though, in all the times I’ve done this, I have never regretted the time spent to do it right.
I compare it though to the shenanigans people go through trying to avoid doing a nuke and pave and it seems like a much better path to me. In the end, we want a highly functional computer that works the way we want, but we also want it to be as fast and cruft-free as possible.
I believe in the nuke and pave method, but I’m sure glad this task is behind me!

Such a mammoth task.
I’m currently in the middle of my “pave” process with my 2015 MacBook Pro.
Unfortunately, I forgot to take into account the speed of my hotel wifi here in Reno.
I happened to do this just when a big festival moved into town, which means the hotel wifi was extremely taxed and I was getting speeds from 10Kbs to 50Kbs for the last few days.
After the update, I have found a few apps that just refuse to work, so I’m hoping that there will be some updates soon.
For some reason I can’t get the “Steam” gaming platform to launch at all.
Hopefully, there will be some updates to the OS, as well as the individual apps, soon to fix these issues.
Now, I’m off to try installing BootCamp and Windows on an internal partition.
Wish me luck!
*** Quick update. ***
All the apps that had issues with just started to work.
I did absolutely nothing to them.
I’m not complaining, but I wonder if there was stuff going on in the background that needed completion before the apps worked properly.
Well, I’m just glad everything I’ve tried so far is working.
Whew! I’m glad that got sorted. I wonder if it could have been some network-related wonkiness?
Props to both of you! I’ve done a few nuke and paves in the past, but it’s been at least a couple of years since the last one. Fortunately, I’m not feeling the need to do another one quite yet, but keeping careful records, as you’ve done, Allison, has to make things better and less stressful.
Great article. I did a similar thing when I got my new laptop. Rather than migrating everything with Migration Assistant I did it by hand. And my notes from the last time I did that came in really handy.
I hope you did make a copy of your mindmap before you started to use it, so it’s ready to go for next time.
BTW you can write a little shell script that can install Homebrew AND all the software you need to install with it in one go.
I am just about to do a Nuke and Pave on my wife’s iMac. I have a time machine backup but everywhere tells me not to restore from that but take a new backup and do selective restores. I am okay with that but once I do the new install what happens with My time machine back up? do I delete it and start again or is it still usable.
I don’t use icloud. What is the best way to back up my mail?