You may have heard Dr. Maryanne Garry on Chit Chat Across the Pond a few times. She’s a professor of false memories who likes to call herself the Crusher of Dreams. She told me she would like to be able to do interviews while at conferences, and asked if I could give her a recommendation for a portable method to do recordings.
You would think that after 14 years of podcasting I would immediately know the answer to that question, but it’s a harder question than it sounds and not actually in my wheelhouse. I can interview anyone in any country with absolute ease, but I rarely record people in person on my own. In fact, Maryanne is one of the few people I interview where we’re in the same room.
Now many of you are saying, “But Allison, you and Steve do those great interviews from CES and CSUN.” Turns out those interviews are recorded via Steve’s video camera, using an Audio-Technica System 10 ATW-1702 Portable Camera-Mount Wireless Microphone System. It’s a really cool setup. I hold a wireless mic that has a digital transmitter in it which transmits to a receiver mounted to the top of Steve’s camcorder. The receiver is then hard-wired to audio input on the camcorder.
Steve produces the videos and extracts the audio from the video to be used for the podcast. This works great, but obviously isn’t quite what Maryanne is looking for.
I’ve used a little Zoom H2 hand held recorder for years, but the batteries corroded in it so it finally was time to let it go. For my birthday, I asked Steve for the big-girl Zoom H4n Pro. There is a review of that coming soon, but I don’t want to get ahead of myself here.
Both the H2 and the H4 are great devices but they’re really complicated. For example, I wanted the H4n Pro because you can attach XLR microphones to it, which is definitely more complexity than Maryanne wanted to deal with.
Since Maryanne, like many of us, uses an iPhone, I thought maybe a microphone that attached directly to her lightning port would be the way to go. When we interviewed Joe Dugandzic’s in his Tiny House for Chit Chat Across the Pond last year, he let me use his $140 Shure MV88. It was really cool and worked well but it requires you to move the phone back and forth with the interviewee to get good audio. I didn’t think Maryanne would want to do that for her first interviews.
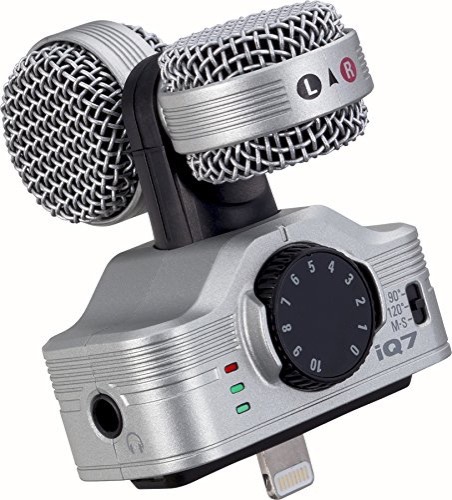
After a bit of poking around I settled on recommending another Zoom product, the Zoom iQ7 for $110 on Amazon. The Zoom iQ7 is very small and very light at around 2×2″ square and about 1″ thick, so it’s very easy to pack along just in case a recording opportunity breaks out.
The Zoom iQ7 is designed to allow you to do either audio-only recording, or record video with audio. In order to accommodate both uses, the mics are in a rotating capsule, allowing you to change the orientation for the best stereo recording. The ability to adapt for video adds complexity but it will give her more flexibility to record in the future.

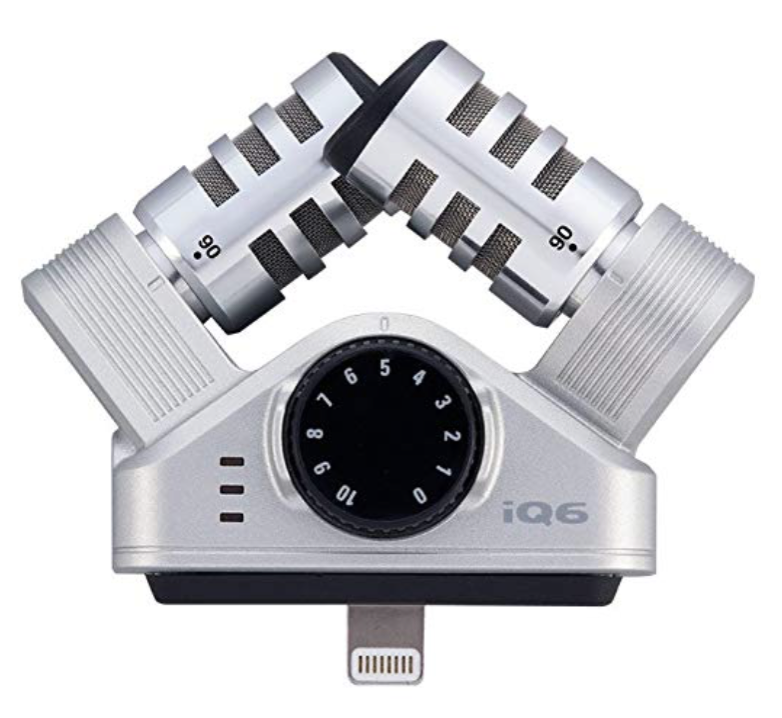
Another option would have been to get her the Zoom iQ6, which is a very similar device, but with fixed microphones for just audio recording. I didn’t actually know about the Zoom iQ6 when I made my recommendation.
But let’s get back to the Zoom iQ7. It has a couple of features that are really well done for such a tiny accessory. It has an analog gain dial marked from 1-10 so real-time you can make adjustments while recording. It also features a 3-LED peak meter. Not a lot of granularity with 3 LEDs but at least you might notice the red one if you’re too hot.
It also has a headphone jack for real-time monitoring of your audio input. Being able to monitor is crucial to ensuring you’re getting a good recording.
There’s also a three-way switch that says 90, 120 and M-S. The 90 and 120 are easy to explain; they describe the angle of the cone in which the microphone will pick up the audio. In our experiments, 120° allows you to put the iPhone standing on its head and have people around a table be picked up well by the mic. M-S continues to baffle me. I read and reread the section in the manual and was no brighter about what it was for when I was done.

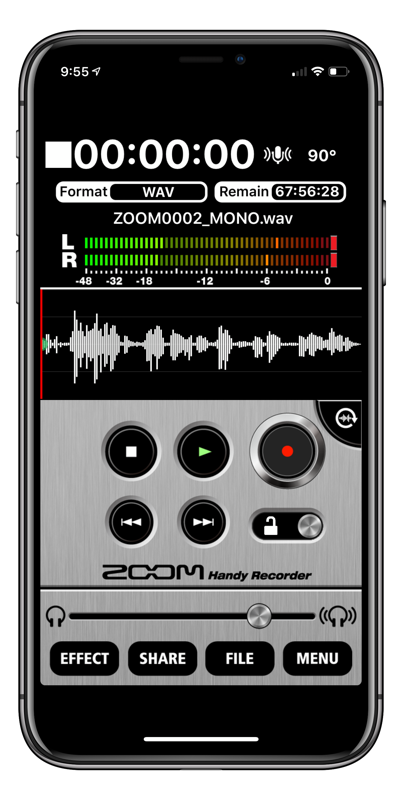
Zoom has an iOS app called Zoom Handy Recorder that isn’t highly-reviewed in the App Store but it gets the job done. The interface looks positively iOS 6 era, but ancient design seems to be the hallmark of Zoom devices. The Zoom Handy Recorder app doesn’t require a Zoom device, so you can play along with your iPhone’s internal mic if you like.
With the Zoom iQ7 you’ll be queried to give permission to use your microphone as you would expect. We only had 3 LEDs to watch levels on the device itself, but in Handy Recorder you get a nice long meter for left and right channels and it shows from green to yellow to red to help you keep your levels in line.
You can choose the format of your recorded file, from an uncompressed WAV file to three qualities of AAC from 64 to 170kbps. There’s also a software mic gain control so you can set the default point from which to start the input level. There are a few rudimentary effects you can apply before recording, such as an equalizer. It’s not clear to me whether these effects are applied as you’re recording or after the recording is made, which wouldn’t be as effective (pun intended).
Testing the iQ7
Now let’s talk about the quality of the audio to see if you actually need a Zoom iQ7. The first test I did was to record myself with the internal microphone on the iPhone XS, and then with the iQ7. Let’s listen to the two recordings:
Internal mic on iPhone XS with just me:
Zoom iQ7 on iPhone XS with just me:
The Zoom iQ7 recording is better, but I’m not sure it’s significantly better. I know how to hold a mic and I am willing and able to hold a real mic or an iPhone right up to someone’s mouth to get good audio, so the internal mic on the iPhone would work for me. If you are equally skilled and bold, then I’m not sure you’d need an iQ7.
But that was not the scenario Maryanne was imagining. She wanted to be able to stand the phone up in the middle of a table and just talk naturally with someone. We did a ton of experiments trying to figure out how to orient the little capsules to get this scenario to create a good recording.

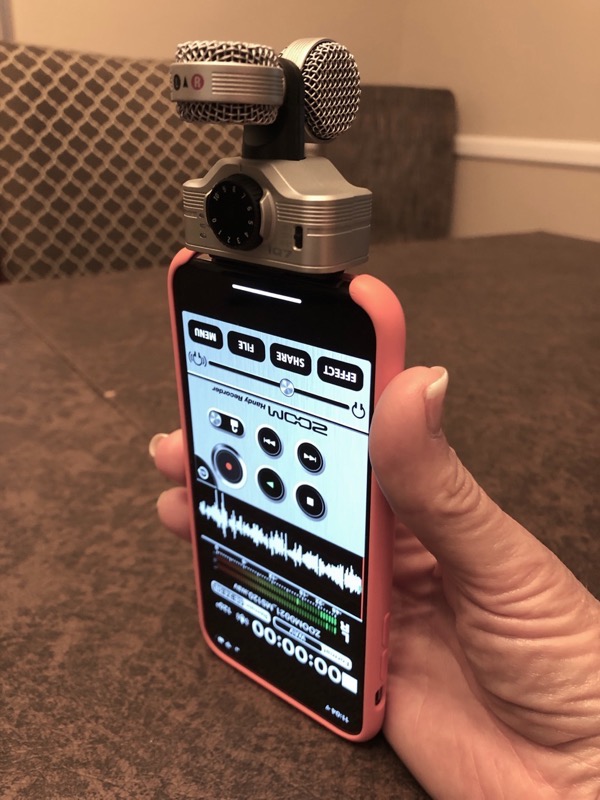
Even with constant rereading of the manual, it took me a long time to figure out exactly how they meant for the capsules to be set. I took a photo of the configuration that worked the best for us.
- iPhone upside down so the mic is mounted on the top via the Lightning connector
- Mic width switch set to 120° to get all around audio
- The capsule with L/R is pointed toward the front of the iPhone, and the arrow on the mic is pointing up.
- This allows you to see the front of the screen on the iPhone and use the gain dial to raise or lower the gain as appropriate for you and your interviewee.
The unfortunate thing about the iPhone is that the API doesn’t allow apps to be right-side up when the phone has the lightning port facing up. That means with any mic attached, you’ll have the recording app upside down.
Before we go any further, I have to say that the initial recordings with this configuration of the Zoom iQ7 were horrible. There was a buzz on it that made it unusable. Here’s a quick snippet of the buzz for you to enjoy:
iPhone XS with radios on recording silence with Zoom iQ7:
We dug through the trash to pull out the box so Maryanne could send the darn thing back. But before going through that, Maryanne found a verified buyer who had written an in-depth review. In the review, the person explained that if you hear noise on the recording, that means it’s picking up interference from the circuitry of the radios from the iPhone itself. They recommended putting the phone in Airplane mode, but for some reason that didn’t turn off all the radios for me. I ended up turning off Bluetooth, WiFi and cellular by hand, and it eliminated the noise. That should have been in the darn instruction manual!
Now I’ll finally let you hear a clip of Maryanne and me making nonsense conversation to test the Zoom iQ7 against the internal mics of the iPhone. We did the recordings in the kitchen so we’re surrounded by tile, granite and windows which is basically an environment designed for maximum ambient room echo. Before you listen to the recordings, I apologize in advance for using “I” as the object of a preposition in the second recording. You’ll first hear the internal iPhone mic, and then the Zoom iQ7 mic.
Internal mic on iPhone XS with me and Maryanne in the kitchen:
Zoom iQ7 on iPhone XS with all radios off with me and Maryanne in the kitchen:
The Zoom iQ7 recording is definitely better than the internal mic and far less echoey. It also has pretty good stereo separation. If you’re listening in the podcast, however, you won’t hear the stereo effect because I mix my show down to mono.
While I just said the Zoom iQ7 audio is better than the internal mic, I’m not sure it’s blow your socks off better. As Maryanne so adeptly points out, the advantage of the internal mic is that it’s free. The Zoom iQ7 is $110 and does require some fiddling to get it just right.
Remember though that some of that fiddling about is using the gain dial to make sure your recording is going to be good — not peaking and not so low that you have to increase the gain in post processing and introduce more noise. You can also monitor real time using the headphone jack so you’ll know if you’re getting a good recording or not. Value-added fiddling can be a good thing!
Maryanne and I figured out that you don’t have to use the ugly and ancient-looking Zoom Handy Recorder app to do the recording. If you’d like a more modern interface for your recordings, you can use the app that comes with the more expensive Shure MV88. It’s called ShurePlus Motiv, and it has the same kinds of features like a visual meter to see if you’re peaking. The Zoom software is so old your options to move your recordings off device are limited to Email and Soundcloud. With Motiv you can save to camera roll, Messages, mail, Dropbox, Files and all of the usual suspects.
Even if you don’t buy the Zoom iQ7 and use the internal mic, I highly recommend you use one of these apps so you can see visually if you’re getting enough gain on the recording or if your speakers are peaking out, both of which can render your once-in-a-lifetime recording completely useless.
This didn’t turn into the resounding endorsement of the Zoom iQ7 that I had hoped it would be, but I’ve been encouraged by listeners to do reviews even if the product doesn’t turn out quite as good as I’d hoped. I think the Zoom iQ7 is a bit complicated to set up but if you don’t want to hold a phone right up to someone’s mouth to get a good recording, it’s a better option than the internal microphone.


MS is a stereo mic technique.
With the Center facing mic capturing any Center audio information and the sideways facing mic capturing the side audio information. With the signals combined and decoded, you essentially have maybe 200-300 degree capture available.
It basically captures stereo information also, e.g. sources on the left will sound on the left and so on…
Great breakdown of the Zoom iQ7! I really appreciate how you compared it against the iPhone’s built-in mic and even tested different environments. The point about interference from the iPhone’s radios is something most buyers wouldn’t think of until they run into the issue themselves — so that tip alone is super valuable. I agree that while the improvement isn’t mind-blowing, the ability to monitor levels in real time and adjust gain makes it worth considering for interviews or podcasts on the go. Thanks for sharing such an honest review!