If you’ve already got a $450 Heil PR40 big girl mic, you’re in good shape for doing audio from home. But if you’re using your AirPods because you don’t own a grown-up microphone, maybe you should consider a different alternative.
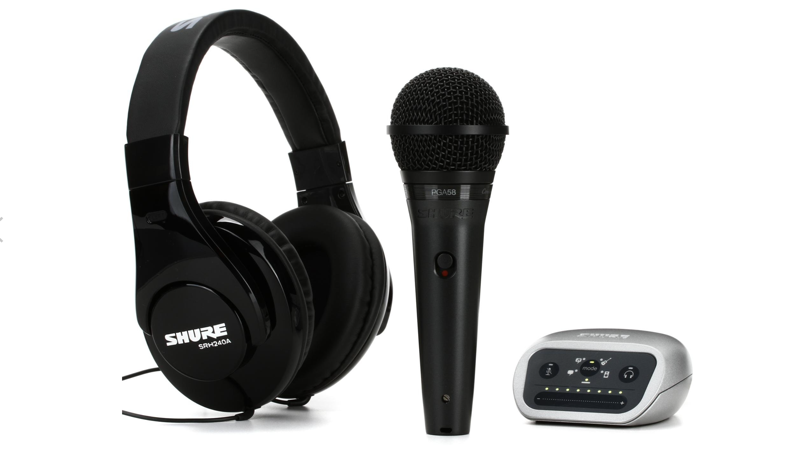
I’d like to suggest you take a look at the Shure Digital Recording kit for $200 from Sweetwater that includes the $54 Shure PGA58 Cardioid Dynamic microphone.
Audio PlayerAs you might have been able to figure out, those three sentences were read to you using the very microphones I was describing. I know it’s been challenging to find reasonably-priced but good-quality audio and video equipment because literally overnight everyone on earth needed just those same tools. I have been giving some of my friends a hard time for their poor quality audio (like Rod Simmons of the SMR podcast for example), but it’s hard to be too rough on them when they can’t get good equipment. I stumbled across the Shure kit and realized it might make a great setup for those looking for a simple setup with all of the tools to get reasonably good audio.
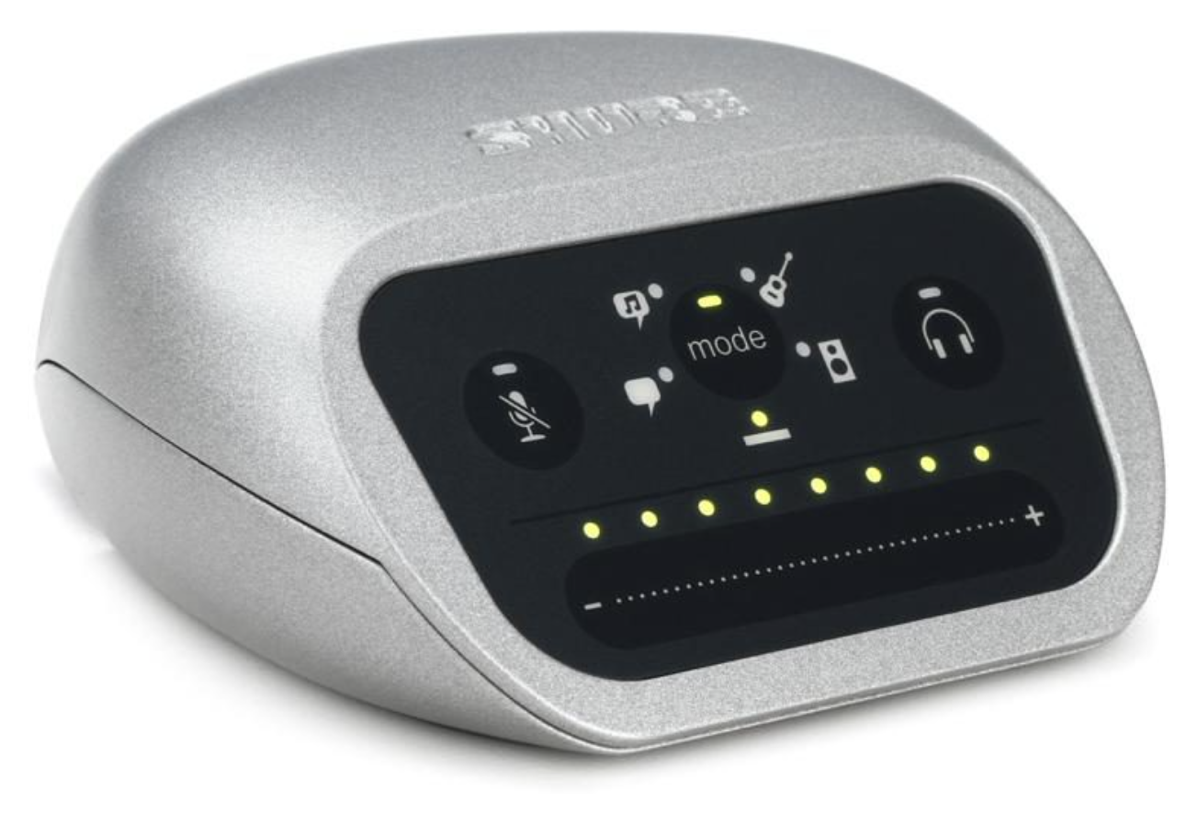
The problem I set out to solve was that I needed to replace my trusty Shure MVi USB interface. This lovely little device does two important jobs for me. One is that it takes the XLR input from my fancy pants microphone and transforms the analog signal into a digital signal so I can plug it into my Mac over USB.
The second almost as important job it does is that it gives me a mute switch. I use this mute switch all day long. If I need to move my mic while recording with someone, or open a drawer, or I hear a truck going by outside while the other person is talking I can mute and come right back.
The Shure MVi fits in the palm of your hand and does its job beautifully. I don’t use this option myself, but the Shure MVi will also allow you to connect a big-girl microphone to your mobile phone. It comes with a Micro USB to Lightning cable for iPhones and you can download the free ShurePlus MOTIV recording software both iOS and Android.
As I said, the Shure MVi does exactly what I need, but she’s been listening to me yak for probably close to a decade now and I was starting to hear some clicks when I was recording and I thought maybe it was starting to fail. A replacement Shure MVi is only $130 at Sweetwater so my initial plan was to simply replace it.
Maybe I Need a Thunderbolt Interface?
But all the cool kids use much fancier interfaces for their microphones. Dave Hamilton is going all Thunderbolt and suggested maybe the problem is that USB just isn’t keeping up and I should get a fancy rig like his. Of course his setup was way overkill for me. I wanted something super simple like the Shure MVi. I wouldn’t mind having two microphone inputs instead of one for doing interviews in person but that wasn’t a strict requirement.
I started searching for a simple Thunderbolt interface that wouldn’t break the bank. I didn’t want to
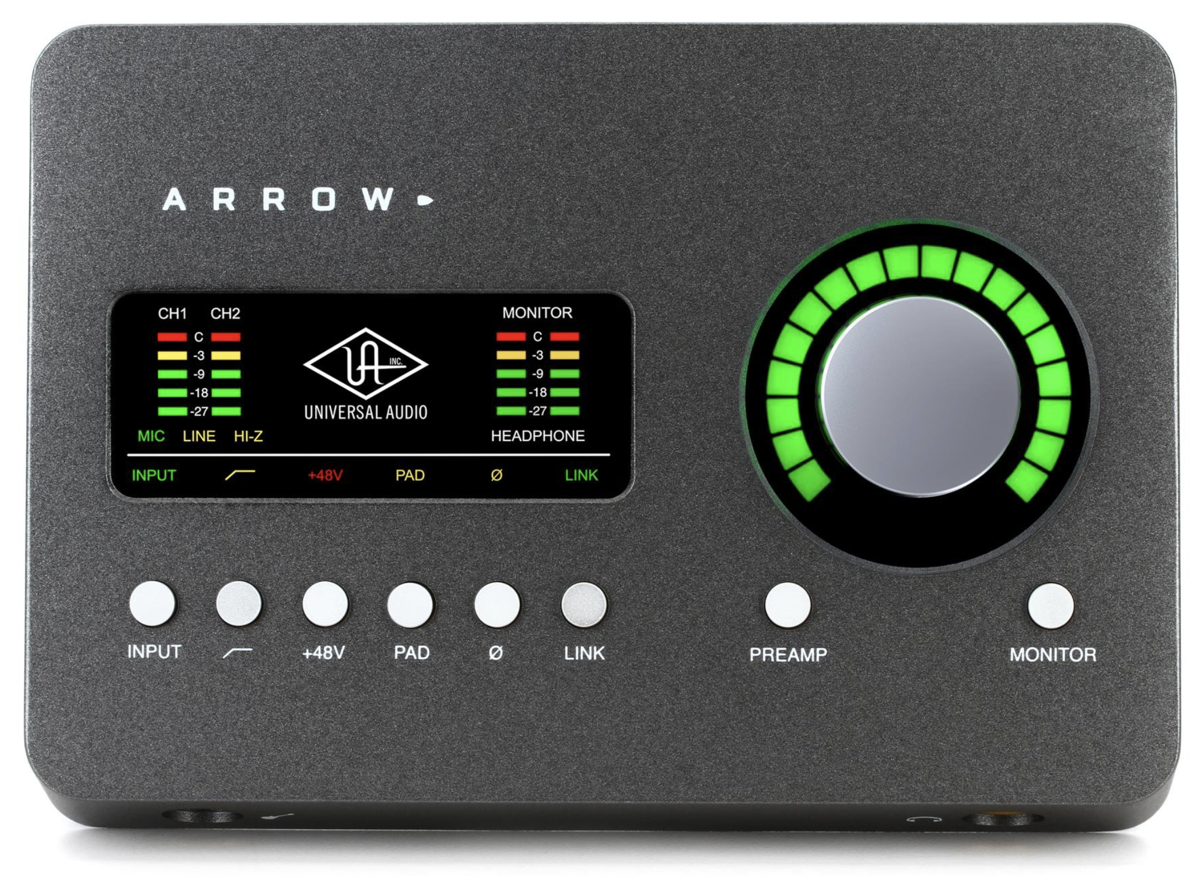
get a Thunderbolt 2 interface, because if I was upgrading, I might as well go to Thunderbolt 3. The only interface I could find that came close to meeting my requirements was the Universal Audio Arrow Thunderbolt 3 interface that runs $500 at Sweetwater.
While the UA Arrow does cost nearly 4X the price of the Shure MVi, it is the prettiest little thing. It’s got 2 XLR inputs on the back and on the front a really nice looking dial with bright green LEDs for the input gain. There are some other pretty little buttons and a display I don’t entirely understand on the UA Arrow too.
The big dial with the green LEDs has a mute function, so yay! I’ve found the device for me! But guess what? Pressing the dial while in Monitor mode mutes the signal going to your powered speakers but there is no mute option for the inputs on the hardware. I was so bummed!
I talked to JF Brissette who is a crazy good audio guy, and he suggested I talk to Kenneth, his contact at Sweetwater. Kenneth was awesome, and explained things in good detail, which is why all of the links I’m giving you are from Sweetwater. He was absolutely lovely. We went back and forth quite a bit about my requirements, and he made several suggestions. Unfortunately, they tended to be overkill for what I needed. He was very patient with me as he explained a lot of the jargon around audio but it was more than I wanted.
I Must Have a Mute Switch
The weird thing to me is that between Kenneth and me, we could not find a Thunderbolt interface that had a physical mute switch. They expect you to mute using the fancy and capable software they ship with these interfaces. I can mute with SoundSource from Rogue Amoeba today if I want, but I have so much already on screen when I’m recording that the idea of keeping SoundSource pinned open too is kind of a non-starter. The sexy UA Arrow has its own software that includes a mute option (along with a lot of high-end capabilities) but I just couldn’t see giving up a physical switch.
Kenneth and JF explained that some people use a mute block, which is another piece of hardware that you put inline with the mic. I looked at a lot of them and they were all, as my father would say, “ugly as sin.” They also fell into two camps, both of which had downsides. One kind did a true mute, cutting off the signal, but reviewers complained that they made a click when you hit the button. Well if your objective is to get rid of clicks, that doesn’t sound like a good option! The other type of mute block merely attenuates the signal, so the sound is still there but it’s much quieter. I don’t understand why none of these devices could do what the Shure MVi can do!
In the end, I decided to simply buy another trusty Shure MVi. Since Kenneth had been so swell (and I’m still pouting about Amazon pulling my associate’s account), I decided to buy from Sweetwater.
I hadn’t bookmarked the Shure MVi so I searched again at Sweetwater for the Shure MVi, and that’s when I stumbled across the Shure Digital Recording kit I mentioned at the very beginning. The full recording kit I’m going to tell you about costs $200, so only $70 more than the Shure MVi interface by itself.
The kit includes an XLR microphone, the XLR cable you’ll need to connect it, and a pair of headphones.
Shure PGA58 Dynamic Cardioid Microphone
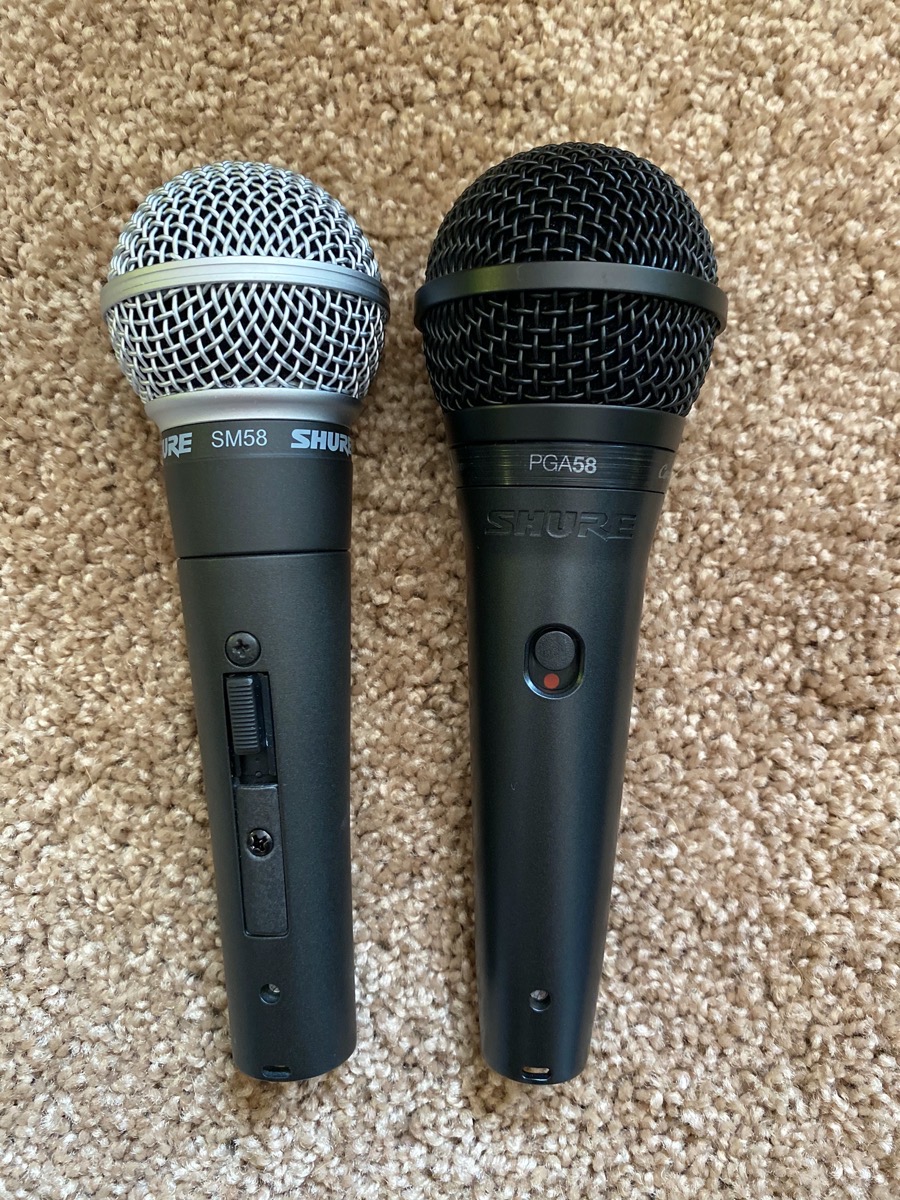
The microphone included in the Shure Digital Recording kit is the Shure PGA58 Dynamic Cardioid Microphone you heard me using up front. That model number might sound a tiny bit familiar to you.
A year ago I wrote an article that explained how I bought two Shure SM58S microphones for use as road mics with my Zoom H4n Pro.. So how does the Shure PGA58 compare to the Shure SM58 I already have?
The first difference I want to point out is the price. The SM58S (the version with an on/off switch that I have) is $104. The PGA58 (which has an on/off switch) is only $54 if you buy it separately at Sweetwater. Let’s have a listen to the two mics back to back.
Audio PlayerYou can tell the difference between the two, but would you say the SM58 is twice as good as the PGA58? If you do think it’s worth twice the price, you might want to buy the SM58 and the Shure MVi interface separately. I found an article from Shure explaining the difference between the two microphones, so I put a link in the shownotes if you want to know more.
The PGA58 comes with a nice little carrying case and a 15-foot XLR cable. 15 feet really long which is swell if you’re dancing around the room I suppose, but I actually would have preferred something more in the 6-foot or shorter category. The least expensive 15-foot XLR cable Sweetwater sells is around $15.
Shure SRH240A Headphones
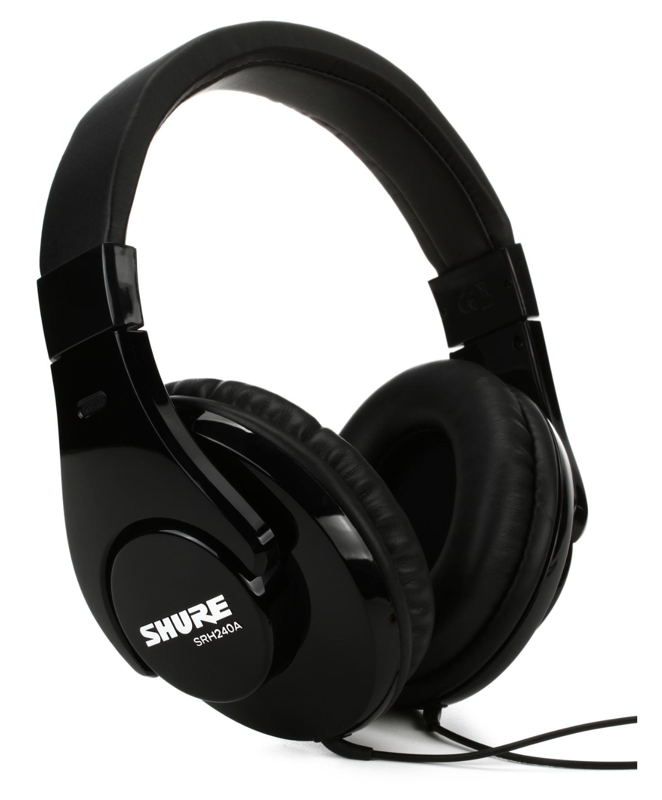
The final piece of the kit is a set of Shure SRH240A headphones. These over-the-ear headphones are quite comfortable and to be honest, Steve and I both preferred the sound and especially bass response when listening to music, over my Bose over-the-hear headphones I normally use. The SRH240A’s run $54 by themselves at Sweetwater.
I’m not saying these headphones are going to blow you away but because they’re closed-back, they fit the need of blocking external sound, will allow you to monitor your own voice through the Shure MVi, and are comfortable to wear for long periods of time.
Bottom Line
If you add up the price of the MVi Interface, the PGA58 Microphone, the Shure SRH240A headphones, and the XLR cable, you’re getting $253 worth of equipment for only $200. That’s really not much money to make your audio podcast or even your voice on Zoom sound a lot better to the people who listen to you.
P.S.
I have two more things to add to this already epically long story that started with me needing to replace my USB interface.
First of all, replacing the Shure MVi did not get rid of the clicks on my audio, so it wasn’t broken in the first place! Kenneth wondered if maybe it was Audio Hijack. You know Audio Hijack is my single favorite app on my Mac so I wasn’t going to toss it out, but Kenneth’s question made me remember that there’s a slider on the app for how it performs when you monitor your own voice through it. The slider goes from “Lower Latency” to “Better Performance”. I have had it set on Lower Latency for as far back as I can remember, but when I slid it up to Better Performance, it seems to have gotten rid of the clicks.
That does mean that my voice is delayed a lot when I hear it vs. when I’m talking and that makes it MUCH harder to actually talk! I’m bummed about this and I’m going to blame the new 16″ MacBook Pro because I didn’t have this clicking problem on the 15″ from 2016!
Now remember the very beginning of the story when I told you the cool kids are using Thunderbolt interfaces? Guess why they’re using them? To lower latency! I may have to go back to the drawing board on this whole issue.
Now for the second part. I thought the new Shure MVi that came with the kit was actually defective. The problem I had was that I had to crank my system input volume to 100% (thereby introducing noise into my recordings) in order to meet the audio levels I had with my old Shure MVi at 30%. I did a bunch of experiments swapping them on my Mac to identify the issue.
And then I thought maybe I should test it on Steve’s computer to definitely eliminate all other variables. Steve also uses a Shure MVi for his XLR mic as well. When I sat down to play at his Mac, I noticed he had the input on his existing Shure MVi set to 100%! I asked him about it and he said that he had to start cranking it up a few months ago. Now I’m wondering if that dumpster fire of an operating system update Catalina is to blame. But I figured out how to solve it.
I did a bunch of the Googles, and couldn’t find anyone else with this problem, but I did find the user manual for the Shure MVi. It did not tell me the answer but it gave me one very interesting clue. It talked about how you can control different equalizer, compressor, and limiter settings and they are stored in the hardware of the MVi.
Now, how the heck would I tell the hardware about EQ, compression, and limiter settings? And that’s when I remembered something I told you way back at the beginning of this story. The Shure MVi can be used with a smartphone and has the ShurePlus Motiv recording software.
I plugged my iPhone into the new Shure MVi, launched the Motiv software, and started poking around in the settings and discovered a setting that says “+20db Mic Gain Boost”. I quit the app, unplugged the phone, and plugged the new Shure MVi back into my Mac, and now I can set my input volume on my Mac to a very reasonable 30%. I went back to Steve’s Mac, repeated the same procedure on his Shure MVi with my phone and now his input is set back to 30% too.
I really thought I was going to have to end this story by saying, “No really, this is a good kit, mine was just broken!” So I’m really happy to be able to end the story with a 100% endorsement of the Shure Digital Recording Kit from Sweetwater for $200.
