Back in March, I told you the story of how I wrote a Shortcut with a shell script to mount a share on my Synology network attached storage (NAS). I said that I had made fire because I was so proud of myself. I taught myself to write shell scripts and taught myself how to use Shortcuts, if in a very rudimentary way.
The problem I was solving with this script/Shortcut solution was that Hazel would become a real nag when I was off my network and it wanted to move files as I’d directed it. If it can’t find the server to move the files to, what else can it do but give me constant notifications that the server isn’t there?
As happy and proud as I was to have solved this problem, I knew that embedding a script into a Shortcut was a bit of a kludge. I knew that a shell script could do all of the work and it didn’t need that fancy pants Shortcut helping it.
Shortcuts are Fragile

I have learned through this exercise that Shortcuts, at least on the Mac, are fragile. They seem to break without provocation. I’ve been able to create Shortcuts that immediately crash the entire Shortcuts app. My Shortcut to mount my NAS share is no exception to this fragility problem. It worked flawlessly when I wrote the original article, but within a week or so, Hazel started complaining about it.
When Hazel would run, it would give me a notification that said, “Shortcut failed Could run Shortcut:.” Not super helpful. I contacted the awesome developer of Hazel, Paul Kim, and he went back and forth with me quite a few times, reviewing my script and shortcut and the Hazel logs. After numerous exchanges, we came to the conclusion that Mac Shortcuts are not ready for prime time.
This exchange with Mr. Noodle himself was back in March, and for the past two months, I’ve been watching my Hazel scripts fail, dismissing the error messages and then manually moving my files to my NAS as they go stale on my internal drive. I finally found myself with some uncommitted time and decided to buckle down and write the rest of the shell script and eliminate Shortcuts from Hazel.
Scripting Process
Writing the script to do this reminded me of my father’s complaint about when he would go to build something in his shop. He would describe going into the shop and realizing his workbench was covered with tools and sawdust and drawings. As he was putting the tools away to start the new project, he’d notice that the leg of the workbench was wobbling. He’d find some wood to make a shim, and reach for his circular saw, only to notice that the blade had to be replaced. He’d go to his stash of blades, and trip over something that had fallen. This process would go on for hours and he’d never be able to get started building the thing he went in the shop to create. Starting to work on my script was exactly like that. Here’s what I did on day one:
- Wanted to modify the existing script, but since it was working, I wanted to have a history of my changes. Basically I needed a version control system, and the obvious choice is Git. In Programming By Stealth we learned how to use Git over a series of lessons so I’m super comfortable with it.
- To use a version control system, you have a local “repo” (repository) and you have a remote repo. You make changes locally and then you push the changes (with messages to yourself about what you did) to the remote.
- Normally we use a web-based repo called GitHub, but I thought this would be a fun opportunity to try using my Synology for the remote repo.
- Setting up Git on my Synology required command-line access. I could have easily used the built-in Terminal app to do this, but Bart had just told us about a nifty new command-line app called Warp, so I downloaded and installed it.
- I didn’t know how to use Warp, so I had to find/read the documentation on Warp
- To connect to the Synology, I needed to turn on SSH, which allows you to create a secure shell into the server. I searched the web and figured out how to turn it on.
- I remembered that Bart had taught us how to enable a remote (that’s not on GitHub), but I didn’t remember how to do it. I went back and read PBS 113 on how to enable a remote. I successfully connected using SSH with Warp to enable a Git bare repo on Synology.
- In Git, I tried to access the remote on the Synology but something was wrong with my syntax.
- Since this process was getting complicated, I decided I’d better record what I was doing in case I ever wanted to do it again.
- I generally document purely text-based instructions for myself using the app Keep It from Reinvented Software, so I popped it open
- I discovered Keep It had a huge update to version 2. I rely heavily on this app so I immediately downloaded Keep It 2.0. It downloaded a free, 15-day trial but I wanted to buy it sight unseen.
- But now I had to decide whether to buy directly from the dev Steve Harris and give him the 30% instead of the Mac App Store
- Before I could do that, I needed to know whether I originally bought it from the Mac App Store the first time.
- To answer that question, I opened my mind mapping software iThoughts. That’s where I’ve documented all of the apps I install when I do a nuke and pave, and I collect the Mac App Store apps together. I knew this would be faster than scrolling through my Mac App Store purchases looking for it since the store doesn’t have search (why, Apple???). I confirmed that I bought it directly from Steve.
- I bought the upgrade license, to Keep It 2 and shook my fist at the purchasing software Mindspring for INSISTING I tell it my phone number and address. This is why people like the Mac App Store.
- I received the email with the license
- First thing I do when I receive a new license key for software is to enter it into 1Password.
- Finally I was able to start documenting my process in Keep It.
- At this point I realized that I need to figure out how to share my public encryption key with my Synology so that every time I try to push a Git change to the remote, I wouldn’t have to enter my password.
- I didn’t remember how to share my public key with a server, so I looked up the Taming the Terminal lesson where Bart taught us how to do it.
- Using what I learned from Bart, I found and followed the Synology-specific instructions and yet I STILL had to enter my password every time I tried to push my Git changes to my Synology.
You’ll notice that I have not yet written a single line of code for my new and improved script after all this. I had a lot of fun along the way but by this time, I decided to just go watch Star Trek and try again in a few days. I finally got SSH working when I had a fresh start.
Mounting the Synology
Now it was time to actually start working on the script. As a reminder, a shell script is just a way to put a bunch of Terminal commands together. That means it’s easy to test because you can type into the command line in Terminal and if it works, plop what you wrote into the script.
As a smidge of review, the script in its original state determines whether my Mac and the Synology are on the same network. If they aren’t then the script should do nothing at all. If they are on the same network, the script passed off this info to the Shortcut. The only function the Shortcut did was to actually mount the appropriate share on my Mac so that Hazel could start copying to it.
The easy way to mount a share from a NAS is to select the Finder menu Go → Connect to Server or use the keyboard shortcut command-K. From there you enter the connection information for the server share you want to mount. The protocol I use is smb so the connection to my share is:
smb://192.168.4.95/synodo-al-backup
I was in the thick of rewatching Deep Space Nine when I got my Synology and Odo was my favorite character, hence the name Synodo for my Synology, and this is the share for my backups, hence “synodo-al-backup”.
The first time you connect in this way, you’ll be prompted for your login credentials and at that prompt, you can tell macOS to save your password in iCloud Keychain. I set this up years ago when I got my Synology and it allows me to hit Command-K, select from a saved list of server shares, hit Enter, and I’m in.
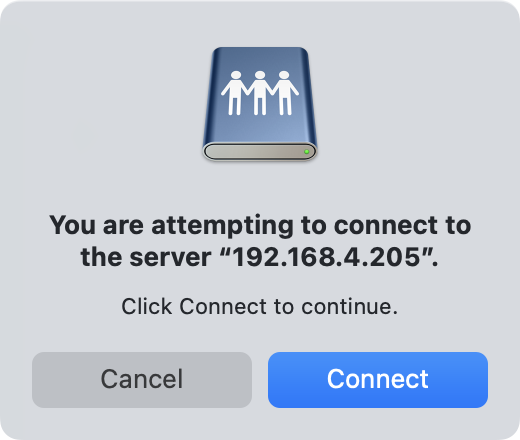
But right when I want to write a script to do the same function from the command line, the Command-K connection to my Synology added an extra step. It didn’t prompt me for my login credentials but it did pop up a window that said, “You are attempting to connect to the server “192.168.4.95”. Click Connect to continue.”
It’s not a huge deal to have to click that Connect button when using Command-K from the GUI. It’s catastrophic though to a command-line script since it has no way of confirming. And more importantly, why is it asking me this now? It never did this before. Like my dad in the shop, I couldn’t start until yet another problem was fixed.
I knew that the problem had to be in that pesky iCloud Keychain. I’m not an expert at it, but it’s not that complicated so I figured I could get it sorted right quick. The app where these credentials are stored is called Keychain Access in /Applications/Utilities. You’ll find an alarming number of entries in Keychain Access when you first open it, but don’t let that freak you out. To find the correct entry, I searched for the IP address of my Synology.
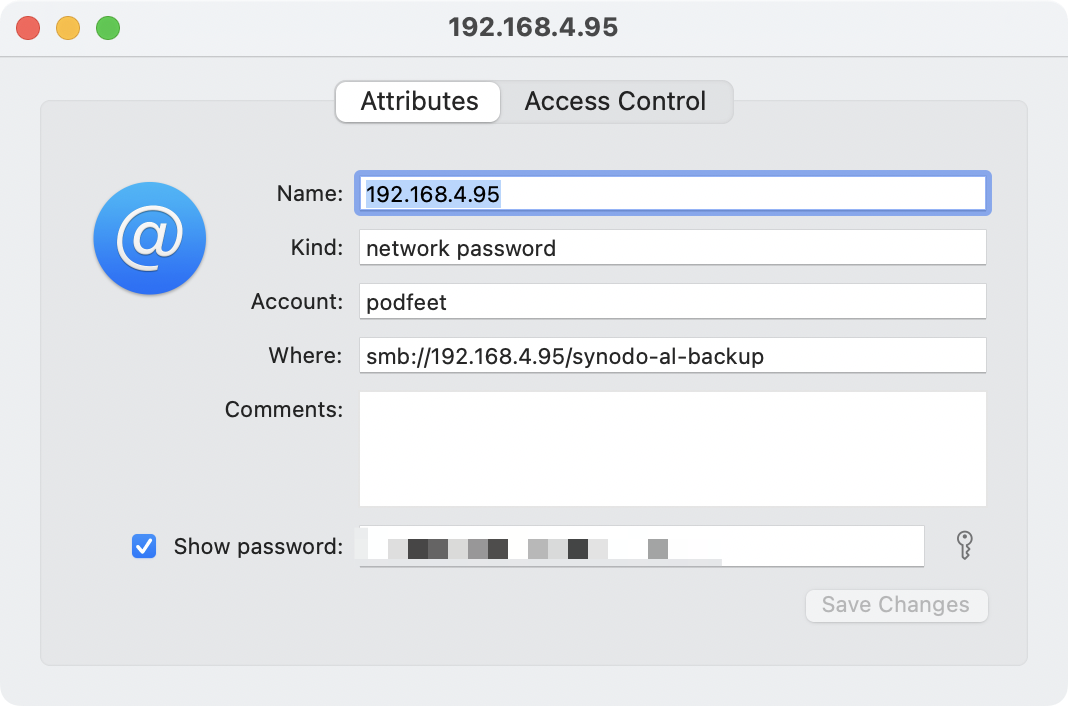
Keychain Access entries have two tabs: Attributes and Access Control. In Attributes, you’ll find the name, which in this case had been entered as the IP address of the server. Kind had been prepopulated with “network password”. The account was my login name to the Synology, “podfeet”. Where shows the smb connection I specified earlier. The password is not shown, but I verified it was correct by hitting the “show password’ checkbox, and entering my Mac’s login credentials. Ok, so far everything looks right.

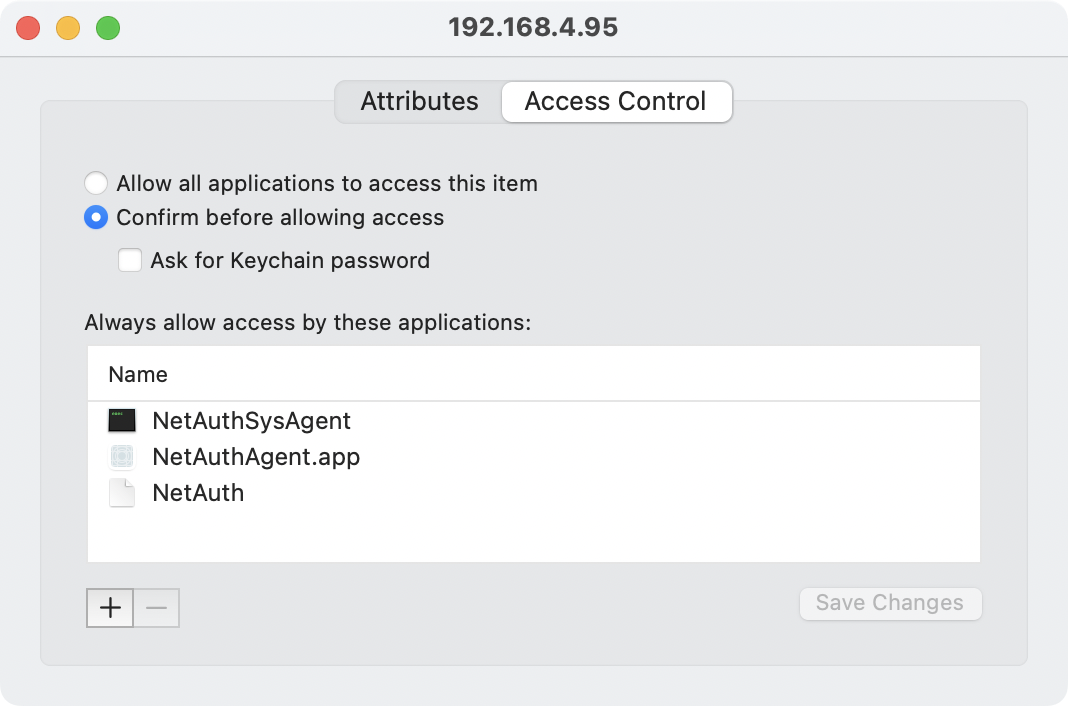
The Access Control tab has two radio button options:
- Allow all applications to access this item
- Confirm before allowing access
- and a sub-option here to Ask for Keychain password
“Confirm before allowing access” was selected. Below these options is a section that says “Always allow access by these applications”. When you authorize a password to a networked device and save it to Keychain, it automatically adds these three items specifically to mount network volumes:
- NetAuthSysAgent
- NetAuthAgent.app
- NetAuth

All three of those “applications” were added to the Keychain Access entry for the share on my NAS. I have a Drobo as well, which was still successfully responding to my requests to mount its shares and not prompting me to push the Connect button. I compared every detail of the two entries in Keychain and they were identical. That got me to think the problem was on my end, but maybe the Synology itself was responding in some weird way that was causing the extra prompt.
I woke up my 2016 MacBook Pro and tried to connect to the Synology shares and it worked perfectly without prompting me to hit that pesky Connect button. I tested from Steve’s Mac Studio and he also was able to Connect to Server on the Synology without the extra prompt.
So I was back to the problem being on my Mac. Next, I deleted all SMB entries in Keychain to this server (I have an ssh entry I’d prefer not to delete) and then recreated it. I repeated that step but did a reboot after deleting and before recreating. I tried disabling iCloud Keychain and repeated delete/recreate steps but still no joy.
In an act of desperation, I called AppleCare where Juan searched for over 50 minutes for any reference to this problem. The entire time he was researching he didn’t talk to me at all, giving me little feedback that he wasn’t just watching TikTok on his headphones but was really researching. When he was unsuccessful, he opened a ticket, but he never followed up on it. I didn’t like him very much.
It was time to bring out the big guns. I reinstalled macOS over the top. This isn’t nearly as scary as it sounds. You do need to figure out how to reboot into Recovery Mode for your particular Mac, but once you crack that code, Apple have a step-by-step support article that walks you through how to do it. You’ll want to do a backup first, but it just replaces system files and theoretically doesn’t mess with your data.
After reinstalling the OS, I still got the pesky prompt.
Even though Keychain was set identically to my older Mac, I tried messing with the access controls. If having confirm before allowing access set and allowing that NetAuthSystem stuff be allowed didn’t work, maybe I should allow ALL applications to access this item. Believe it or not, that made it even worse. With that setting, when I try to connect to my Synology, it asks for my Keychain password, which is the inverse of what I would expect.
Every few days I went back to the Googles trying to find some way of phrasing my search that would avoid the password prompt problem and find just the connect button problem. Finally, after more than a week, I struck gold. Or at least iron. I found an archived Apple Support article back from the macOS Sierra days, entitled, If you’re asked to click Connect before reconnecting to a server – Apple Support. The premise of the article is:
When connecting to a server that requires a user name and password, macOS Sierra 10.12 or later asks you to click Connect, even when the name and password have been saved in your keychain. This helps you to avoid transmitting login credentials to a server you didn’t intend to connect to.
It goes on to explain how to disable this security feature so that you can connect without providing additional confirmation. The fix is via a Terminal command. The command changes a preference file called com.apple.NetworkAuthorization, and it changes one line to allow unknown servers.
In macOS, if you’re willing to go under the hood, you can change the default preferences by issuing a defaults write command. You have to be an administrator to do this, so you add the “superuser do” command at the front, making the command sudo defaults write. Anything you try to change with this command will then prompt you for your admin password. With these defaults in Preference files, you tell it to set boolean to yes or no (boolean literally means yes or no, or true or false). Putting all of this together, we get:
sudo defaults write /Library/Preferences/com.apple.NetworkAuthorization AllowUnknownServers -bool YES
If you ever want to undo a change like this, you issue the same command but instead of -bool YES, you send -bool NO. This sounds very scary but knowing you can undo changes means it’s pretty safe to do. One of the ones I used to set all the time was to turn off the automatic drop shadow macOS puts on all screenshots.
The good news is that changing this Preference to allow unknown servers successfully removed the need for me to hit that annoying Connect button when connecting to my Synology. While joyous, I ran it by Bart to make sure this wasn’t a huge security hole I was opening and he said that it wasn’t a problem, and in fact, he vaguely remembered doing it himself years ago.
If you have changed a Preference with a defaults write, you can check the status by issuing a defaults read command. I woke up my slumbering 2016 MacBook Pro and asked it if I’d changed the NetworkAuthorization Preference, but I had not.
I will continue to lie awake at night trying to figure out why I needed to do this, but I’m back in business.
I would like to point out that like my dad in his shop, I still haven’t really gotten started yet on my bash script!
