On NosillaCast #969, Tom Mattock explained how important it is that we all add alternative text to our images when we post them on social media. We say we want more engagement, and one of the ways to get that is to be inclusive in your postings. Without alt text, blind folks can’t tell anything about our images, but with the text, their screen readers can let them be part of the party too.
Back in the day, it used to be a real chore to add alt text and you had to be “in the know” to even know it was something you could do. But I’m finding these days that developers (in most cases) are making it pretty obvious that there’s a field for you to add descriptive text.
When Tom and I were chatting, he told us about a cool app called Be My Eyes that will create a super-detailed description of your images using AI that you can use as your alt text. I tried to figure out how to do it live on the show and I ran into some troubles, but after the show, with Tom’s encouragement, I figured out how to use Be My AI to caption my photos. it’s super cool so I want to walk you through how to do it.
I think you’ll be amazed at how detailed the captions are that Be My Eyes AI generates.
Install Be My Eyes & Create an Account
First, you need to download Be My Eyes from the App Store for iOS or the Google Play Store for Android. I believe that the Android Version is in beta, so I’ve included a link to the Be My Eyes web page where they have a download link and specifically talk about the new AI feature. As I go through the steps to use AI to caption photos, I’ll be describing how it works on iOS with the hope that it’s the same on Android.
When you first launch Be My Eyes, it will ask you whether you need visual assistance (because you’re visually impaired) or whether you’re volunteering to share your eyesight. The Be My Eyes concept is that sighted volunteers can be called upon to describe what the visually impaired person’s phone can see.
The Be My AI feature to caption photos is only available to you if you select “need visual assistance.” I had previously created a login as a sighted volunteer, and that’s why I was unable to find Be My AI when I was recording with Tom. If you have an account as a sighted volunteer, you’ll need to open a new account, or delete your existing account and start over. They say deleting an account can take a couple of days so I just used a second email address.
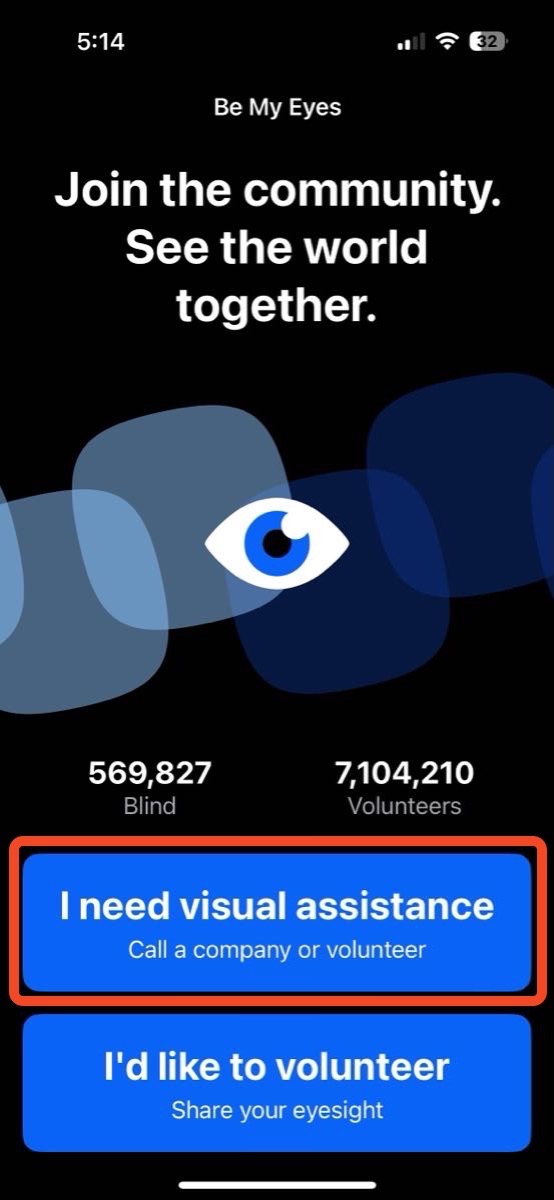
When you select the button that says “I need visual assistance” it will say “Call a company or volunteer” on the same button, but don’t be concerned — it doesn’t call anyone when you tap this button.
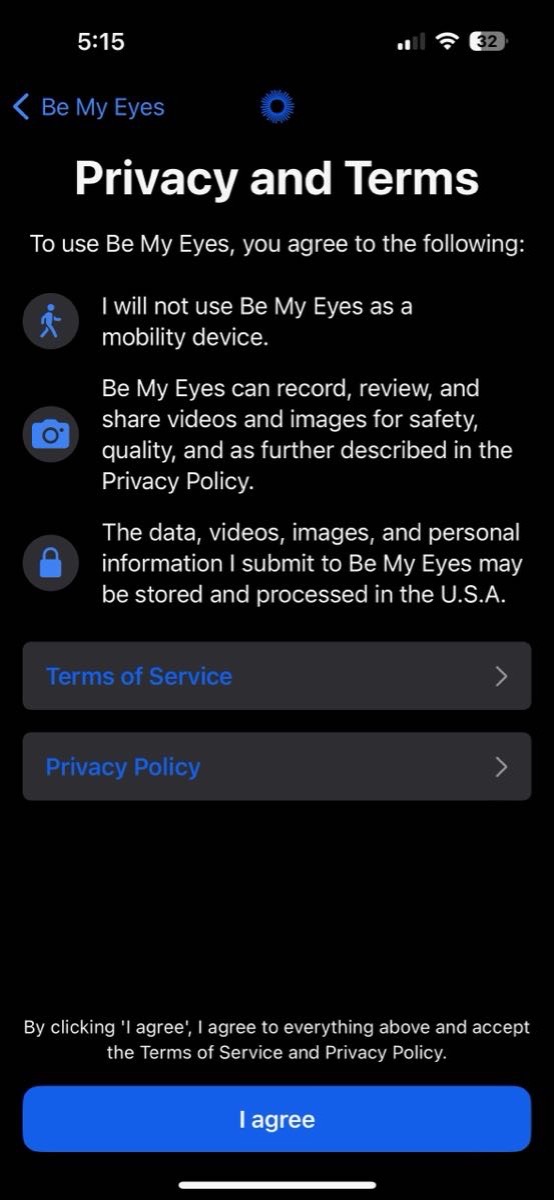
The next page is dedicated to privacy and terms, and they provide a good summary along with a way to view the terms of service and the full privacy policy. In the summary, you agree to not use Be My Eyes as a mobility device. You agree that Be My Eyes can record, review, and share videos and images for safety, quality, and as further described in the Privacy Policy. Finally, the data, videos, images, and personal information I submit to Be My Eyes may be stored and processed in the U.S.A. If you’re okay with those terms, select agree.
Next, you’ll create a login using your email, or a logon with Apple, Google, or Facebook.
After account creation, you’ll get a screen with a GIANT blue button covering most of the page inviting you to call a volunteer for live video support. Below that you’ll see an option to view specialized support. This has nothing to do with captioning but you can get help with assistive tech, beauty and grooming (I’m thinking, “Do I have a chive in my tooth?”), you can find out about blindness organizations, look at careers, and more.
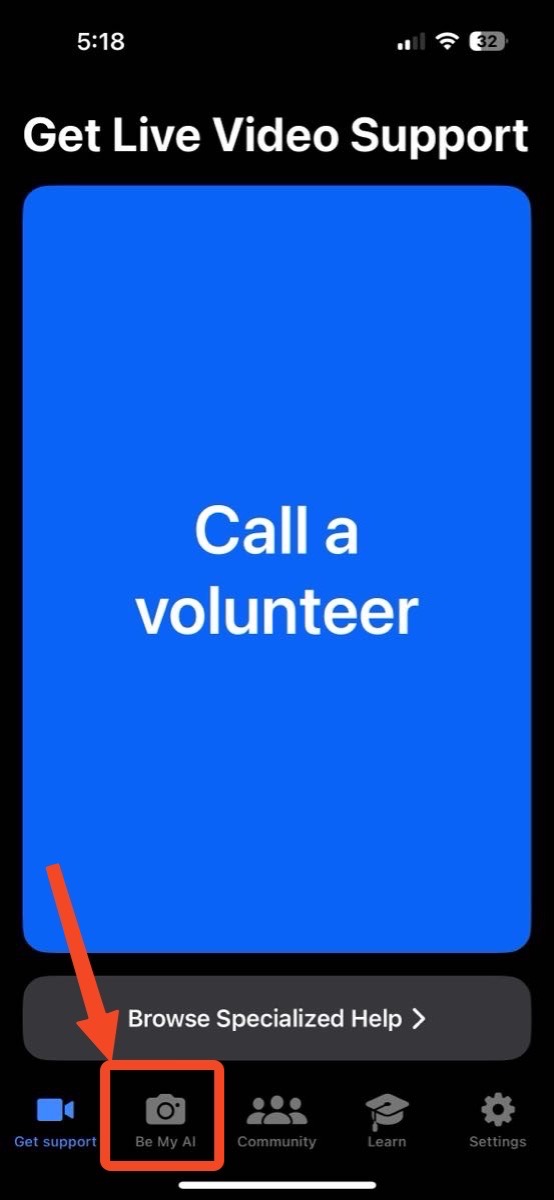
We’re not going to access any of these options. At the bottom of the screen, you’ll see that we’ve been on the Get Support tab which looks like a little video camera. The next tab is a regular camera icon that says Be My AI underneath it, and this is where we’re going to have some real fun.
Take a Photo and Caption with Be My Eyes (Be My AI)
When you select the camera icon, you’ll be greeted by some cautionary statements on using Be My AI, the AI tool that will be creating the captions for us within the Be My Eyes interface.
In the cautionary page, they say that they don’t want you to trust it for everything and they admit that it’s not 100% accurate. They don’t want you to use it for crossing streets, or for medical use, and they tell you not to use it for sensitive information. Having worked for a government contractor working with sensitive information, I can see why they have this caution. They also explain that Be My AI can analyze faces but not identify people. As all AI tools should warn, they say to double-check important things and use more appropriate tools in health and safety cases.
Once you understand those cautions, select Get Started. Be My Eyes will request access to the camera, and you have to say yes if you want to play along.
This immediately opens the camera app with a blue button telling you to take a photo. For the shownotes, I took a picture of a coaster on my desk. It came from the company Universal Audio. If I was to write an alt text description for this photo, I would say “Two men in white shirts working on some electronics.”
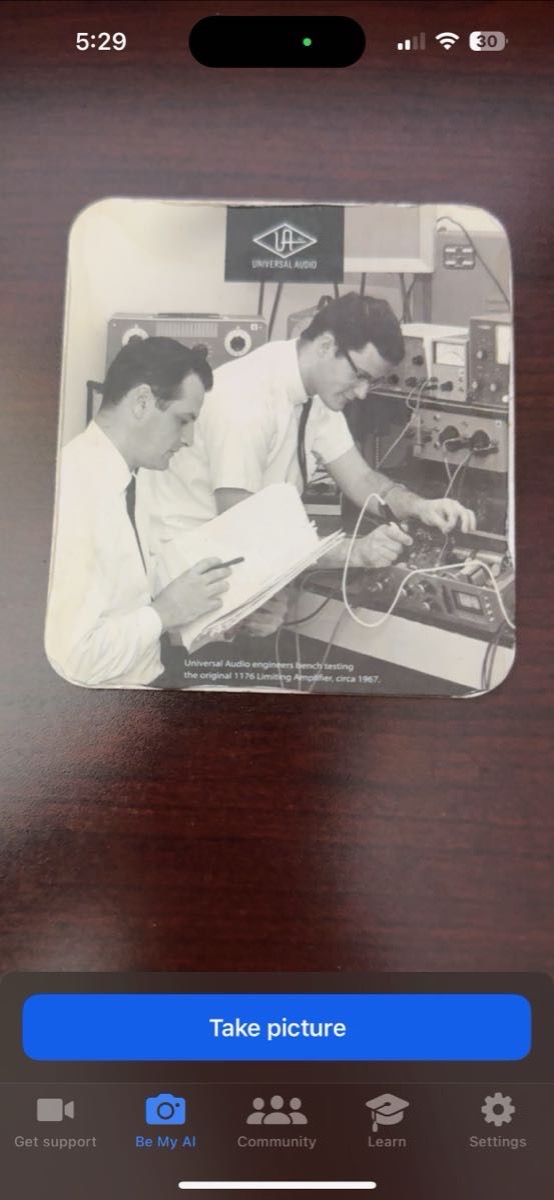
After I took the photo, Be My AI worked for a little bit and then wrote this:
The picture shows a black and white photograph of two men working on some electronic equipment. They are both wearing white lab coats. The man on the left is seated, looking down at some papers he is holding, while the man on the right is standing and appears to be adjusting or testing the equipment with his hands. In the background, there are racks of electronic devices with various knobs and meters. At the top of the photo, there is a logo that reads “UNIVERSAL AUDIO.” Below the image, there is a caption that states, “Universal Audio engineers bench testing the original 1176 Limiting Amplifier, circa 1967.” The photo is placed on a dark wood surface.
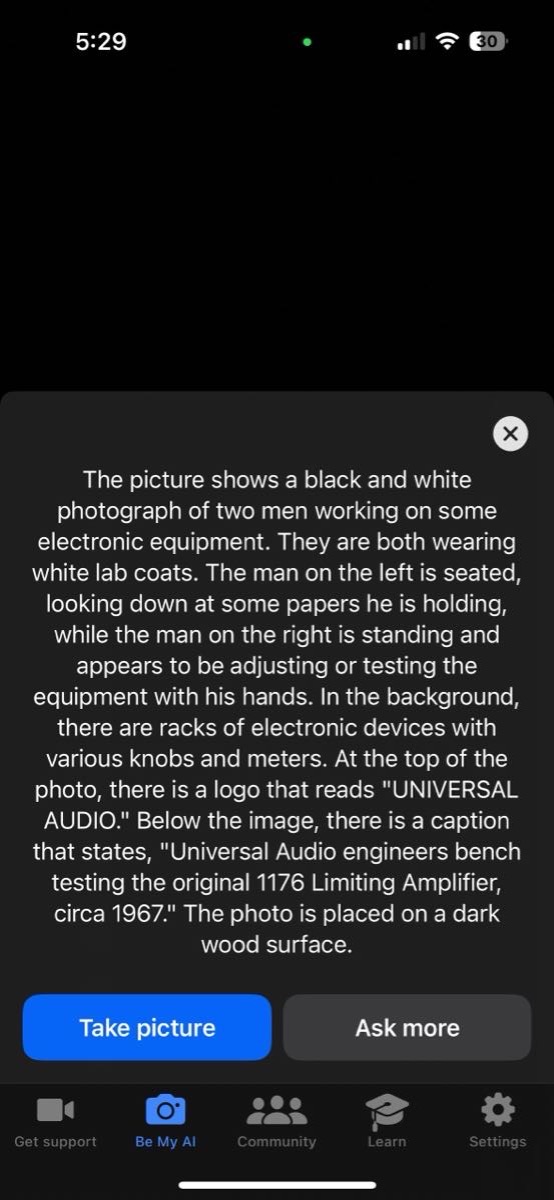
This is a perfect description of this photo and provides the screen reader user with a lot more detail and context than my description. I do want to remind you of something Tom said when I bemoaned that my captions weren’t worthy. He said that when you write your descriptions for photos online, you don’t have to be this detailed. He said to focus your energy on what’s important about the photo, like why is it funny or compelling or beautiful. So maybe my description would be better as, “a coaster I got from Universal Audio years ago with two nerdy guys playing with electronics.”
We’ll circle back on how to maybe get the best of both worlds.
Caption Existing Photos with Be My Eyes / Be My AI
Now that we know how to take a photo and find out what’s in it, which is of massive value to those without sight, let’s get into what you can do with your existing photos. Once you have Be My Eyes installed on your phone, it becomes an Action in the share sheet for Photos.
I’ll use a very silly photo I took of my granddaughter hugging our dog Tesla as my example of how to take an existing image from your Photos library and add a caption to it created by Be My AI.
With the photo selected, hit the Share Sheet icon (the square with the up arrow) and swipe up. Be My Eyes will not be one of those pretty icons in the horizontal row, but rather down lower in the text list of Actions such as “Create Watch Face” and “Add to New Quick Note”. I’ll be honest with you I never noticed how many cool things you can do from this list — I never actually read them all before.
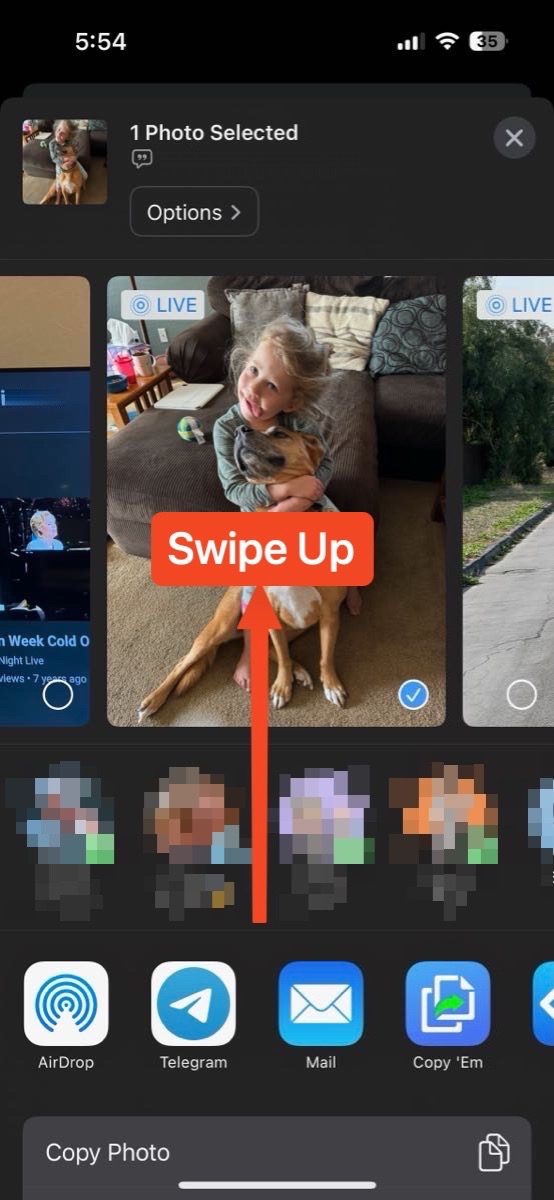
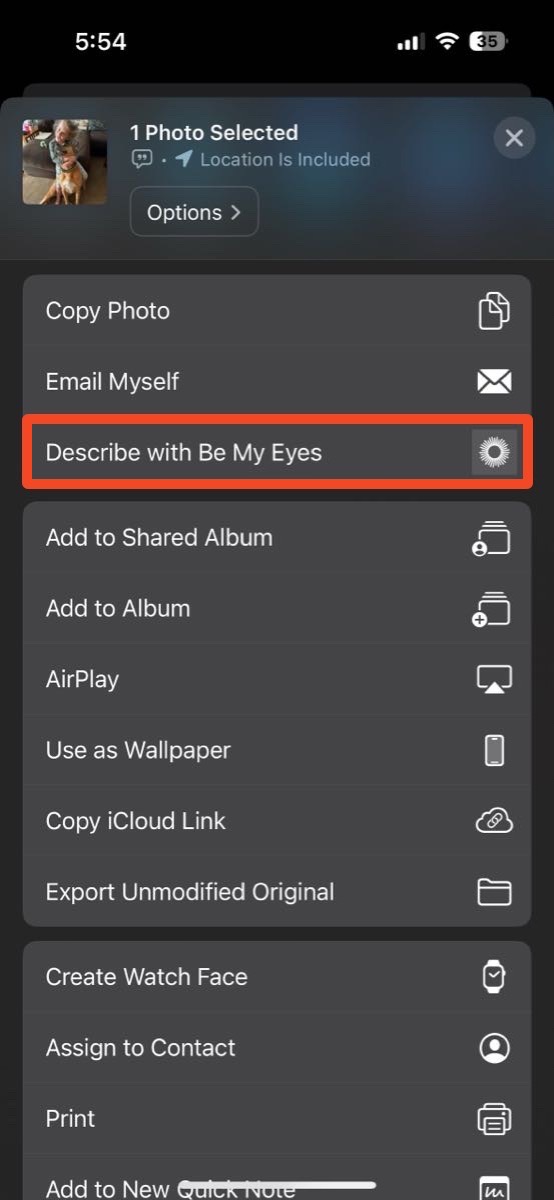
You’re looking for “Describe with Be My Eyes”. On my phone it was way down at the bottom, so I used the Edit Actions button to move it closer to the top since I plan on using Be My AI often.
With your photo selected, in the Share Sheet select Describe with Be My Eyes, it will think for a little bit, and after a few seconds, you’ll see the description.
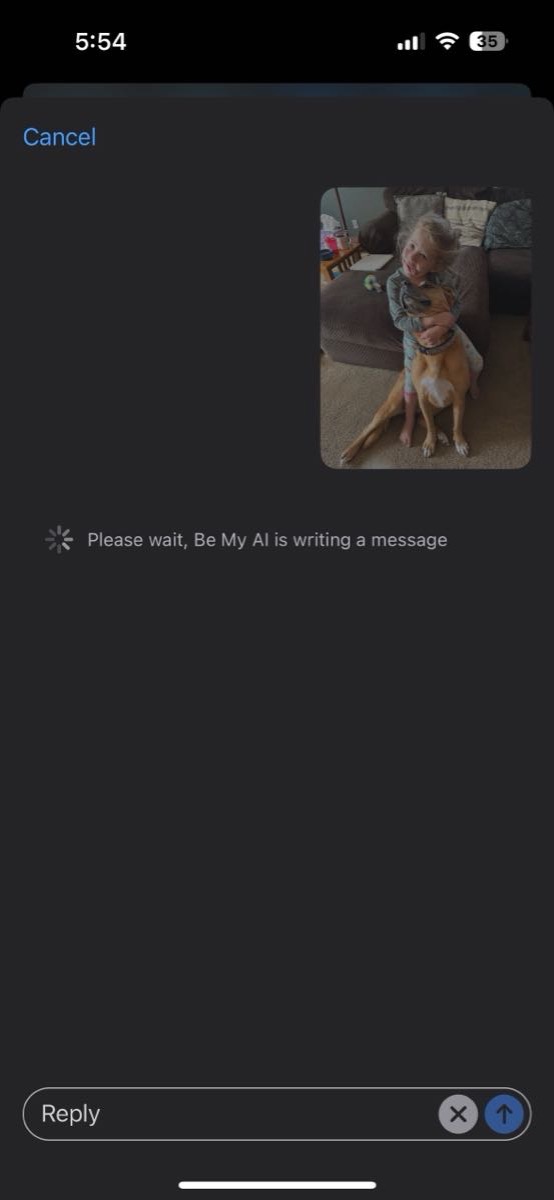
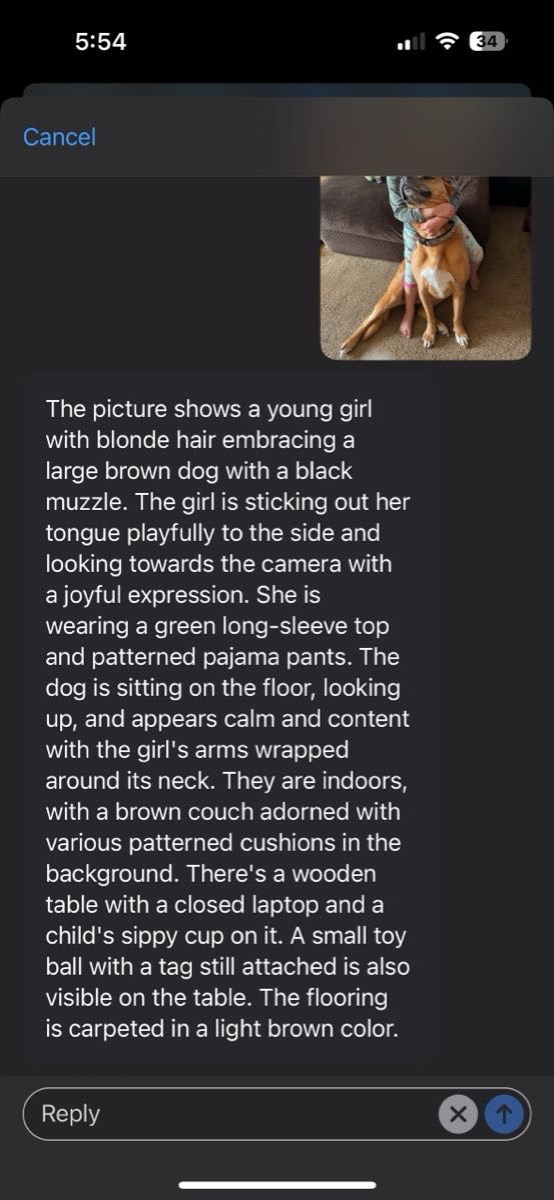
On my Siena and Tesla photo, it came back with this description:
The picture shows a young girl with blonde hair embracing a large brown dog with a black muzzle. The girl is sticking out her tongue playfully to the side and looking towards the camera with a joyful expression. She is wearing a green long-sleeve top and patterned pajama pants. The dog is sitting on the floor, looking up, and appears calm and content with the girl’s arms wrapped around its neck. They are indoors, with a brown couch adorned with various patterned cushions in the background. There’s a wooden table with a closed laptop and a child’s sippy cup on it. A small toy ball with a tag still attached is also visible on the table. The flooring is carpeted in a light brown color.
I am floored by what a fantastic description that is. My only complaint is it wasn’t a closed laptop, it was a closed iPad, but I’ll let that go I guess.
Add Description from Be My AI to Your Photo
Once you have this fantastic description in Be My Eyes, you can tap and hold on the description to get a one-tap copy button. Cancel out of the description and you’re back in Photos with your selected image. If you swipe up on the image, you can paste the description right into the caption field for the photo.
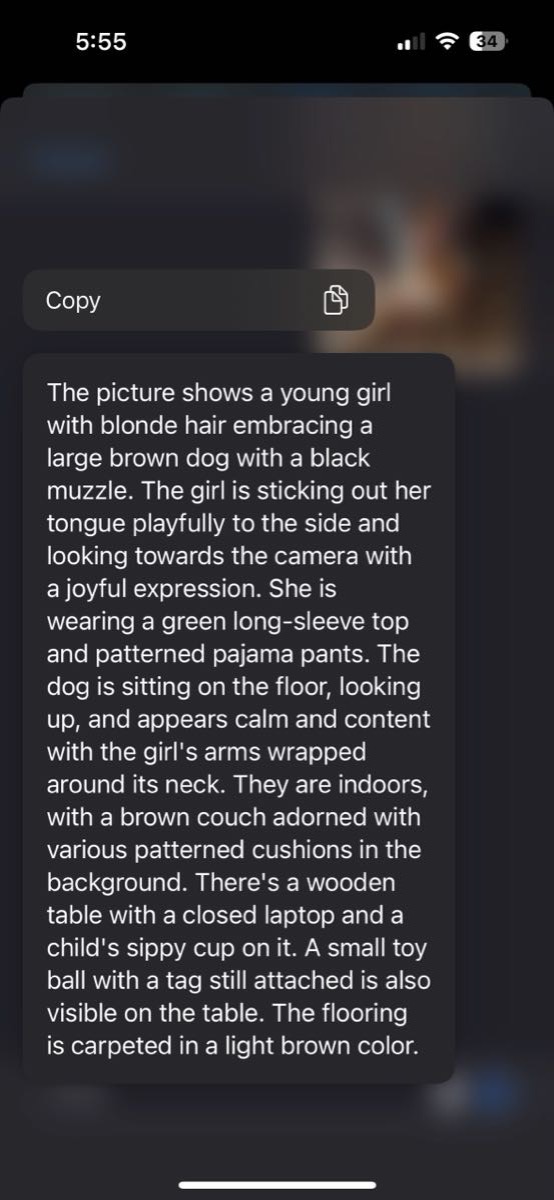
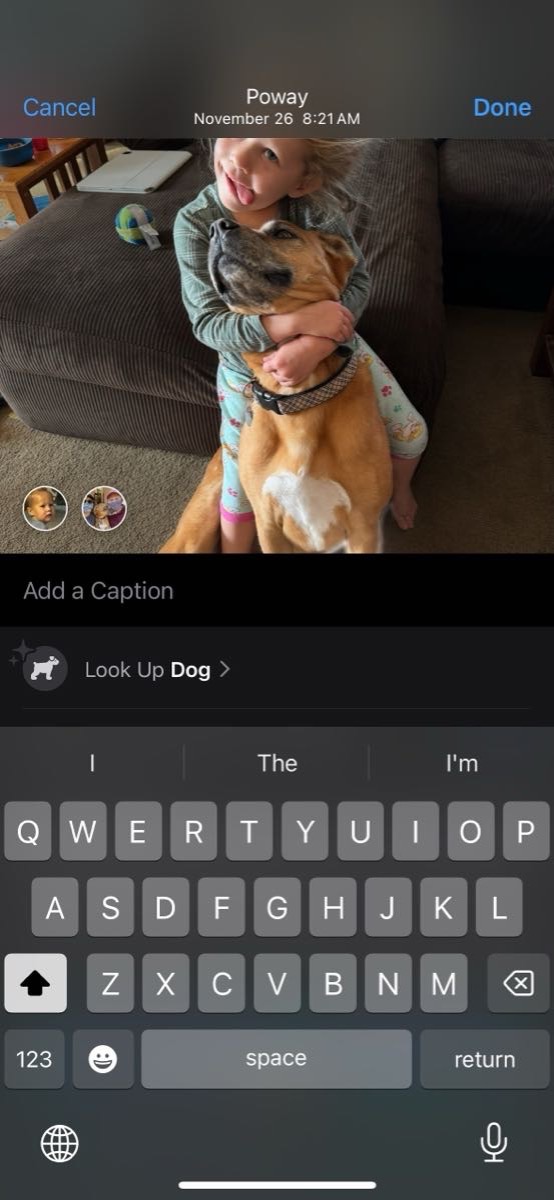
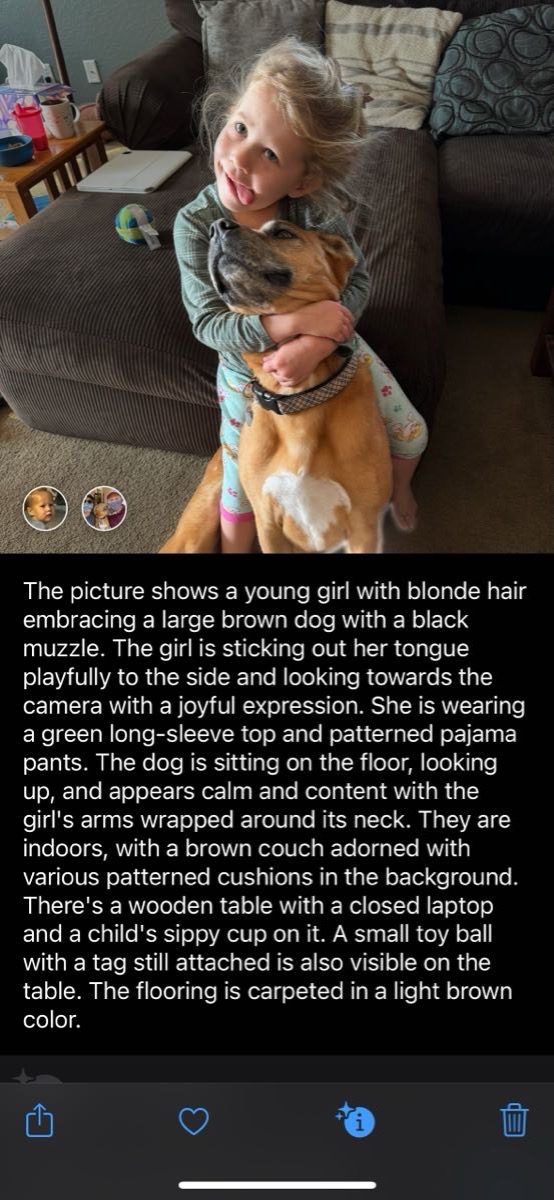
With the text in the caption field, you can copy it as you post your images to social media, ready to paste into the alt text field. But if you use Mona for Mastodon, it’s even easier than that.
Mona has native clients for the Mac, iPhone, and iPad, and it was built with accessibility as part of its foundation. If you add captions to your images inside Apple Photos, when you send them to Mona, the caption is automatically added as the alt text!
You don’t have to add the caption using Be My AI to get the advantage of the feature, but it’s so easy to do and supplies so much more of a vivid description without having to use your own brain power, it might be an easier way for you to add alt text.
To recap, so far we opened Photos to the image we intend to post to Mastodon, used the share sheet to get Be My AI to write a description, copied it, and swiped up on the image to paste in the description. Still in Photos, we can use the share sheet again, this time to post to Mona. It immediately switches you into Mona with the image attached to a new post … and the caption is automatically added as the alt text! How cool is that?
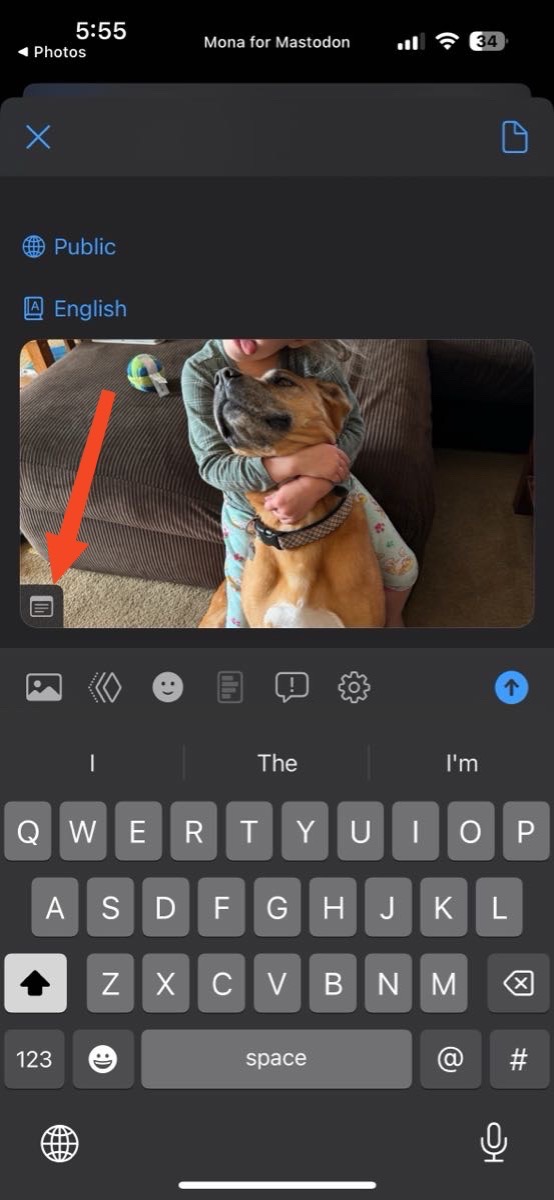
Let’s review to see if using Be My AI to create captions is any easier than the normal process. The normal process to post an image to Mastodon with alt text is:
- Open Photos
- Select the image you want to post
- Use the share sheet to open in your Mastodon app such as Mona
- In the Mastodon app, tap the attached image
- Tap add Description
- Think up a caption and type it in
- Tap Done
- Now you’re ready to write your clever post
If you use Mona with Be My Eyes to write your caption the process is:
- Open Photos
- Select the image you want to post
- Use the share sheet and select “Describe with Be My Eyes”
- Wait for it to think up a detailed and descriptive caption
- Copy the caption
- Hit cancel to back out of Be My AI
- Now you’re back in photos where you can swipe up, tap in the captions field and tap paste
- Use the share sheet to send to Mona and your detailed alt text is already in the image
- Now you’re ready to write your clever post
It’s definitely an extra step but it sure is cool to be able to provide so much more context for our blind friends.
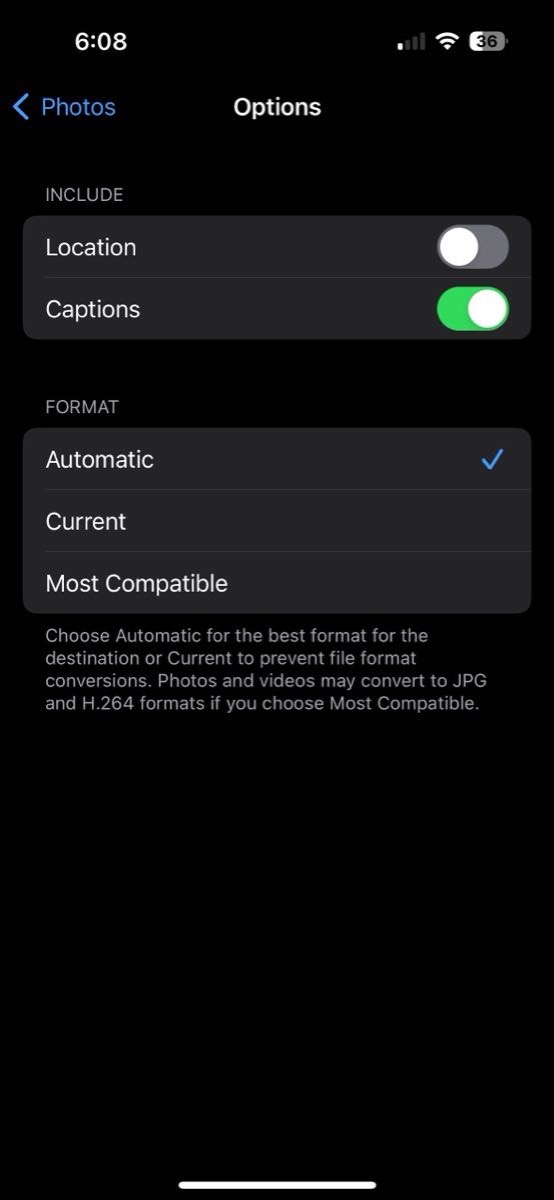
If you don’t see your captions from Photos showing up in Mastodon, go into iOS Settings, scroll down to Mona, tap on Photos, Select Options, and make sure Captions is toggled on. I also discovered there’s a toggle for whether location information is included in your attached images in Mona.
I tested this process using Apple Photos on the Mac posting to Mona, and the share sheet method is entirely broken; the image never shows up in the post. I sent a Mastodon post to @[email protected] and they wrote back that it’s a bug in macOS 14 and they would solve it later.
Bottom Line
When I started researching this cool method of adding captions to my images, I was really hoping to walk you through how all of the social media apps like Threads, Facebook, Slack, and Instagram would automatically add the captions from Photos into the alt text field.
But sadly in all of my testing, Mona for Mastodon is the only place I saw the caption preserved as alt text. Even Ivory, beloved by many as a Mastodon client, doesn’t import the caption.
I mentioned at the beginning that in most cases, developers are making it easier and more obvious to add alt text. The giant exception is Instagram.
In Instagram, after you add a photo the first thing you’re offered is a filter, and you have to hit next to get past it. Now you have a screen to write the post (which they call a caption). Then you have a long list of things with submenus, like tag people, tag products, set the audience, add a location, add music, add a fundraiser (really?), and then a toggle to share to Facebook. AFTER all of that, there’s a submenu for Advanced Settings.
Within Advanced Aettings are four options with toggles and finally another submenu to write alt text. So that’s three taps in just to get to where we can add the information our blind friends can use to enjoy the image we’re posting. Then it’s two more taps to get back out to where we can share the image. I’m shocked at how poorly Meta handles alt text on images, and to channel my inner John F. Braun, I send a fistshake to Mark Zuckerberg.
Back on a happy note though, I’m going to try using Be My AI to write the alt text for all of the images I post to Mona for a while. I may not stick with it but I will always add alt text to my images even by hand because why would I want to restrict anyone from enjoying the incredibly clever content I post online?
You can learn more about Be My Eyes at support.bemyeyes.com.
And in the immortal words of Peter Falk playing the detective Columbo, “Just one more thing…” Around the time I was researching and testing Mona for this article, I read a post on Mastodon by Kyle Reddoch (@[email protected]) in which he said,
If there is one thing @[email protected] could add is AI-generated alt descriptions when posting pics. @[email protected] nailed this feature.
You know I had to install Ice Cubes to test out what Kyle said, and you know what? It does write alt text without you having to do anything at all! It’s nothing like the level of detail that Be My AI creates, but if you find yourself not adding any alt text at all, it’s definitely better than nothing. Do check what it writes though because it may miss the point of the photo. I tested with a photo of my brother Kelly and my dad on our boat where Kelly is at the helm. The photo is precious to me as neither of them is with us any longer, but on Kelly’s birthday every year, I like to think of him up there sailing with Dad.
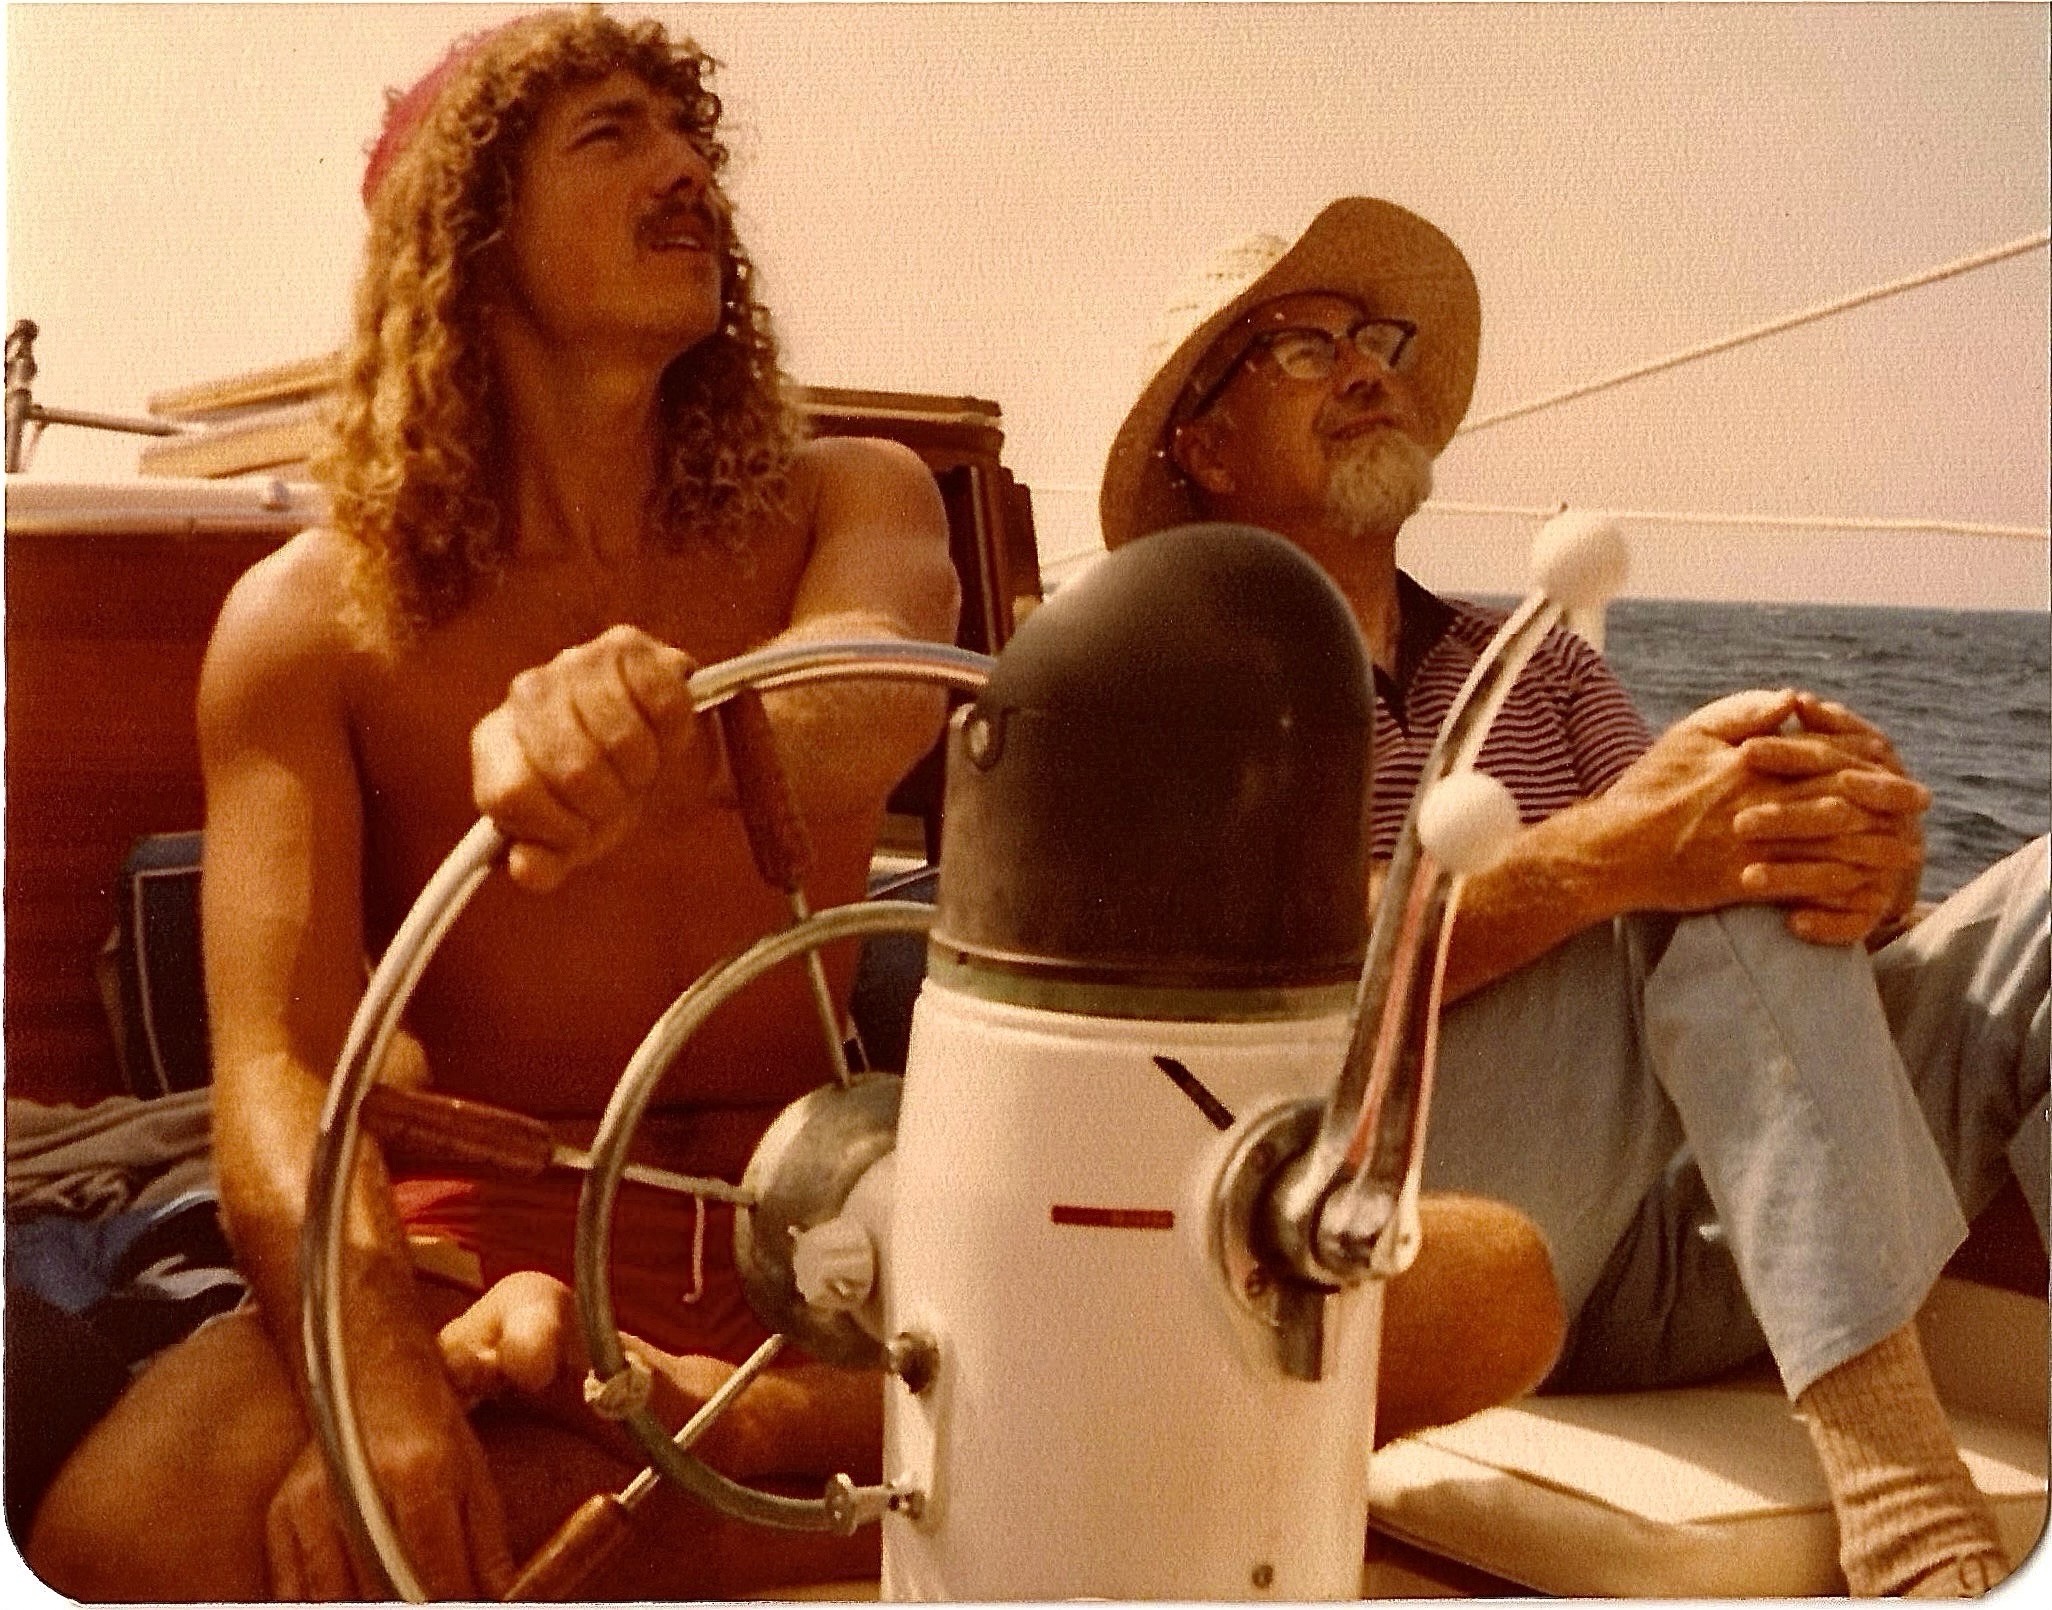
Sentimentality aside, I tested to see what Ice Cubes added as a caption. It automatically, with no intervention on my part at all, wrote:
Two men aboard a sailboat, one steering the vessel and the other sitting casually, both looking in different directions.
This is an example of where I’d want to correct the altl text, because Ice Cubes did miss the point of the photo. Kelly and my dad are both looking up in the same direction. I know from looking at it that they’re looking at the sails to see if they’re luffing. Luffing is when the sail kind of flutters near the mast or mainstay which means you’re headed too close to the direction of the wind. You need to either turn downwind a smidge or trim the sails in even tighter.
In contrast to the brevity of Ice Cubes, Be My AI wrote:
The picture shows two men on a boat. The younger man on the left has curly hair, a mustache, and is shirtless, wearing red shorts. He is steering the boat with a large wheel. The older man on the right wears glasses, a straw hat, a striped shirt, and blue jeans. He is seated, looking off into the distance with his hands clasped. Both appear relaxed and are surrounded by calm sea waters under a clear sky.
Ice Cubes does a passable job with no intervention by the user (who may or may not choose to write captions), but clearly Be My AI did a much better job of capturing the vibe with that one extra step.
Either way, as Kyle and I both agreed, competition in this space is an awesome thing so hats off to the developers of Mona and Ice Cubes and BOO on Instagram.

Very cool! Thanks.