The Problem to be solved
Bartender was a great app for hiding menu bar items, and it may well continue to be a great app for the myriad things it can now do for the new proprietors. But, I felt it wasn’t the right fit for me right now, so I went looking for a replacement.
The function I want is to have a way to hide menu bar items because I have so many of them that they do not all fit on my MacBook Air. A menu bar tool like this provides a button on the menu bar that expands and collapses items, both providing a neater look, and in extreme cases making the icons visible at all.
Hidden Bar is available from the App Store for free, or directly from GitHub as open source software. I went with the App Store.
First Opening
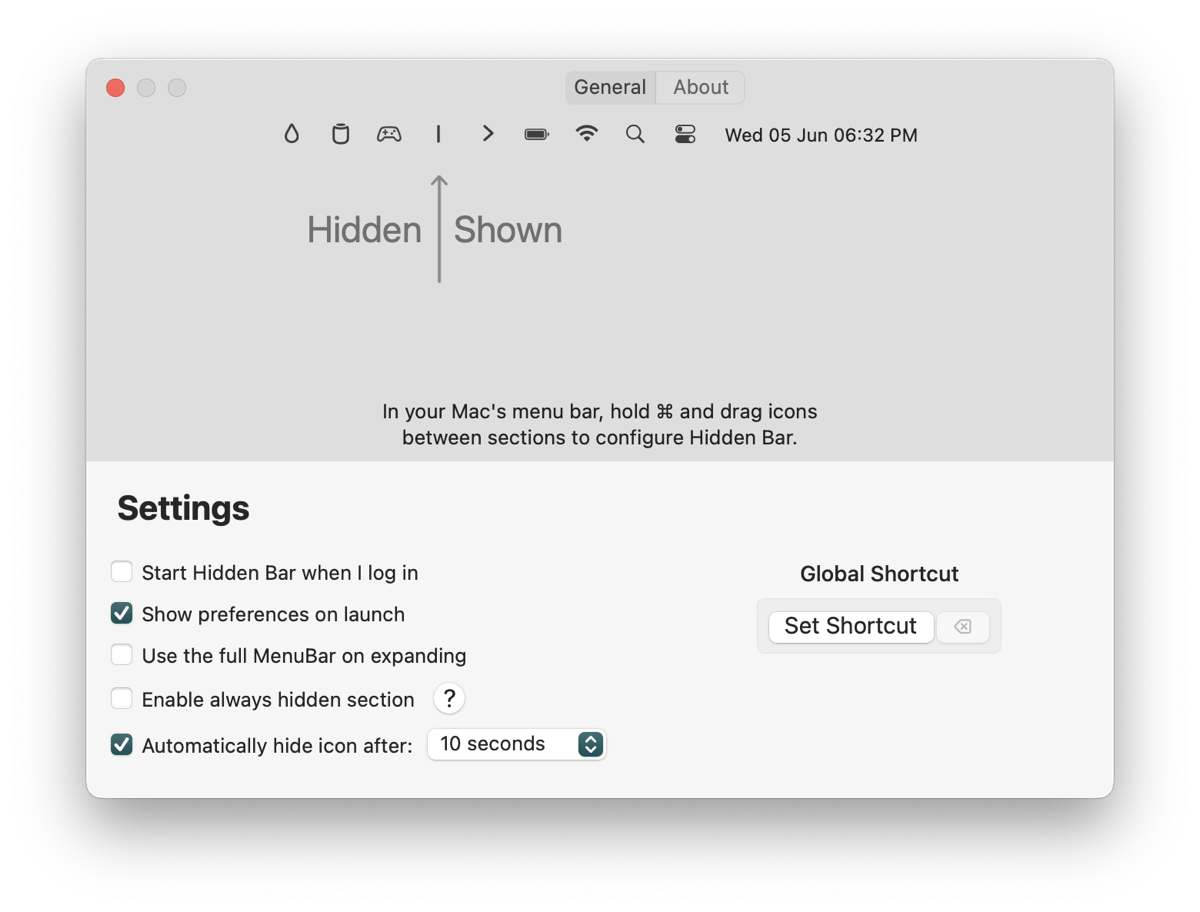
When you first open Hidden Bar, the settings screen appears and you’ll see how little there is to this app, which is a good thing.

Hidden Bar’s settings screen that opens when first launched. The screen is described in the main text.
The screen has a nice big image in the top half that explains how to use the app, or at least it tries to. It shows an example menu bar with standard icons for Control Centre, Spotlight, WiFi, and the battery, reading from right to left.
Then there’s a chevron pointing to the right, a solidus, or vertical line if you prefer, then some less well-known icons representing a controller, a battery maybe, and a water drop.
Underneath that solidus is a big pointy arrow, and to the left is written Hidden in big letters, and to the right is written Shown.
It doesn’t take much to figure out that you’re going to put the things you want to hide on the left, and everything on the right will stay visible.
It even has text explaining, “In your Mac’s menu bar hold the command key and drag icons between sections to configure Hidden Bar”. This is all super intuitive and works as described.
Settings
There are 6 more settings that can be adjusted.
First is “Start Hidden Bar when I log in”, which is happily unticked by default, making it a user choice. I checked it straight away.
Below that is “Show preferences on launch”, which is handy when you get started, but I unchecked that straight away.
“Use the full MenuBar on expanding” is an option that hides the current app’s menu bar items when you expand Hidden Bar, which is useful on a laptop.
Skipping ahead, at the bottom is “Automatically hide icon after:”, which is set at 10 seconds by default. This means that if you expand the menu bar to show all your icons, Hidden Bar will automatically collapse it down again and give you your zen back.
Over on the right is a setting to enable a “Global Shortcut”, which obviously works to expand and hide the hidden menu bar items, though you still need to move the cursor up to click them. Perhaps this will be useful if you have a bunch of info up there like HomeKit temperatures.
Saving the confusing one for last, we have “Enable always hidden section.” Not ‘always enable hidden section’, but “Enable always hidden section.” It has a question mark button next to it, which gives this hint:
Use the always hidden feature to keep your icons tidy. Here’s how to set it
Steps to enable:
- Enable the always hidden “|” (translucent color bar)
- Hold & and drag it on the left-hand side of the normal bar, then move any icons you want to disappear on the left of that bar.
- Finally, please right-click on the collapse “>” icon to make it disappear.
Steps to view always hidden icons:
- You right-click on “>” icon again to view and repeat the action to enable the feature. Enjoy!
That was less helpful than I’d hoped for, but I think I have things figured out.
How to use the app
The app has at least two menu bar items.

Menu bar with 4 icons. From left to right, Hazel, Focus Mode, Hidden Bar’s solidus, which is invisible, and Hidden Bar’s chevron.
The Chevron
The chevron is purely Hidden Bar’s interface item. It’s what you click on to activate the hiding and unhiding. It can be put anywhere you want, so on the right, middle or left of all your other menu bar items. This means that not everything to the left of it gets hidden, that’s what the solidus is going to be for.
I admit I got confused by this for a while. Oh, and yes you can place the chevron to the far left so it should get hidden by itself, but luckily it gets disabled in this state.
The Solidus
The solidus, unfortunately, is invisible on my Mac. I don’t know why, but it appears to take the same colour as my menu bar. I know it’s there because I can drag it around and it bumps things out of its way, but I cannot see it. This is what prompted me to write this.
My Layout
What makes sense to me is to have the chevron as far left as I can, then put the invisible solidus immediately to the left of that. This means that, in effect, everything to the left of the chevron will get hidden.
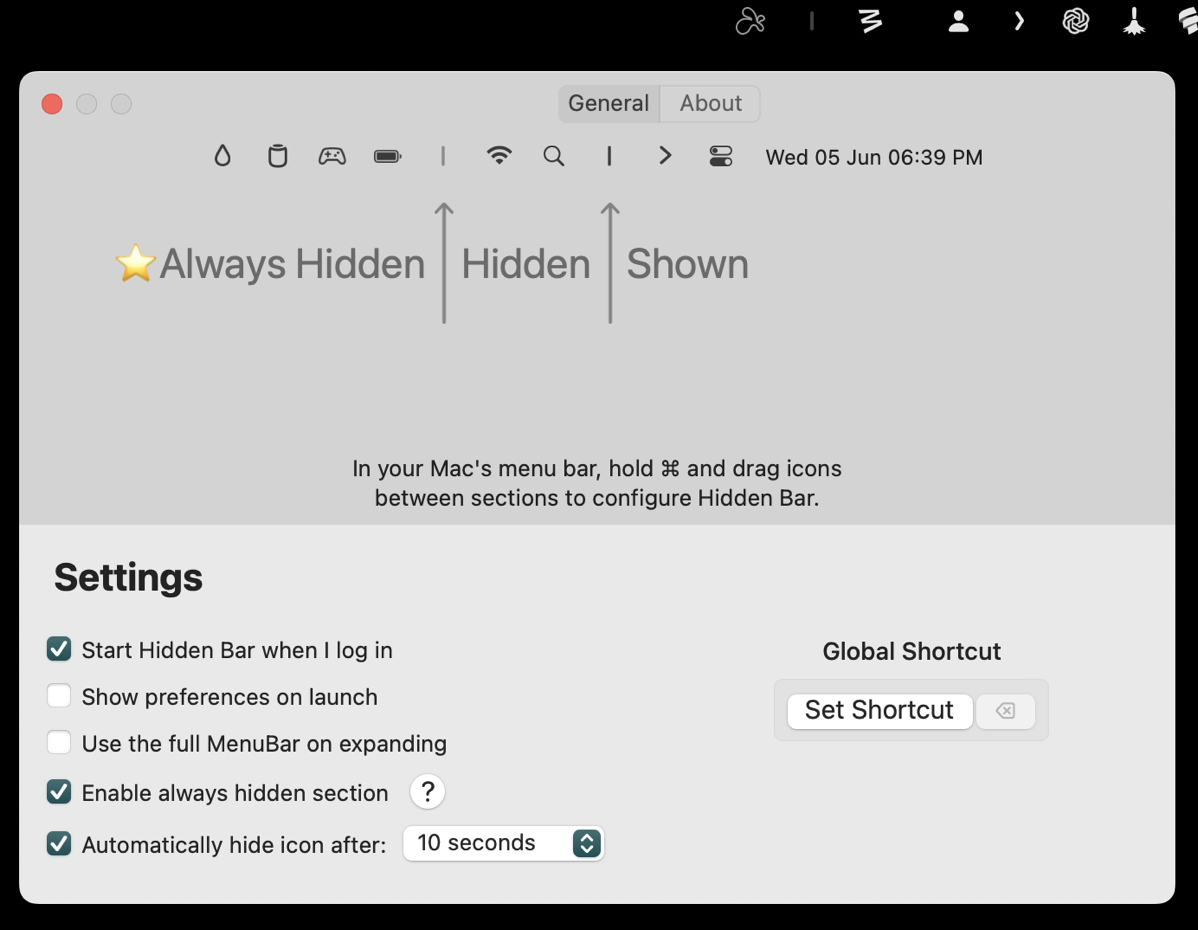
I then command-drag other icons that I want to hide to the left of the invisible solidus. If you’re doing it correctly, there will be a gap between the chevron and the icon. Once I’m happy, I enable the always hidden section, and that gives me a new solidus which I can see to the far left of everything else.
Now, I can drag icons I really don’t like over there, to the far-far left.
Once settled, I can click the chevron and everything to the left disappears, and click it again and everything reappears.
Did I just say everything? Yes, even the always-hidden icons are visible, but at least they are sectioned off a little!
My Settings
My settings in Hidden Bar, show that I only have three options ticked: Start when I log in, Enable always hidden, and hide after 10 minutes.

Final Thoughts
The app hasn’t been updated for a while and has some little quirks, but once set up it seems to do the job well and it has that sense of “can’t be too naughty” that comes with the apps from the App Store, so I’m going to stick with it.
Allison here, to make a few remarks about Hidden Bar after Graeme’s terrific review. I decided to give Hidden Bar a go just for fun. If you’re in the target audience for an app that hides menu bar items, it’s probably because you have too many menu bar items to fit in your menu bar. But if you have too many to fit, then Hidden Bar simply won’t work for you.
As Graeme described, to get menu bar items into the hidden side, you have to drag existing menu bar items to the left of the vertical line icon Graeme calls the solidus. But when Hidden Bar is initially launched, the chevron to get to the solidus is to the left of all of your existing menu bar items. If you have too many to fit on screen, that means the solidus isn’t on screen because it’s the last one. I discovered this when I tried to use Hidden Bar on my 14″ MacBook Pro.

Icons stop at TextExpander
I did figure out a way around the problem but it may not work for you. I connected my laptop to an external display and only then was I able to see the last 9 menu bar items that hadn’t fit on the 14-inch screen, including the chevron at the very end on the left.
I put a screenshot in the shownotes in an attempt to illustrate the problem but it’s pretty hard to read because it’s so wide but thin:

9 More Icons Showing after TextExpander
Click to Embiggen (sort of)
Once I dragged a whole slew of menu bar items to the left of the solidus, I was able to collapse and expand my menu bar items. But think about what I’ve described. When I expand, I still can’t see all of my menu bar items on the screen because it’s too small! You might suggest I use the second solidus to move some items to the always-hidden category, but I could never find the second solidus!
Bartender solves these problems by giving you a secondary bar that drops below the standard menu bar. This allows you to have two substantial menu bars on-screen one above the other with no compromises. In Bartender’s Settings screen you can also move menu bar items to an always-hidden section, and you can group icons together so they only fill up one slot in the menu bar and then have a little dropdown.
Hidden Bar is free, and does what it says on the tin, and does not require screen recording permission to function, but if you have too many menu bar items to fit on your screen, I’m not sure it’s the best option. And finally, Hidden Bar isn’t accessible with VoiceOver.

One thing I forgot to make clear in my review is that Hidden Bar does not request any special permissions from the user beyond the default for App Store apps, so no Accessibility or Screen Recording requirements.
Thanks for this. I got spooked by the Bartender app a bit and looked for an alternative. Hidden Bar kept coming up. Best part it’s free. I could not see the straight bar either. I’m using it on a 49″ Ultra-wide monitor so I drug the menu icons all the way across and they started disappearing. Success! I don’t think I would have ever guessed it was just blending into the menu.