 This article is time sensitive so jump to the bottom line if you don’t have time to read the whole thing right this minute. Otherwise, indulge me as I get to the point in my normal thorough manner.
A couple weeks ago Bob Correa did a great Clarify tutorial showing how to enable the new extensions in Photos and I was THRILLED that this capability is finally here. The extensions Bob used for his example were from Macphun, a company known for some really cool standalone tools like Snapheal for erasing unwanted things from your images and Snapselect, a great tool to help you get rid of duplicate photos and almost duplicate photos. I happened to have met Kevin La Rue, VP of Macphun at the Trey Ratcliff photo walk so I wrote to him with a few questions and he offered to give me some license codes so I could test out the new extensions.
Spoiler. I LOVE THESE EXTENSIONS!!! I upgraded my MacBook to El Capitan and fell in love with the Macphun tools so much that I moved my production podcasting machine over to El Capitan just so that I could keep using them. Now that you know the punchline, let’s take a look at how they work.
In Photos if you hit the enter key with a photo selected, you get into the Edit menu. You’ll see a set of options down the right sidebar that each expand to provide more capabilities. You’ve got Enhance, Rotate, Crop, Filters, Retouch and most importantly the Adjust button where the good lighting stuff is, but in El Capitan you get an Extensions button. If you click that you see a More button where if you have the extensions installed you can enable them in system preferences to have them show up in Photos. This is where Bob’s tutorial was most helpful. Once they’re enabled they show up under that Extensions button.
I’m going to review a few of the Macphun tools in detail as separate posts but I wanted to give you the breakdown of how their pricing works first.
When you buy Macphun tools, they’re standalone apps AND extensions to Photos, Photoshop Elements, and Lightroom. You don’t have to buy one or the other. Their non-pro tools are sold individually through the Mac App Store. For example, my favorite and the most essential tool they sell (in my opinion) is called Intensify. You can buy Intensify in the Mac App Store for $14.99 and you get both the standalone version and it works inside Photos as an extension.
If you want the pro versions of the tools, they sell those standalone as well but not through the Mac App Store. You can get Intensify Pro or Noiseless Pro (another amazing app) for $59.99 each. While we love the Mac App Store model where you can load it on every Mac you own, Macphun lets you load their pro apps on up to five computers, which is fantastic. I don’t take this for granted, as I just found out I can’t use the $100 ScreenFlow application on both my MacBook and my MacBook Pro even though I’m just one user. As you can see, buying the Macphun pro tools one by one could start to really add up. Here’s the time sensitive part.
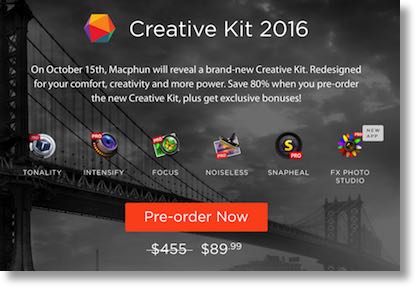
Macphun has a deal that expires TODAY because it releases tomorrow, called Creative Kit 2016. This bundle includes Tonality which is their black and white filters collection, Intensify which is the tool I’m most excited about that gives complete creative control over the image, Focus which allows you to change the focus point of the image for effects like tilt-shift photography, Noiseless which is their noise reduction program (spoiler, I love this one too), Snapheal which allows you to selectively remove things from your images, and FX Photo Studio which gives you tons of cool filters. Creative Kit 2016 is the PRO version of these tools which if bought together is $455, but is on sale today for $89.99.
They’ve even got pricing on the Pro products that I call the “Uncle Bob version”. If you live in a beautiful cabin in the wilderness, you don’t have the bandwidth to download these products, so they offer their Special Edition which is the products delivered to your door on a 4GB SD card. How’s that for flexible pricing?
I was hoping to give you a link to compare the pro to standard apps but as of the time of this writing I can’t find it. It was in their forums but the forums are down right now, so I can’t help you see the differences. As always I’m not telling you what you need but how to determine what you need. In my case, the pro version of Noiseless for example is critical because with the standard version you can’t work on RAW files. However, Intensify does work on RAW photos without the pro version. There are some gains in pro but you may not need them.
If you missed this one day sale, don’t be sad, because these tools are still sold individually and in some smaller bundles you might like, such as the one for Noiseless Pro and Intensify Pro for a combined price of $66. That’s an amazing package right there. Stay tuned for my reviews of the individual applications.

I bought the Pro versions. Don’t even remember why. But I’m cheap, so there must have been a good reason.
Most of what these tools do can be accomplished in the free Snaoseed app on iOS and Android. It just doesn’t integrate as editing extensions on a Mac.
[…] Dramatically Extend Photos Capabilities with Macphun Tools […]