Buttons Explained
Opening Scene
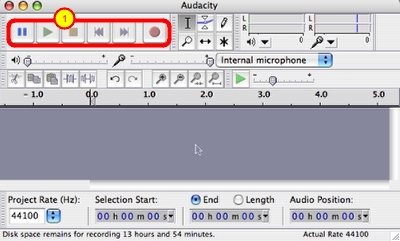
When audacity first opens, you'll see the familiar pause, play, stop, rewind, fast forward and record buttons of any audio application. After that, it's all pretty unfamiliar territory!
Audio Input/Output Controls
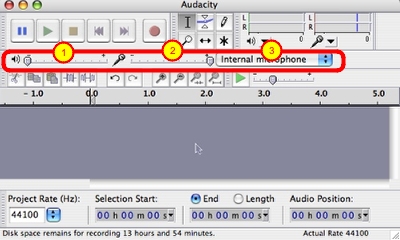
1. speaker volume for playback
2. microphone volume for recording
3. pulldown to choose a microphone input. You probably would have an external microphone to make a high quality recording so you would want to pull this down to select your mic.
Selection Tools
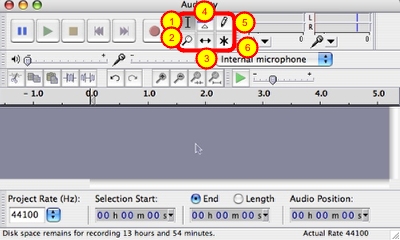
1. This is the selection tool. You'll use this to drag across the timeline to select a region to cut, remove noise, or enhance in some other way.
2. The magnifier is used much in the same way as the selection tool - drag it across a region to expand that area for more close inspection. This is invaluable when you're trying to identify a specific area of sound by its wave form - for example, remove um's and ah's in a recording. Hold down the shift key to drag or click and zoom back out.
3. The time shift tool is used to, well, shift time! just select the tool, and click/drag your audio to slide it right or left in time. This is useful when you are trying to line up two tracks, for example if you want to lay in some music and have it line up with something else you've recorded.
4. The envelope tool is used to help you fade in and out a recording. By simply dragging across a region you can compress down the wave form
Level Meters
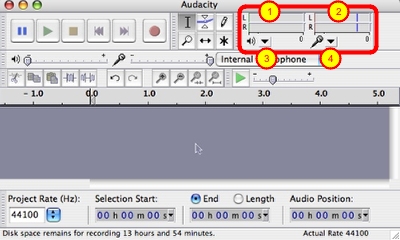
1. The left meter shows you the levels for the output - what you are currently hearing.
2. The right meter shows the levels of the input - you want to watch this meter while you're recording to make sure it doesn't go too far to the right and light up red - that would mean you're exceeding the input volume for the device selected and so your recording will be clipped and won't sound very good
Undo/Redo and More Zooming
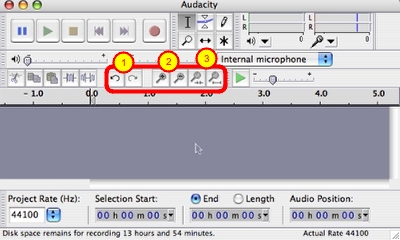
1. The familiar undo and redo buttons
2. Didn't we already learn the magnifying glass? Well, here's 4 more! These 2 allow you to zoom in or out with a click, but not to a specific region.
3. The final two zoom magnifiers are really useful and interesting. The first one zooms up on a selection you've already made, which could be useful if you've got a section you've been fiddling with already. The second one simply zooms out until the entire audio file fills the width of your screen.